Easy Lunchbox Pizza Muffins: Quick Kid Lunches & Muffin Pan Lunch Ideas

If you’re searching for a fun, portable, and kid-approved lunch idea, these easy lunchbox pizza muffins are about to become your new go-to recipe. Packed with classic pizza flavors—melty cheese, savory sauce, and your favorite toppings—these bite-sized muffins are perfect for school lunches, snacks, or even quick dinners.

What makes these pizza muffins so special is their versatility. You can customize them to suit picky eaters, dietary needs, or whatever ingredients you have on hand. Plus, they’re made in a muffin pan, making portion control and meal prep incredibly simple.


Why You’ll Love These Easy Lunchbox Pizza Muffins

These easy lunchbox pizza muffins are a favorite for both kids and parents—and for good reason.

  • Quick and easy to prepare
  • Perfect for lunchboxes and on-the-go meals
  • Customizable with different toppings
  • Freezer-friendly and great for meal prep
  • Kid-friendly and fun to eat

They bring all the joy of pizza into a convenient, mess-free format.
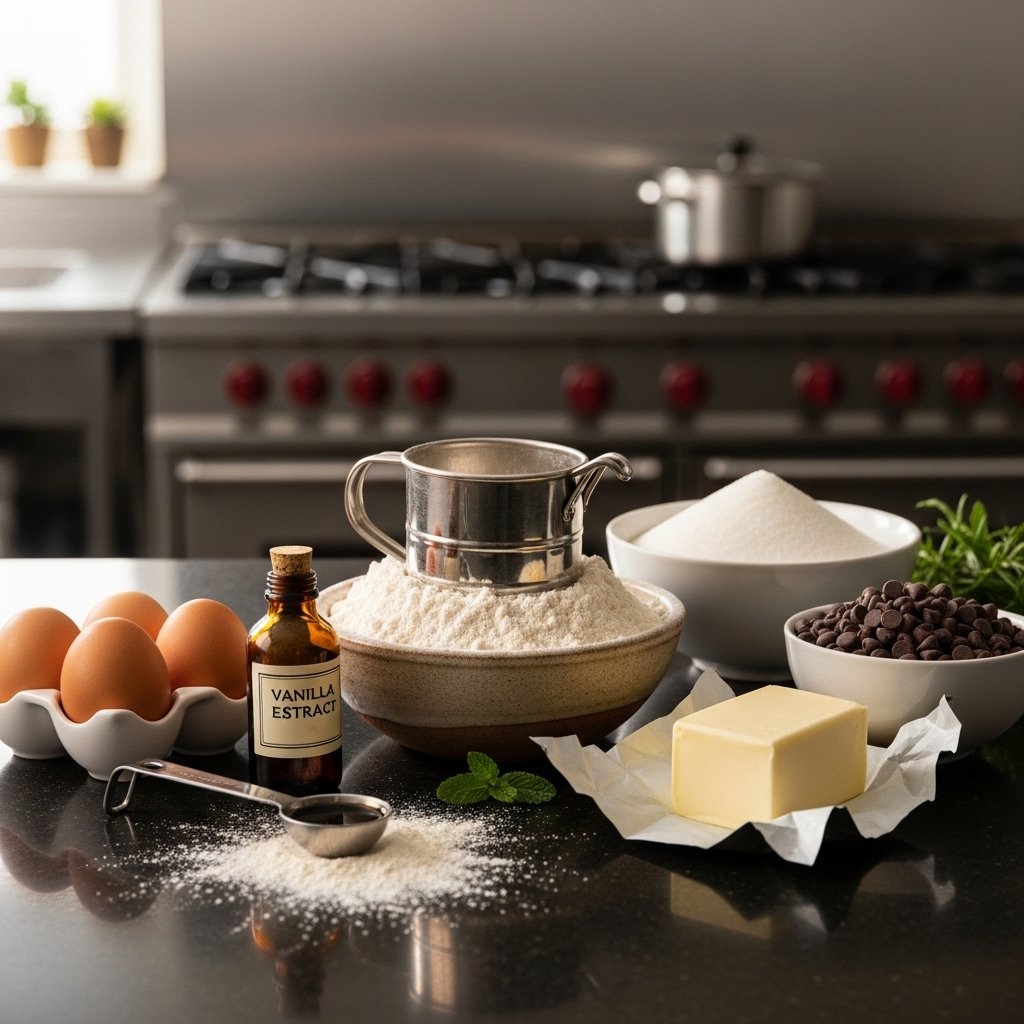
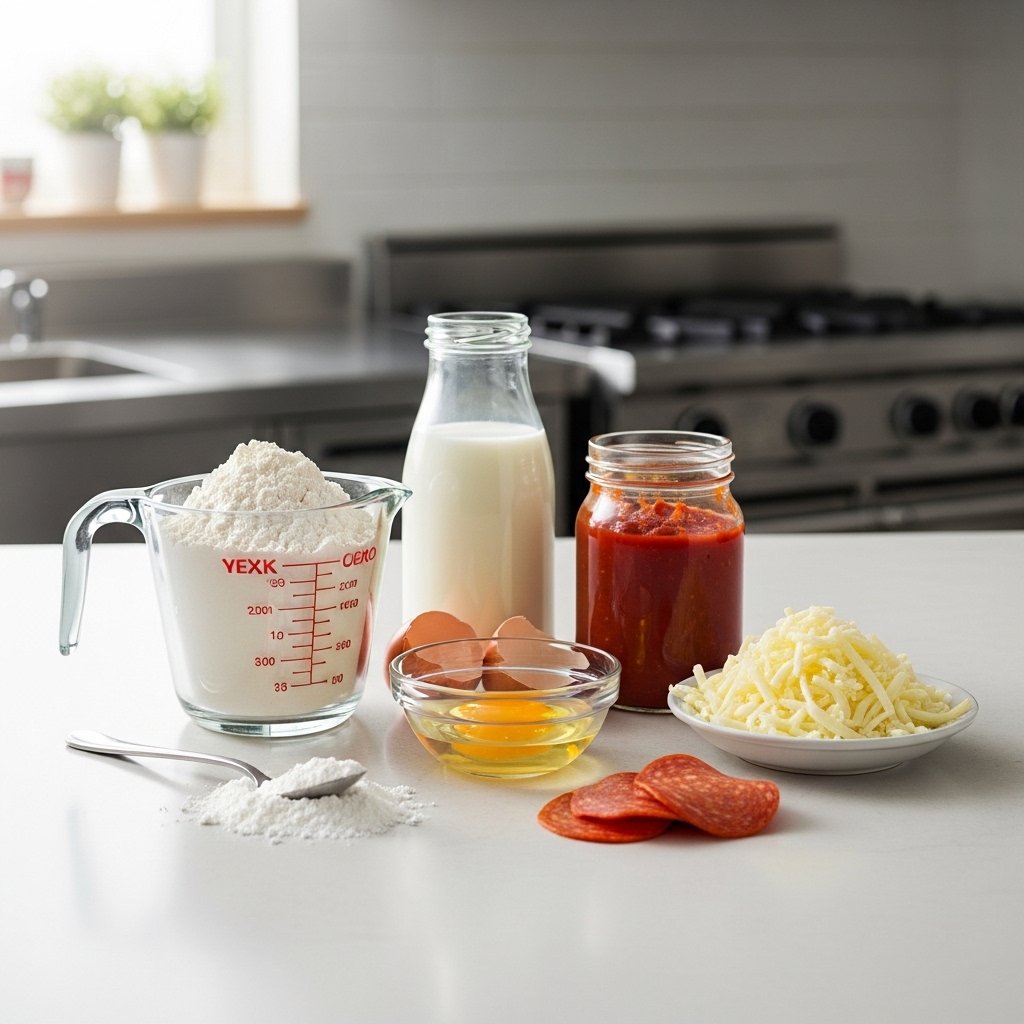

Ingredients

To make these delicious easy lunchbox pizza muffins, you’ll need:

  • 1 cup all-purpose flour
  • 1 tsp baking powder
  • 1/2 tsp salt
  • 1 tsp Italian seasoning
  • 1/2 cup milk
  • 1 egg
  • 1/2 cup pizza sauce
  • 1 cup shredded mozzarella cheese
  • 1/2 cup mini pepperoni or diced toppings


Ingredient Notes

The beauty of these easy lunchbox pizza muffins lies in their flexibility. Mozzarella cheese provides that classic gooey texture, while pizza sauce adds rich flavor.

Feel free to swap pepperoni for veggies like bell peppers, mushrooms, or olives. You can also use whole wheat flour for a healthier twist.


Step-by-Step Instructions

1. Preheat the Oven

Preheat your oven to 375°F and grease a muffin tin.

2. Mix Dry Ingredients

In a bowl, combine flour, baking powder, salt, and Italian seasoning.

3. Add Wet Ingredients

Stir in milk, egg, and pizza sauce until just combined.

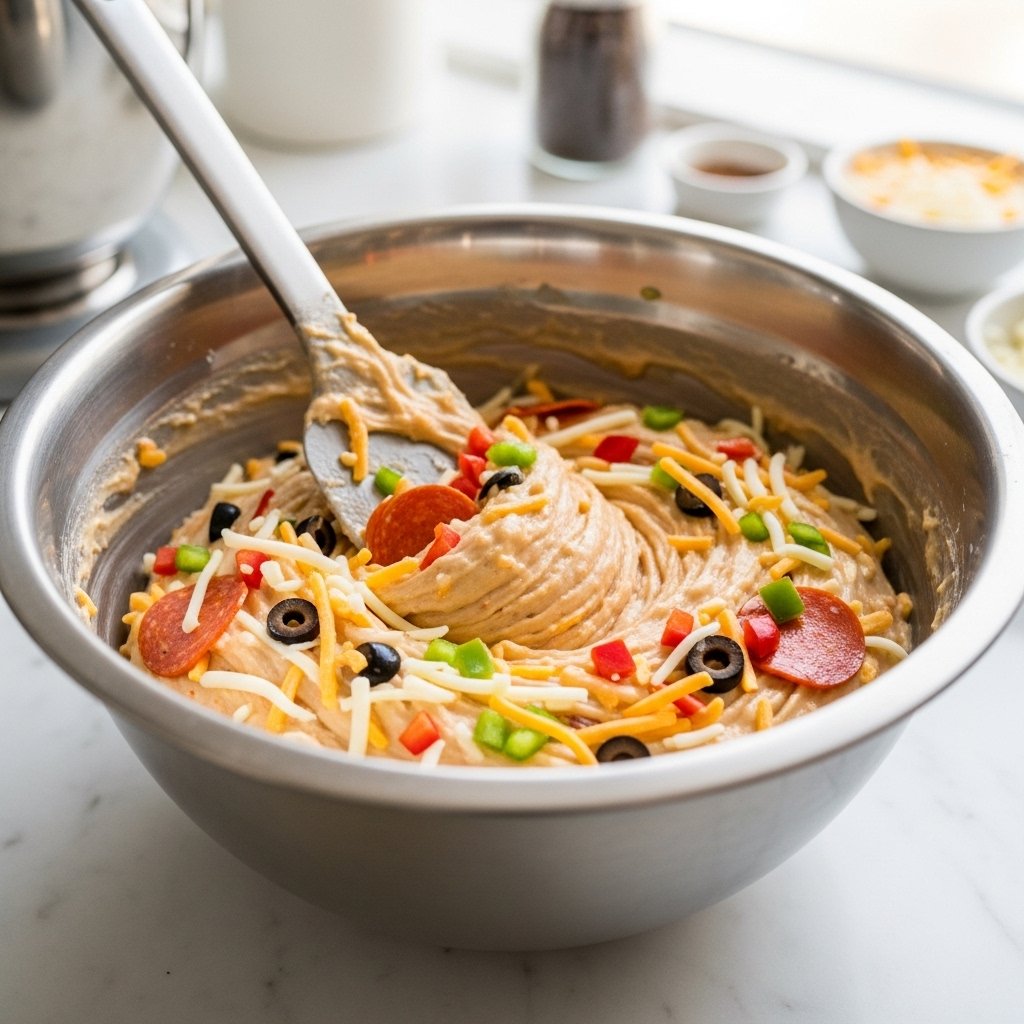
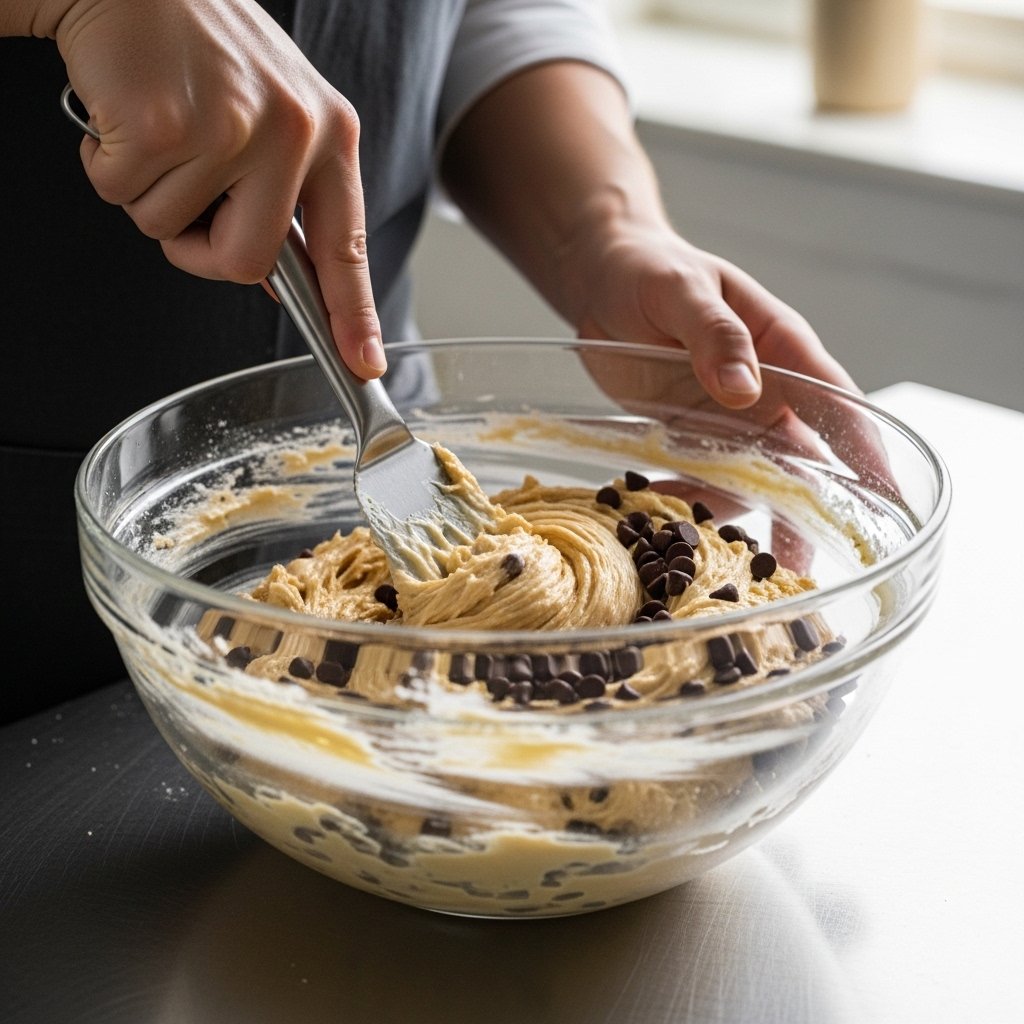
4. Fold in Cheese & Toppings

Add shredded cheese and your favorite toppings.

5. Fill Muffin Tin

Spoon the mixture into muffin cups, filling each about 3/4 full.
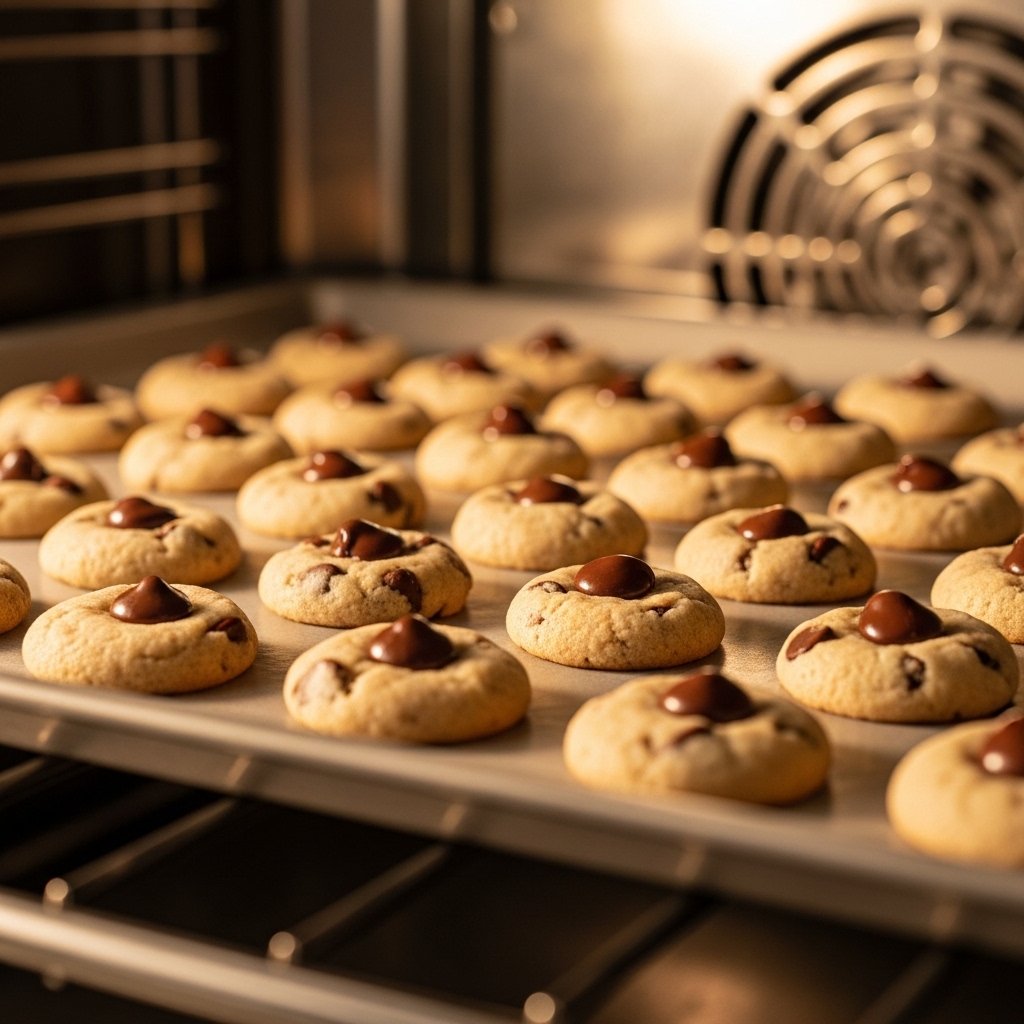
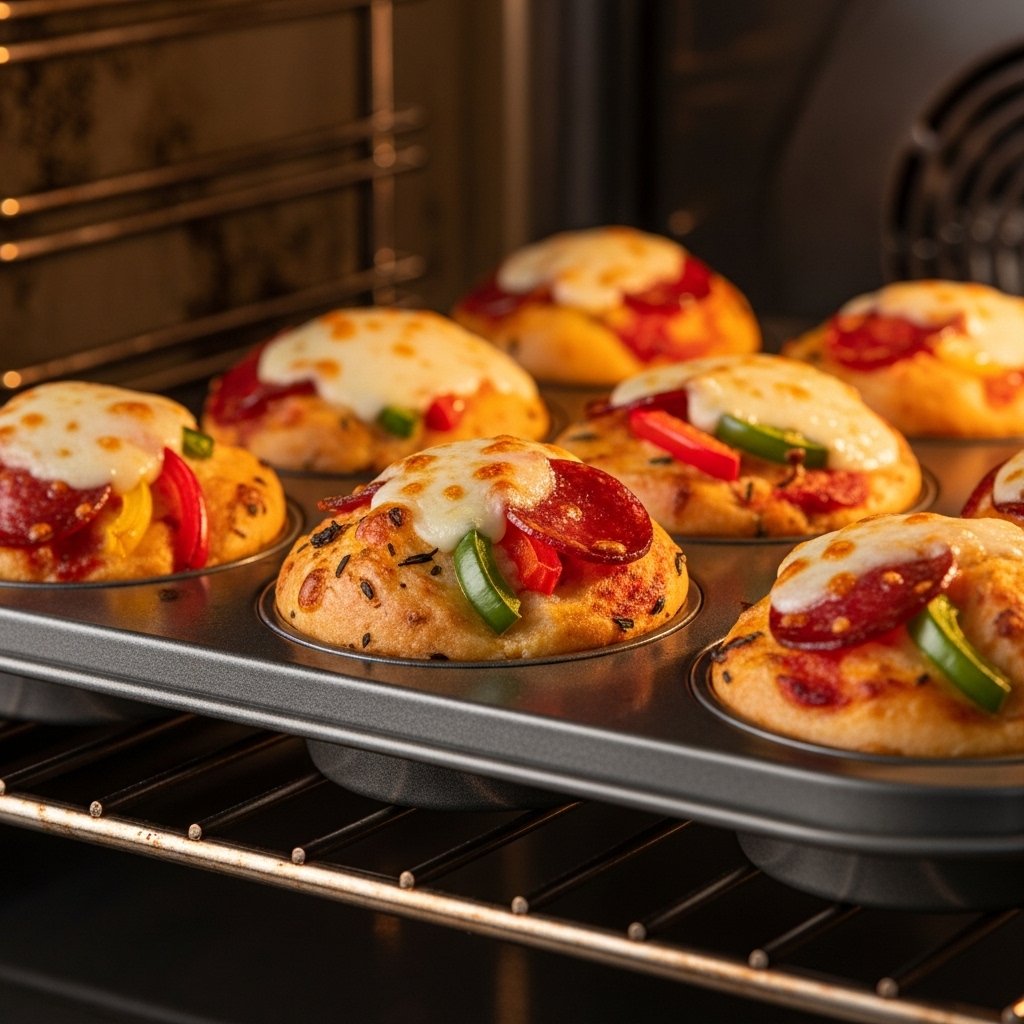
6. Bake

Bake for 15–20 minutes until golden and cooked through.


Tips for Perfect Results

To get the best easy lunchbox pizza muffins, keep these tips in mind:

  • Don’t overmix the batter
  • Use freshly shredded cheese for better melting
  • Grease the muffin tin well or use liners
  • Let muffins cool slightly before removing

These tips ensure soft, flavorful muffins every time.
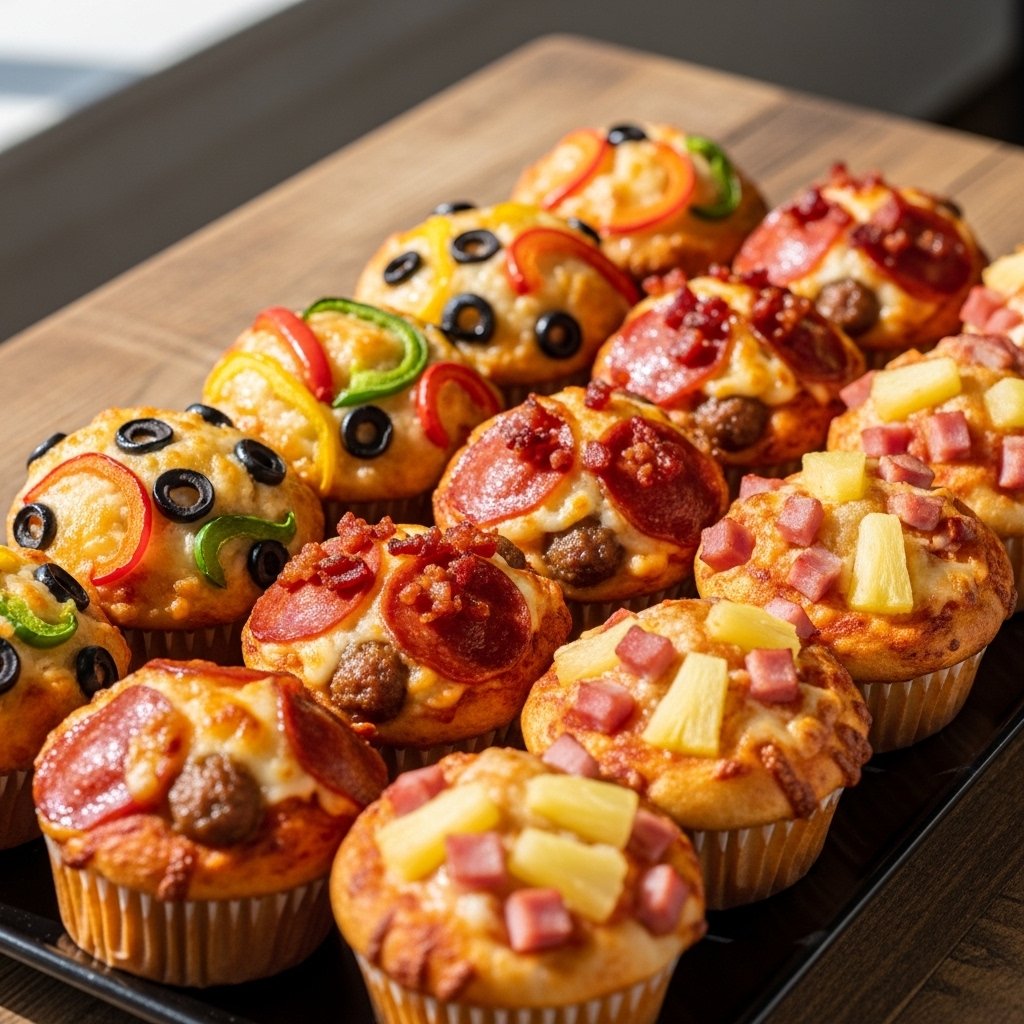

Variations to Try

Make your easy lunchbox pizza muffins even more exciting:

  • Veggie version with spinach, peppers, and onions
  • Hawaiian style with ham and pineapple
  • Meat lovers with sausage and bacon
  • Cheesy garlic version with extra mozzarella and herbs


What to Serve With It

Pair these easy lunchbox pizza muffins with:

  • Fresh fruit like apple slices or grapes
  • A side salad
  • Yogurt or cheese sticks
  • Dipping sauces like marinara or ranch

They make a complete and balanced lunch.
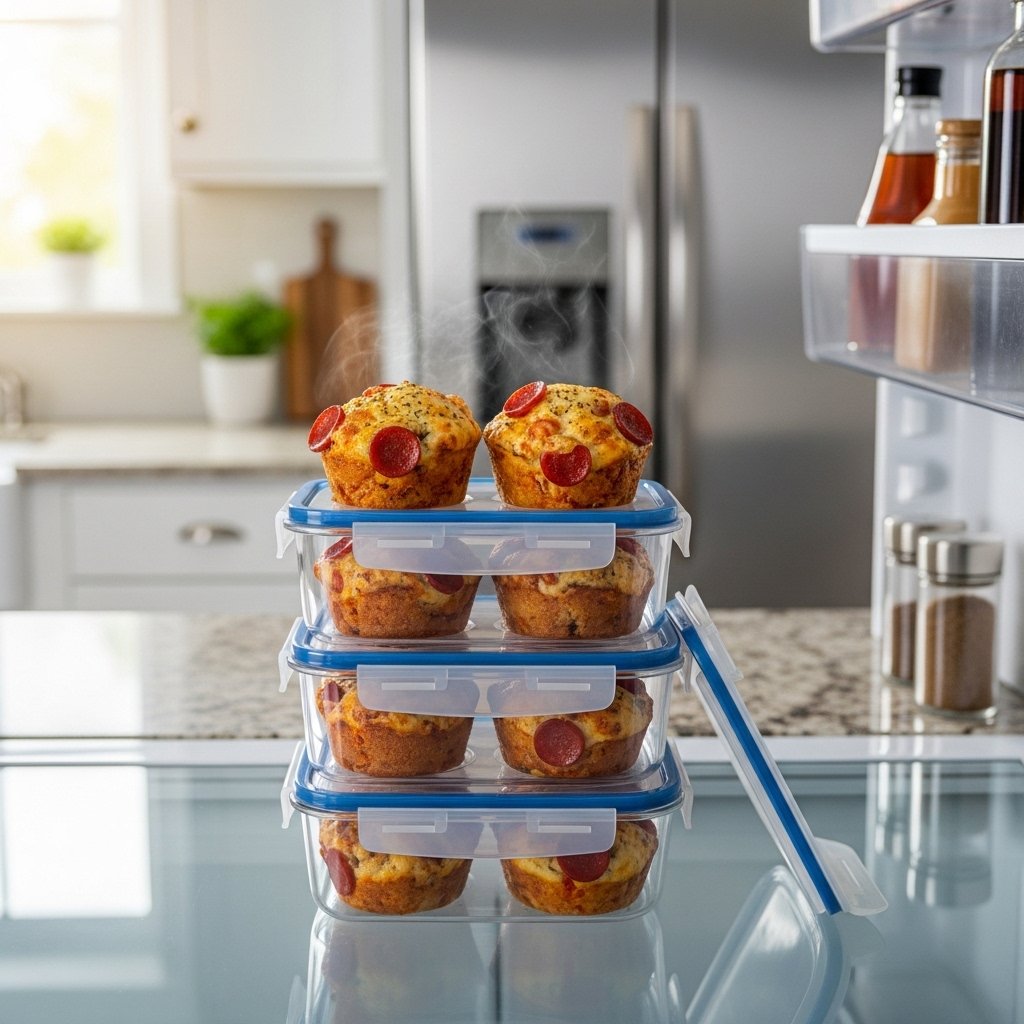

Storage & Reheating

These easy lunchbox pizza muffins are perfect for meal prep:

  • Store in an airtight container in the fridge for up to 4 days
  • Freeze for up to 2 months
  • Reheat in the microwave for 20–30 seconds


Common Mistakes to Avoid

Avoid these common issues:

  • Overfilling the muffin cups
  • Using too much sauce (can make muffins soggy)
  • Overbaking (leads to dryness)
  • Not greasing the pan properly

Paying attention to these details makes all the difference.


FAQs

Can I make these ahead of time?

Yes! They’re great for meal prep and can be stored or frozen.

Can I make them gluten-free?

Absolutely—just use a gluten-free flour blend.

Are these good cold?

Yes, they taste great cold, making them perfect for lunchboxes.

Can I use different cheeses?

Yes, try cheddar, provolone, or a blend for different flavors.


Final Thoughts

These easy lunchbox pizza muffins are the ultimate solution for busy families looking for quick, tasty, and portable meals. They’re easy to make, endlessly customizable, and loved by kids and adults alike.

Whether you’re prepping for school lunches or just need a quick snack idea, these muffin pan creations deliver big flavor in every bite. Try them once, and they’ll quickly become a regular in your kitchen rotation!

Summer Corn Salad with Avocado: A Fresh and Vibrant Delight

There’s something truly magical about summer produce, and this summer corn salad with avocado captures all the bright, fresh flavors of the season in one irresistible dish. Sweet corn, creamy avocado, crisp vegetables, and a zesty dressing come together to create a salad that’s as beautiful as it is delicious.

Whether you’re hosting a backyard BBQ, heading to a picnic, or just craving something light yet satisfying, this salad checks all the boxes. It’s quick to prepare, packed with nutrients, and bursting with color and texture.


Why You’ll Love This Summer Corn Salad with Avocado

This summer corn salad with avocado is a must-have recipe during the warmer months.

  • Fresh and seasonal ingredients
  • Ready in under 20 minutes
  • Perfect for meal prep or gatherings
  • Naturally gluten-free and healthy
  • Versatile and customizable

It’s one of those recipes you’ll find yourself making again and again all summer long.


Ingredients

To make this refreshing summer corn salad with avocado, you’ll need:

  • 3 cups fresh or grilled corn kernels
  • 2 ripe avocados, diced
  • 1 cup cherry tomatoes, halved
  • 1/4 cup red onion, finely chopped
  • 1/4 cup fresh cilantro, chopped
  • Juice of 1 lime
  • 2 tbsp olive oil
  • Salt and pepper to taste


Ingredient Notes

The key to a perfect summer corn salad with avocado is using the freshest ingredients possible. Sweet corn—especially when in season—adds natural sweetness, while ripe avocados bring a creamy contrast.

If fresh corn isn’t available, frozen corn (thawed) works well too. For extra flavor, try grilling the corn before adding it to the salad.


Step-by-Step Instructions

1. Prepare the Corn

Cook or grill the corn, then let it cool before cutting off the kernels.

2. Chop the Ingredients

Dice the avocado, halve the tomatoes, and finely chop the onion and cilantro.

3. Combine Everything

In a large bowl, gently mix all ingredients together.

4. Add Dressing

Drizzle with lime juice and olive oil, then season with salt and pepper.

5. Toss and Serve

Gently toss to combine and serve immediately.


Tips for Perfect Results

To make the best summer corn salad with avocado, keep these tips in mind:

  • Use ripe but firm avocados to prevent mushiness
  • Add avocado just before serving
  • Chill the salad slightly for extra freshness
  • Taste and adjust seasoning before serving

These small details elevate the dish from good to amazing.


Variations to Try

This summer corn salad with avocado is incredibly versatile:

  • Add grilled chicken or shrimp for protein
  • Mix in black beans for a heartier salad
  • Use feta cheese for a salty twist
  • Add jalapeños for a spicy kick


What to Serve With It

Pair this summer corn salad with avocado with:

  • Grilled meats like steak or chicken
  • BBQ ribs or burgers
  • Tacos or wraps
  • Fresh lemonade or iced tea

It’s the perfect side dish for any summer meal.


Storage & Reheating

This salad is best enjoyed fresh, but here’s how to store it:

  • Refrigerate in an airtight container for up to 1 day
  • Add avocado just before serving to prevent browning
  • Stir gently before serving again


Common Mistakes to Avoid

Avoid these pitfalls when making summer corn salad with avocado:

  • Using overripe avocados
  • Overmixing the salad
  • Skipping seasoning
  • Adding dressing too early

Keeping these in mind ensures the best flavor and texture.


FAQs

Can I use canned corn?

Yes, just drain and rinse it well before using.

How do I keep avocado from browning?

Add lime juice and mix gently, or add avocado last.

Can I make this ahead of time?

Yes, but add the avocado just before serving.

Is this salad vegan?

Yes, it’s naturally vegan and plant-based.


Final Thoughts

This summer corn salad with avocado is everything you want in a warm-weather dish—fresh, flavorful, and incredibly easy to make. It’s perfect for gatherings, meal prep, or simply enjoying a healthy and satisfying meal at home.

Once you try it, you’ll understand why it’s a staple recipe for summer. Bright, vibrant, and delicious, this salad truly celebrates the best of the season.

11 Quick and Easy 5-Minute Dessert Recipes You’ll Love

Sometimes, you just need dessert—and you need it fast. That’s exactly where these 11 quick and easy 5-minute dessert recipes come in. Whether you’re dealing with a sudden sweet craving, unexpected guests, or just want something simple after dinner, these recipes are designed to deliver maximum flavor with minimal effort.

From creamy mug cakes to refreshing fruit treats, these desserts prove you don’t need hours in the kitchen to enjoy something indulgent. Let’s dive into these quick, easy, and absolutely delicious options that anyone can make.


Why You’ll Love These 5-Minute Desserts

These 11 quick and easy 5-minute dessert recipes are perfect for busy lifestyles.

  • Ready in minutes
  • Minimal ingredients required
  • No complicated techniques
  • Perfect for beginners
  • Easily customizable

They’re ideal for anyone who wants delicious desserts without the hassle.


Essential Ingredients for Quick Desserts

To make these 11 quick and easy 5-minute dessert recipes, keep these basics on hand:

  • Cocoa powder and chocolate chips
  • Milk, cream, or yogurt
  • Fresh fruits like berries and bananas
  • Cookies or crackers
  • Sugar, honey, or syrup


Ingredient Notes

The beauty of these 11 quick and easy 5-minute dessert recipes is flexibility. You can swap ingredients based on what you have at home. For example, yogurt can replace cream, and honey can be used instead of sugar.

Fresh, high-quality ingredients will always give you the best flavor, even in quick recipes.


11 Quick and Easy 5-Minute Dessert Recipes

Here are some of the best ideas to try:

1. Chocolate Mug Cake

A rich, warm dessert made in the microwave.

2. Strawberry Yogurt Parfait

Layered with fresh fruit and creamy yogurt.

3. Banana Peanut Butter Bites

Simple, healthy, and satisfying.

4. No-Bake Cheesecake Cups

Creamy and indulgent with a cookie base.

5. Chocolate-Dipped Strawberries

Elegant and easy.

6. Ice Cream Sundae

Classic and customizable.

7. Oreo Mug Dessert

Crushed cookies mixed with milk and microwaved.

8. Fruit Salad with Honey

Refreshing and naturally sweet.

9. Nutella Toast Dessert

Quick and chocolatey.

10. Rice Cake with Peanut Butter & Chocolate

Crunchy and satisfying.

11. Instant Pudding Delight

Smooth and creamy in minutes.


Step-by-Step Example: Chocolate Mug Cake

1. Mix Ingredients

Combine flour, cocoa powder, sugar, milk, and oil in a mug.

2. Microwave

Cook for 60–90 seconds.

3. Serve

Top with chocolate chips or whipped cream.


Tips for Perfect 5-Minute Desserts

To master these 11 quick and easy 5-minute dessert recipes:

  • Use fresh ingredients
  • Don’t overcook microwave desserts
  • Keep portions small
  • Taste and adjust sweetness

These simple tips help you get consistent, delicious results.


Variations to Try

Get creative with your 11 quick and easy 5-minute dessert recipes:

  • Add nuts or seeds for texture
  • Use flavored yogurt or milk
  • Mix different fruits
  • Try dark chocolate for a richer taste


What to Serve With These Desserts

Pair your quick desserts with:

  • Coffee or tea
  • Milk or plant-based alternatives
  • Fresh fruit juices
  • Smoothies

These pairings enhance the overall experience.


Storage & Reheating Tips

Most of these 11 quick and easy 5-minute dessert recipes are best enjoyed fresh, but:

  • Refrigerate leftovers for short-term storage
  • Reheat mug desserts briefly if needed
  • Store ingredients prepped for quick assembly


Common Mistakes to Avoid

Avoid these mistakes:

  • Overcooking microwave desserts
  • Using too much sugar
  • Skipping measurements
  • Not balancing flavors

Even quick recipes benefit from attention to detail.


FAQs

Can I really make desserts in 5 minutes?

Yes! These recipes are designed to be quick and simple.

Are these desserts kid-friendly?

Absolutely—most are easy enough for kids to help make.

Can I make them healthier?

Yes, by reducing sugar or using healthier substitutes.

Do I need special equipment?

No—just basic kitchen tools and a microwave for some recipes.


Final Thoughts

These 11 quick and easy 5-minute dessert recipes prove that delicious treats don’t have to be time-consuming. With simple ingredients and minimal effort, you can create satisfying desserts anytime.

Whether you’re craving chocolate, fruit, or something creamy, these recipes have you covered. Try them out and enjoy quick, sweet moments whenever you need them!

Easy Microwave Mug Brownie – Rich, Fudgy Dessert in Minutes 🍫

When chocolate cravings hit, you don’t always have the time—or patience—to bake a full batch of brownies. That’s where this easy microwave mug brownie comes in. Ready in just minutes, this single-serve dessert is rich, fudgy, and incredibly satisfying.

Whether you’re craving something sweet after dinner or need a quick dessert fix, this mug brownie delivers all the indulgence of a classic brownie without the wait. It’s simple, fast, and made with ingredients you probably already have in your kitchen.


Why You’ll Love This Easy Microwave Mug Brownie

This easy microwave mug brownie is a game-changer for dessert lovers.

  • Ready in under 5 minutes
  • Perfect single serving (no leftovers!)
  • Rich, chocolatey, and fudgy texture
  • Minimal ingredients and cleanup
  • Easily customizable

It’s the ultimate quick dessert that doesn’t compromise on flavor.


Ingredients

To make this delicious easy microwave mug brownie, you’ll need:

  • 4 tbsp all-purpose flour
  • 2 tbsp cocoa powder
  • 3 tbsp sugar
  • 1/8 tsp salt
  • 3 tbsp milk
  • 2 tbsp vegetable oil or melted butter
  • 1/4 tsp vanilla extract
  • 2 tbsp chocolate chips


Ingredient Notes

The beauty of this easy microwave mug brownie lies in its simplicity. Cocoa powder gives it that deep chocolate flavor, while oil or butter adds richness and moisture.

You can easily adjust the sweetness or swap chocolate chips for chunks, peanut butter chips, or even caramel pieces for a unique twist.


Step-by-Step Instructions

1. Mix Dry Ingredients

In a microwave-safe mug, combine flour, cocoa powder, sugar, and salt.

2. Add Wet Ingredients

Stir in milk, oil, and vanilla extract until smooth.

3. Add Chocolate Chips

Fold in chocolate chips for extra gooey goodness.

4. Microwave

Microwave on high for 60–90 seconds depending on your microwave.

5. Let It Cool Slightly

Allow the brownie to cool for 1–2 minutes before digging in.


Tips for Perfect Results

To get the best easy microwave mug brownie, keep these tips in mind:

  • Don’t overcook—it continues to cook after microwaving
  • Use a wide mug for even cooking
  • Mix thoroughly to avoid dry pockets
  • Adjust time based on your microwave power

These small tweaks make a big difference in texture.


Variations to Try

Make your easy microwave mug brownie even more exciting:

  • Add a spoonful of peanut butter in the center
  • Mix in crushed cookies or nuts
  • Top with marshmallows for a s’mores version
  • Use dark chocolate for a richer flavor


What to Serve With It

Take your easy microwave mug brownie to the next level with:

  • A scoop of vanilla ice cream
  • Whipped cream
  • Fresh berries
  • A drizzle of chocolate or caramel sauce

These toppings turn a simple dessert into something extra special.


Storage & Reheating

While this easy microwave mug brownie is best enjoyed fresh:

  • You can store leftovers covered for up to 1 day
  • Reheat for 10–15 seconds in the microwave
  • Add a splash of milk before reheating to keep it moist


Common Mistakes to Avoid

Avoid these common issues:

  • Overcooking (leads to dryness)
  • Not mixing properly
  • Using a mug that’s too small
  • Skipping chocolate chips

Getting these right ensures a perfect brownie every time.


FAQs

How long should I microwave a mug brownie?

Typically 60–90 seconds, depending on your microwave.

Why is my mug brownie dry?

It was likely overcooked—reduce the cooking time slightly.

Can I make this without eggs?

Yes! This recipe is naturally egg-free.

Can I make it healthier?

You can reduce sugar or use alternative sweeteners and whole wheat flour.


Final Thoughts

This easy microwave mug brownie is proof that you don’t need a full kitchen setup to enjoy a rich, indulgent dessert. It’s quick, easy, and incredibly satisfying—perfect for busy days or late-night cravings.

Once you try it, you’ll see why this simple recipe has become a favorite for so many. Grab a mug, mix up your ingredients, and treat yourself to a warm, chocolatey delight in minutes!

Easter M&M Cookies – Soft, Chewy & Colorful Spring Treats 🌸🍪

If you’re looking for a cheerful, crowd-pleasing dessert this spring, these Easter M&M cookies are exactly what you need. Bursting with pastel colors and rich chocolate flavor, they’re a festive twist on classic chocolate chip cookies that instantly brighten any Easter table.

These cookies are perfect for baking with kids, sharing at gatherings, or simply enjoying with a glass of milk. The soft centers, slightly crisp edges, and crunchy candy coating create a texture and flavor combination that’s impossible to resist.


Why You’ll Love These Easter M&M Cookies

These Easter M&M cookies are a must-bake during the spring season.

  • Soft and chewy with a slight crunch from candies
  • Bright pastel colors perfect for Easter
  • Easy to make with simple ingredients
  • Great for parties, gifting, or family baking
  • Customizable with your favorite mix-ins

They combine festive fun with classic cookie comfort in every bite.


Ingredients

To make these delicious Easter M&M cookies, you’ll need:

  • 2 ¼ cups all-purpose flour
  • 1 tsp baking soda
  • ½ tsp salt
  • 1 cup unsalted butter (softened)
  • ¾ cup brown sugar
  • ½ cup granulated sugar
  • 2 large eggs
  • 2 tsp vanilla extract
  • 1 cup chocolate chips
  • 1 cup Easter M&M candies


Ingredient Notes

The secret to perfect Easter M&M cookies lies in balancing flavors and textures. Brown sugar helps keep the cookies moist and chewy, while granulated sugar gives a slight crispness.

Using pastel-colored M&Ms adds both sweetness and visual appeal. For best results, reserve a few candies to press on top of the cookies before baking for a bakery-style finish.


Step-by-Step Instructions

1. Mix Dry Ingredients

In a bowl, whisk together flour, baking soda, and salt.

2. Cream Butter and Sugars

Beat butter, brown sugar, and granulated sugar until light and fluffy.

3. Add Eggs and Vanilla

Mix in eggs one at a time, followed by vanilla extract.

4. Combine and Fold

Gradually mix in dry ingredients, then fold in chocolate chips and M&Ms.

5. Scoop Dough

Scoop dough onto a lined baking sheet, spacing evenly.

6. Bake

Bake at 350°F (175°C) for 10–12 minutes until edges are golden.

7. Cool and Serve

Let cookies cool on a wire rack before serving.


Tips for Perfect Easter M&M Cookies

To get the best Easter M&M cookies, follow these tips:

  • Chill the dough for thicker cookies
  • Don’t overbake—centers should be soft
  • Add extra M&Ms on top before baking
  • Use parchment paper for even baking

These tips will give you soft, bakery-style cookies every time.


Variations to Try

Switch things up with these fun ideas:

  • Use white chocolate chips instead of regular
  • Add chopped nuts for crunch
  • Try peanut butter dough for a richer flavor
  • Use mini M&Ms for smaller cookies


What to Serve With Easter M&M Cookies

These cookies pair perfectly with:

  • Cold milk or flavored milk
  • Coffee or tea
  • Vanilla ice cream for cookie sandwiches
  • Fresh fruit for a balanced treat

They’re perfect for dessert tables or casual snacking.


Storage & Reheating Tips

Keep your Easter M&M cookies fresh with these tips:

  • Store in an airtight container for up to 5 days
  • Freeze baked cookies for up to 2 months
  • Reheat briefly in the microwave for a soft texture
  • Freeze dough balls for quick baking later


Common Mistakes to Avoid

Avoid these common baking mistakes:

  • Using melted butter instead of softened
  • Overmixing the dough
  • Overbaking the cookies
  • Not measuring ingredients properly

Paying attention to these details ensures perfect cookies.


FAQs

Can I make Easter M&M cookies ahead of time?

Yes! The dough can be refrigerated for up to 2 days before baking.

Why are my cookies flat?

Your butter may be too warm, or the dough wasn’t chilled.

Can I freeze Easter M&M cookies?

Absolutely. Both baked cookies and dough freeze well.

Can I use regular M&Ms instead of Easter ones?

Yes, but pastel M&Ms give the cookies a festive spring look.


Final Thoughts

These Easter M&M cookies are the ultimate springtime treat—easy to make, fun to decorate, and absolutely delicious. Their soft texture and colorful appearance make them perfect for Easter celebrations, baking with kids, or simply enjoying at home.

Once you try this recipe, it’s sure to become a seasonal favorite. So grab your ingredients, preheat your oven, and enjoy baking these cheerful, irresistible cookies!

Easter Chocolate Chip Cookies – Soft, Festive & Perfect for Spring Baking 🍪🌸

There’s something magical about baking during the spring season, and these Easter chocolate chip cookies capture that joy perfectly. Soft, chewy, and filled with colorful pastel candies, these cookies are a fun and festive twist on the classic chocolate chip cookie we all love.

Whether you’re preparing treats for an Easter brunch, filling dessert trays, or baking with kids, this recipe delivers both flavor and visual appeal. The combination of gooey chocolate and crunchy candy shells makes every bite irresistible.


Why You’ll Love These Easter Chocolate Chip Cookies

These Easter chocolate chip cookies are more than just a dessert—they’re a seasonal experience.

  • Soft and chewy texture with crispy edges
  • Loaded with chocolate chips and pastel candies
  • Perfect for Easter gatherings and gifting
  • Easy to make with simple pantry ingredients
  • Kid-friendly and fun to decorate

They bring together classic comfort and festive charm in one delicious recipe.


Ingredients

To make these irresistible Easter chocolate chip cookies, you’ll need:

  • 2 ¼ cups all-purpose flour
  • 1 tsp baking soda
  • ½ tsp salt
  • 1 cup unsalted butter (softened)
  • ¾ cup brown sugar
  • ½ cup granulated sugar
  • 2 large eggs
  • 2 tsp vanilla extract
  • 1 cup chocolate chips
  • 1 cup pastel candy-coated chocolates


Ingredient Notes

The secret to perfect Easter chocolate chip cookies lies in the balance of ingredients. Brown sugar adds moisture and chewiness, while granulated sugar gives a slight crisp edge. The pastel candies not only add sweetness but also bring a pop of spring color that makes these cookies stand out.

For best results, use room-temperature butter and fresh baking soda to ensure even texture and rise.


Step-by-Step Instructions

1. Mix the Dry Ingredients

In a bowl, whisk together flour, baking soda, and salt.

2. Cream Butter and Sugars

In another bowl, beat the butter, brown sugar, and granulated sugar until light and fluffy.

3. Add Eggs and Vanilla

Mix in eggs one at a time, then add vanilla extract.

4. Combine and Fold

Gradually add dry ingredients, then fold in chocolate chips and pastel candies.

5. Scoop and Shape

Scoop dough onto a lined baking sheet, spacing evenly.

6. Bake

Bake at 350°F (175°C) for 10–12 minutes until edges are golden.

7. Cool and Enjoy

Let cookies cool on a rack before serving.


Tips for Perfect Easter Chocolate Chip Cookies

To get bakery-quality Easter chocolate chip cookies, keep these tips in mind:

  • Chill the dough for 20–30 minutes for thicker cookies
  • Don’t overbake—cookies should look slightly underdone in the center
  • Press extra candies on top before baking for a prettier finish
  • Use parchment paper for even baking

These small steps make a big difference in texture and presentation.


Variations to Try

Want to customize your Easter chocolate chip cookies? Try these ideas:

  • Swap chocolate chips for white chocolate
  • Add chopped nuts for crunch
  • Use mini eggs instead of candy-coated chocolates
  • Make them gluten-free with a flour substitute


What to Serve With Easter Chocolate Chip Cookies

These cookies pair beautifully with:

  • Cold milk or chocolate milk
  • Coffee or espresso
  • Fresh fruit platters
  • Vanilla ice cream for cookie sandwiches

They’re perfect for dessert tables or casual snacking.


Storage & Reheating Tips

Keep your Easter chocolate chip cookies fresh with these tips:

  • Store in an airtight container for up to 5 days
  • Freeze baked cookies for up to 2 months
  • Reheat briefly in the microwave for a soft texture
  • Freeze dough balls for easy future baking


Common Mistakes to Avoid

Avoid these common baking mistakes:

  • Using cold butter instead of softened
  • Overmixing the dough
  • Overbaking the cookies
  • Skipping proper measurements

Attention to detail ensures perfect cookies every time.


FAQs

Can I make Easter chocolate chip cookies ahead of time?

Yes! You can prepare the dough in advance and refrigerate it for up to 2 days.

Why are my cookies flat?

Your butter may be too warm, or you didn’t chill the dough.

Can I freeze Easter chocolate chip cookies?

Absolutely. Both baked cookies and dough freeze well.

What candies work best for Easter cookies?

Pastel candy-coated chocolates or mini eggs are perfect choices.


Final Thoughts

These Easter chocolate chip cookies are the ultimate springtime treat—simple, festive, and incredibly delicious. They combine the comfort of classic cookies with a fun seasonal twist that makes them perfect for Easter celebrations.

Whether you’re baking for family, friends, or just yourself, this recipe is sure to become a holiday favorite. Grab your ingredients, get creative, and enjoy every sweet bite of these delightful cookies!

30 Irresistible Easter Cookies Perfect for Spring Baking

Spring is in the air, and that means it’s time for pastel colors, sweet treats, and festive baking! These 30 irresistible Easter cookies perfect for spring baking are exactly what you need to celebrate the season in the most delicious way possible. Whether you’re baking with kids, hosting a brunch, or preparing treats for an Easter gathering, these cookies bring joy, color, and flavor to your table.

From classic sugar cookies decorated with icing to fun, creative designs shaped like bunnies and eggs, these recipes are as delightful to make as they are to eat. Let’s dive into the ultimate collection of Easter cookies that will brighten your spring baking.


Why You’ll Love These Easter Cookies

These 30 irresistible Easter cookies perfect for spring baking are a must for the season.

  • Bright, fun, and festive designs
  • Perfect for family baking activities
  • Easy to customize with colors and flavors
  • Great for gifting or parties
  • Kid-friendly and crowd-pleasing

They bring creativity and sweetness together in the best way.


Essential Ingredients for Easter Cookies

To make the best 30 irresistible Easter cookies perfect for spring baking, gather these ingredients:

  • All-purpose flour
  • Butter and sugar
  • Eggs and vanilla extract
  • Baking powder or baking soda
  • Food coloring and sprinkles
  • Icing or frosting


Ingredient Notes

The success of these 30 irresistible Easter cookies perfect for spring baking comes down to quality ingredients and attention to detail. Softened butter creates a smooth dough, while vanilla adds a warm, classic flavor.

Food coloring and decorative toppings are what truly bring these cookies to life, so don’t be afraid to get creative with pastel shades and fun textures.


30 Irresistible Easter Cookies Perfect for Spring Baking

Here are some delightful ideas:

Classic Favorites

  • Sugar cookies with royal icing
  • Chocolate chip cookies with pastel candies
  • Shortbread cookies

Festive Designs

  • Bunny-shaped cookies
  • Egg-shaped decorated cookies
  • Flower cookies

Fun & Creative Options

  • Sprinkle cookies
  • Sandwich cookies with cream filling
  • Thumbprint cookies with jam


Step-by-Step Example: Classic Easter Sugar Cookies

1. Make the Dough

Cream butter and sugar, then mix in eggs and vanilla.

2. Add Dry Ingredients

Combine flour and baking powder, then mix into the dough.

3. Roll and Cut

Roll out dough and cut into Easter shapes.

4. Bake

Bake at 350°F (175°C) until lightly golden.

5. Decorate

Decorate with icing and sprinkles once cooled.


Tips for Perfect Easter Cookies

To master these 30 irresistible Easter cookies perfect for spring baking:

  • Chill the dough before rolling
  • Use even thickness for consistent baking
  • Let cookies cool completely before decorating
  • Use piping bags for precise icing

These tips help create bakery-quality results.


Variations to Try

Add your own twist with these ideas:

  • Use lemon or almond extract for flavor
  • Add chocolate drizzle
  • Make gluten-free versions
  • Try different icing techniques


What to Serve With Easter Cookies

Pair these cookies with:

  • Milk or flavored milk
  • Coffee or tea
  • Hot chocolate
  • Fresh fruit platters

These pairings enhance the festive experience.


Storage & Reheating Tips

To keep your 30 irresistible Easter cookies perfect for spring baking fresh:

  • Store in airtight containers
  • Keep decorated cookies in a cool place
  • Freeze undecorated cookies for later
  • Separate layers with parchment paper


Common Mistakes to Avoid

Avoid these common issues:

  • Overbaking cookies
  • Skipping dough chilling
  • Decorating while cookies are warm
  • Using too much flour

Careful preparation leads to perfect cookies.


FAQs

What are the best cookies for Easter?

Sugar cookies, decorated cookies, and fun shaped cookies are the most popular.

Can I make Easter cookies ahead of time?

Yes, you can bake and freeze them in advance.

How do I decorate cookies like a pro?

Use piping bags and practice simple designs first.

Can kids help with these recipes?

Absolutely! Decorating cookies is a fun activity for kids.


Final Thoughts

These 30 irresistible Easter cookies perfect for spring baking are the perfect way to celebrate the season with creativity and flavor. They’re fun to make, beautiful to serve, and delicious to eat.

Whether you’re baking for family, friends, or just for yourself, these cookies will bring a touch of springtime magic to your kitchen. So grab your ingredients, get creative, and enjoy every sweet moment of Easter baking!

Easy Mini Cookies Recipe (Makes 100 Pieces) 🤎🍪

If you’re looking for the ultimate crowd-pleasing treat, this easy mini cookies recipe (makes 100 pieces) is exactly what you need. These bite-sized cookies are soft, chewy, and packed with flavor, making them perfect for parties, lunchboxes, or just a quick sweet snack.

What makes this recipe truly special is how simple and versatile it is. Whether you’re baking for a large group or prepping treats for the week, these mini cookies deliver big flavor in a tiny package.


Why You’ll Love This Mini Cookies Recipe

This easy mini cookies recipe (makes 100 pieces) is a must-try for so many reasons:

  • Perfect for sharing and parties
  • Quick and easy to prepare
  • Soft, chewy texture
  • Customizable with different mix-ins
  • Great for freezing and meal prep

These cookies are designed to make baking fun, efficient, and delicious.


Ingredients

To make this easy mini cookies recipe (makes 100 pieces), you’ll need:

  • 2 ½ cups all-purpose flour
  • 1 tsp baking soda
  • ½ tsp salt
  • 1 cup unsalted butter (softened)
  • ¾ cup brown sugar
  • ½ cup granulated sugar
  • 2 large eggs
  • 2 tsp vanilla extract
  • 1 ½ cups chocolate chips


Ingredient Notes

The success of this easy mini cookies recipe (makes 100 pieces) comes down to using quality ingredients. Softened butter ensures a smooth dough, while brown sugar adds moisture and chewiness.

You can easily swap chocolate chips for white chocolate, peanut butter chips, or even dried fruit depending on your taste preferences.


Step-by-Step Instructions

1. Prepare the Dough

In a bowl, whisk together flour, baking soda, and salt. In another bowl, cream butter and sugars until light and fluffy.

2. Add Wet Ingredients

Mix in eggs and vanilla extract until fully combined.

3. Combine Everything

Gradually add dry ingredients to the wet mixture, then fold in chocolate chips.

4. Shape Mini Cookies

Scoop small portions of dough (about 1 teaspoon each) and place on a lined baking sheet.

5. Bake

Bake at 350°F (175°C) for 8–10 minutes or until edges are lightly golden.

6. Cool and Serve

Let cookies cool on a rack before serving.


Tips for Perfect Mini Cookies

To get the best results from this easy mini cookies recipe (makes 100 pieces):

  • Don’t overmix the dough
  • Use a small scoop for even sizes
  • Avoid overbaking to keep cookies soft
  • Chill the dough if it feels too soft

These simple tips will help you achieve bakery-quality cookies every time.


Variations to Try

Switch things up with these ideas:

  • Add nuts for extra crunch
  • Use different types of chocolate
  • Mix in sprinkles for a fun twist
  • Make double chocolate cookies with cocoa powder


What to Serve With Mini Cookies

These mini cookies pair perfectly with:

  • Milk or chocolate milk
  • Coffee or tea
  • Ice cream for mini cookie sandwiches

They’re versatile and perfect for any occasion.


Storage & Reheating Tips

To keep your easy mini cookies recipe (makes 100 pieces) fresh:

  • Store in airtight containers at room temperature for up to 5 days
  • Freeze for up to 2 months
  • Reheat briefly in the microwave for a warm, soft texture


Common Mistakes to Avoid

Avoid these common baking mistakes:

  • Overbaking the cookies
  • Using cold butter
  • Skipping proper measurements
  • Crowding the baking tray

Paying attention to these details makes a big difference.


FAQs

How do I keep mini cookies soft?

Store them in an airtight container and avoid overbaking.

Can I freeze the dough?

Yes, portion the dough and freeze for later use.

Why are my cookies spreading too much?

The dough may be too warm—try chilling it before baking.

Can I make these cookies gluten-free?

Yes, substitute with a gluten-free flour blend.


Final Thoughts

This easy mini cookies recipe (makes 100 pieces) is the perfect go-to for anyone who loves simple, delicious baking. With minimal effort and maximum flavor, these cookies are sure to become a staple in your kitchen.

Whether you’re baking for a party, prepping snacks, or just craving something sweet, these mini cookies deliver every time. Try them once, and you’ll keep coming back for more!

Sweet & Easy! The Best No Bake Desserts for Hot Summer Days

When summer temperatures soar, the last thing you want is to turn on the oven. That’s exactly why these best no bake desserts for hot summer days are such a game changer. They’re cool, simple, and incredibly satisfying—perfect for everything from lazy afternoons to backyard gatherings.

These desserts focus on fresh flavors, creamy textures, and minimal effort. Whether you’re craving something fruity, chocolatey, or light and refreshing, you’ll find plenty of inspiration here to keep your sweet tooth happy without overheating your kitchen.


Why You’ll Love These No Bake Desserts

These best no bake desserts for hot summer days are perfect for anyone looking for easy, delicious recipes.

  • No oven required
  • Quick and beginner-friendly
  • Perfect for hot weather
  • Great for entertaining
  • Customizable with simple ingredients

They’re ideal for busy days when you want something sweet without spending hours in the kitchen.


Essential Ingredients for No Bake Desserts

To create the best no bake desserts for hot summer days, keep these staples on hand:

  • Fresh fruits (berries, bananas, mango, peaches)
  • Yogurt, cream cheese, or whipped cream
  • Chocolate chips or cocoa
  • Graham crackers, cookies, or granola
  • Honey or natural sweeteners


Ingredient Notes

The key to mastering the best no bake desserts for hot summer days is balancing flavors and textures. Creamy layers pair beautifully with crunchy bases, while fresh fruit adds brightness and natural sweetness.

You can easily adapt recipes for dietary needs by using dairy-free alternatives or low-sugar options. The flexibility is what makes no-bake desserts so appealing.


Best No Bake Desserts for Hot Summer Days

Here are some irresistible ideas:

Fruity & Refreshing Treats

  • Berry parfaits
  • Watermelon fruit cups
  • Mango yogurt bowls
  • Strawberry shortcake cups

Creamy Favorites

  • No-bake cheesecake
  • Chocolate mousse
  • Peanut butter pie
  • Icebox cake

Frozen Delights

  • Popsicles
  • Frozen yogurt bark
  • Ice cream sandwiches
  • Banana bites

Quick & Fun Desserts

  • Chocolate truffles
  • No-bake cookie bars
  • Dessert cups
  • Trail mix sweets


Step-by-Step Example: No-Bake Chocolate Mousse

1. Prepare the Base

Melt chocolate and let it cool slightly.

2. Whip the Cream

Whip cream until soft peaks form.

3. Fold Together

Gently fold chocolate into whipped cream.

4. Chill and Serve

Refrigerate until set, then serve.


Tips for Perfect Results

To make the best no bake desserts for hot summer days, keep these tips in mind:

  • Always chill desserts thoroughly
  • Use high-quality ingredients
  • Keep flavors balanced
  • Prepare ahead when possible

These simple tips ensure your desserts turn out perfectly every time.


Variations to Try

Switch things up with these ideas:

  • Add tropical fruits like pineapple or coconut
  • Use flavored yogurt or whipped cream
  • Try vegan or dairy-free options
  • Incorporate crunchy toppings like nuts or granola


What to Serve With These Desserts

Pair your desserts with refreshing drinks:

  • Iced coffee
  • Lemonade
  • Sparkling water
  • Fruit smoothies

These pairings enhance the overall experience and keep things cool.


Storage & Reheating Tips

To store your best no bake desserts for hot summer days:

  • Keep in airtight containers
  • Refrigerate creamy desserts
  • Freeze when necessary
  • Serve chilled for best texture


Common Mistakes to Avoid

Avoid these common issues:

  • Not chilling desserts long enough
  • Using overly sweet ingredients
  • Skipping proper layering
  • Leaving desserts out in the heat

A little attention to detail goes a long way.


FAQs

What are the easiest no bake desserts?

Parfaits, mousse, and fruit-based desserts are among the easiest.

Can I make these desserts ahead of time?

Yes, most no-bake desserts are perfect for prepping in advance.

How long do no bake desserts last?

Typically 2–4 days when stored in the refrigerator.

Are no bake desserts healthier?

They can be, especially when made with fresh fruit and natural ingredients.


Final Thoughts

These best no bake desserts for hot summer days are everything you need to stay cool while enjoying something sweet. They’re easy, versatile, and perfect for any occasion—from casual afternoons to festive gatherings.

With so many delicious options to choose from, you’ll never run out of ways to treat yourself without turning on the oven. Try a few favorites and make your summer desserts effortless and unforgettable!

20 Refreshing Summer Desserts Everyone Will Love

When the heat of summer kicks in, nothing hits the spot quite like a cool, sweet treat. These 20 refreshing summer desserts everyone will love are designed to keep you satisfied without weighing you down. Light, fruity, creamy, and often no-bake, these desserts are perfect for warm afternoons, backyard parties, or relaxing evenings on the patio.

Whether you’re hosting a crowd or simply treating yourself, these recipes deliver maximum flavor with minimal effort. Best of all, many of them can be made ahead, so you can spend less time in the kitchen and more time enjoying the sunshine.


Why You’ll Love These Summer Desserts

These 20 refreshing summer desserts everyone will love are a must-have for your seasonal recipe collection.

  • Light and cooling for hot weather
  • Easy to prepare with simple ingredients
  • Great for entertaining or everyday treats
  • Kid-friendly and customizable
  • Perfect balance of sweet and refreshing

They’re designed to bring joy to every bite while keeping things simple and stress-free.


Essential Ingredients for Refreshing Summer Desserts

To make the best 20 refreshing summer desserts everyone will love, keep these ingredients stocked:

  • Fresh fruits (berries, watermelon, mango, pineapple)
  • Yogurt, whipped cream, or cream cheese
  • Chocolate, honey, or natural sweeteners
  • Graham crackers, cookies, or granola
  • Ice cream or frozen yogurt


Ingredient Notes

The magic of these 20 refreshing summer desserts everyone will love lies in combining textures and flavors. Creamy elements pair beautifully with crunchy layers, while fresh fruit adds brightness and natural sweetness.

Feel free to swap ingredients based on dietary preferences—dairy-free yogurt, gluten-free cookies, or plant-based whipped cream all work wonderfully.


20 Refreshing Summer Desserts Everyone Will Love

Here are some delicious ideas to try:

Fruity & Light Desserts

  • Berry parfaits
  • Watermelon slices with lime
  • Fruit salads
  • Mango pudding

Creamy & Dreamy Treats

  • No-bake cheesecake
  • Chocolate mousse
  • Banana cream cups
  • Icebox cakes

Frozen Favorites

  • Popsicles
  • Ice cream sandwiches
  • Frozen yogurt bark
  • Sorbet

Fun & Shareable Desserts

  • Dessert boards
  • Chocolate-dipped fruit
  • Mini trifles
  • Layered pudding cups


Step-by-Step Example: Frozen Yogurt Bark

1. Spread the Yogurt

Spread yogurt evenly on a lined tray.

2. Add Toppings

Top with fresh fruit and granola.

3. Freeze Until Firm

Place in the freezer until solid.

4. Break and Serve

Break into pieces and enjoy.


Tips for Perfect Summer Desserts

To get the best results from these 20 refreshing summer desserts everyone will love:

  • Always chill desserts before serving
  • Use ripe, fresh fruit for maximum flavor
  • Keep portions light and balanced
  • Prepare ahead for convenience

These tips help you achieve perfect texture and taste every time.


Variations to Try

Keep things interesting with these ideas:

  • Add tropical fruits like coconut or papaya
  • Use flavored yogurt or cream
  • Experiment with different cookie bases
  • Try sugar-free or low-carb versions


What to Serve With These Desserts

Pair your desserts with refreshing drinks:

  • Iced tea
  • Lemonade
  • Sparkling water
  • Fruit smoothies

These beverages enhance the refreshing experience.


Storage Tips

To keep your 20 refreshing summer desserts everyone will love fresh:

  • Store in airtight containers
  • Refrigerate creamy desserts
  • Freeze frozen treats properly
  • Avoid leaving desserts out too long in heat


Common Mistakes to Avoid

Avoid these common mistakes:

  • Not chilling desserts long enough
  • Using unripe fruit
  • Overloading with sugar
  • Skipping proper storage

Simple adjustments can make a big difference in quality.


FAQs

What are the best refreshing summer desserts?

Fruit-based desserts, frozen treats, and no-bake options are ideal.

Can I make these desserts ahead of time?

Yes, many can be prepared in advance and stored until serving.

How do I keep desserts from melting outside?

Keep them chilled and serve in small batches.

Are these desserts healthy?

Many are lighter options, especially those made with fruit and yogurt.


Final Thoughts

These 20 refreshing summer desserts everyone will love are the perfect way to beat the heat while enjoying something sweet and satisfying. They’re simple, versatile, and ideal for any summer occasion.

Whether you’re hosting a party or enjoying a quiet evening, these desserts will bring a refreshing touch to your table. Try a few favorites and make your summer a little sweeter!