Soft and Cheesy Mozzarella Stuffed Bread – The Ultimate Gooey Comfort Recipe

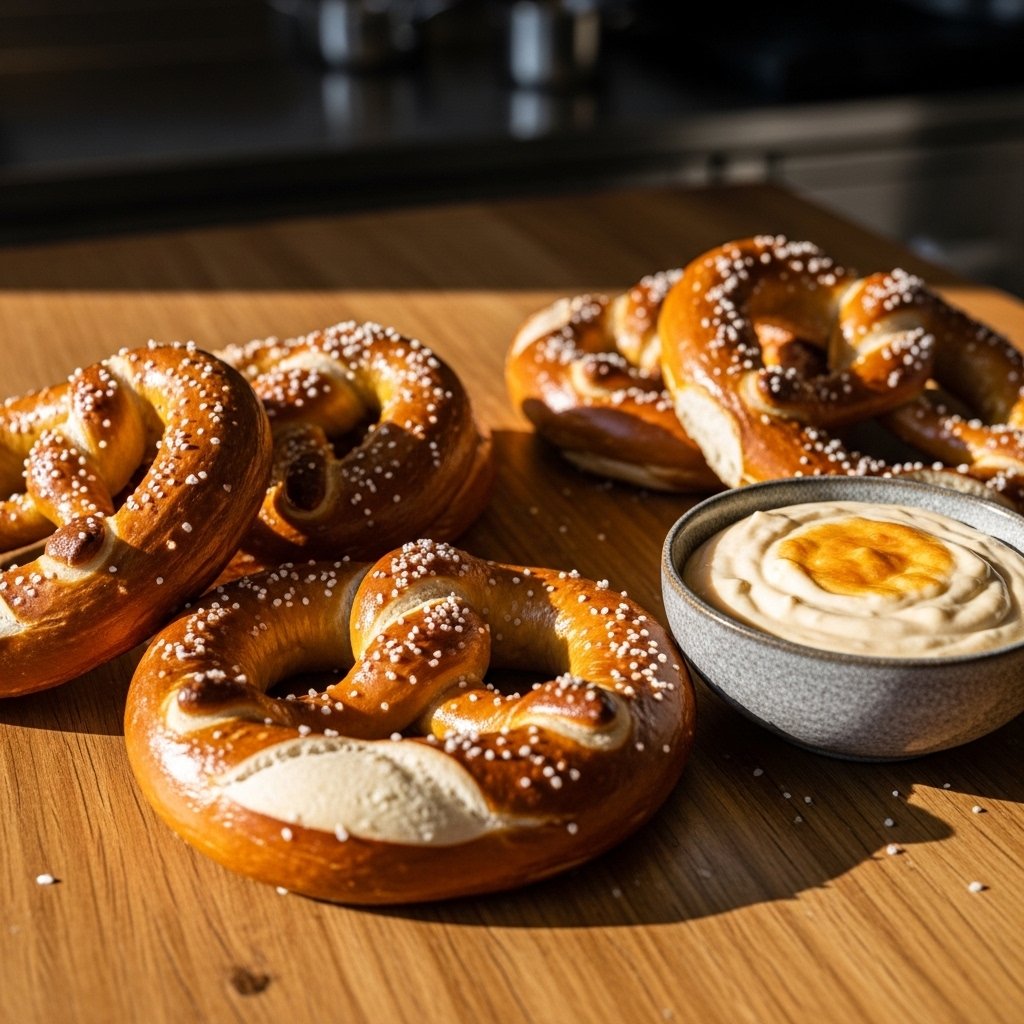
There’s something incredibly comforting about warm, freshly baked bread—especially when it’s filled with gooey, melted cheese. This soft and cheesy mozzarella stuffed bread takes that comfort to the next level with a fluffy interior and a rich, cheesy center that pulls apart beautifully with every bite.

Whether you’re serving it as an appetizer, a side dish, or a snack, this recipe is guaranteed to impress. It’s simple enough for beginners but delicious enough to feel bakery-quality. Once you try this homemade version, you may never go back to store-bought again.


Why You’ll Love This Soft and Cheesy Mozzarella Stuffed Bread

This soft and cheesy mozzarella stuffed bread is everything you want in a homemade baked good.

  • Soft, fluffy texture with a golden crust
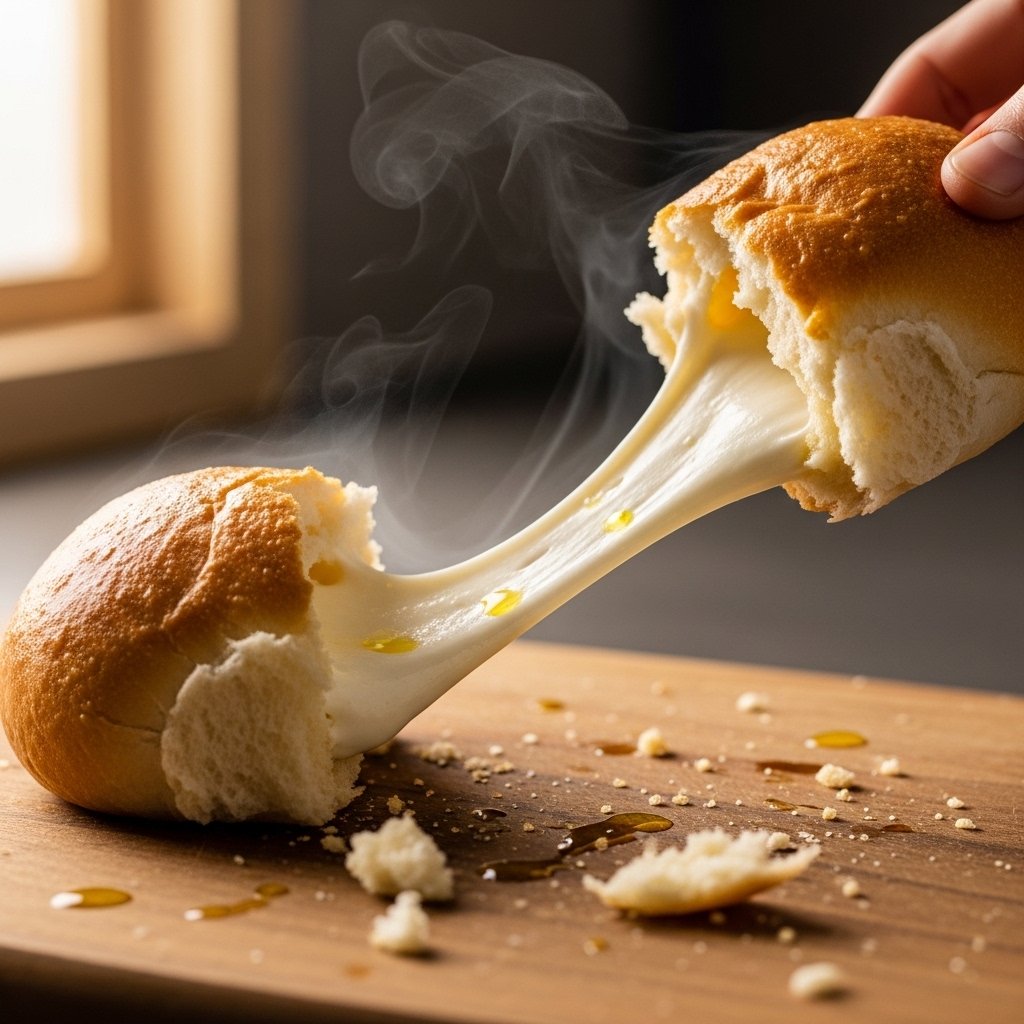
  • Gooey mozzarella filling that stretches beautifully
  • Easy to customize with herbs and flavors
  • Perfect for sharing with family and friends
  • Great for parties, dinners, or snacks

It’s a recipe that delivers both comfort and wow-factor.
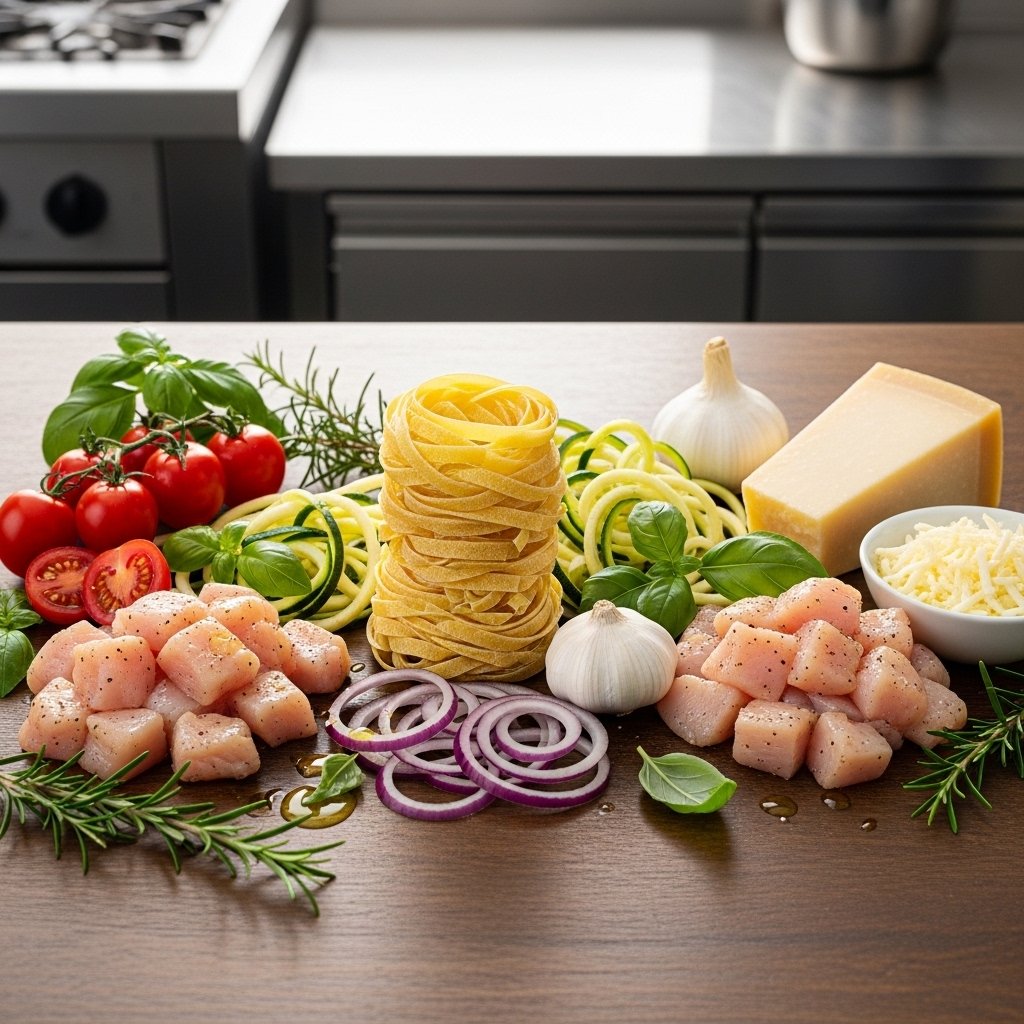
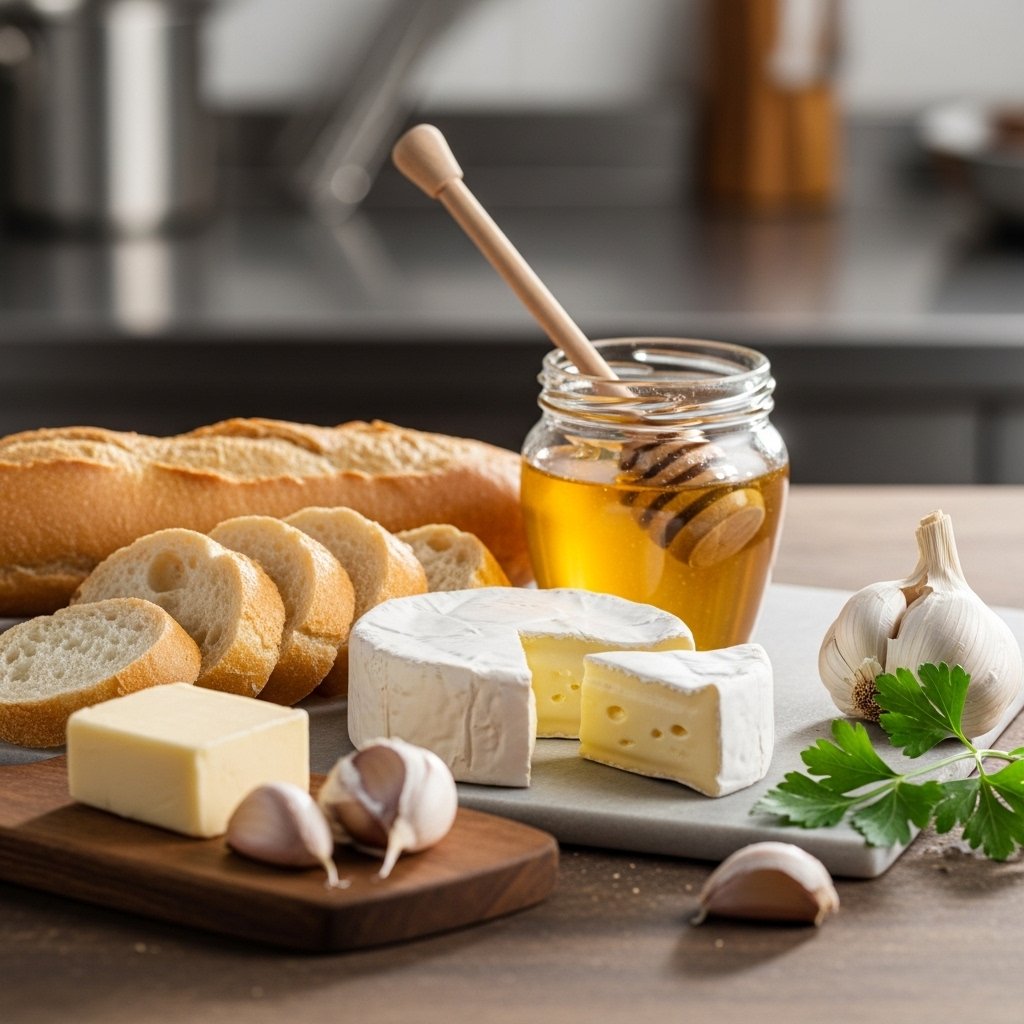
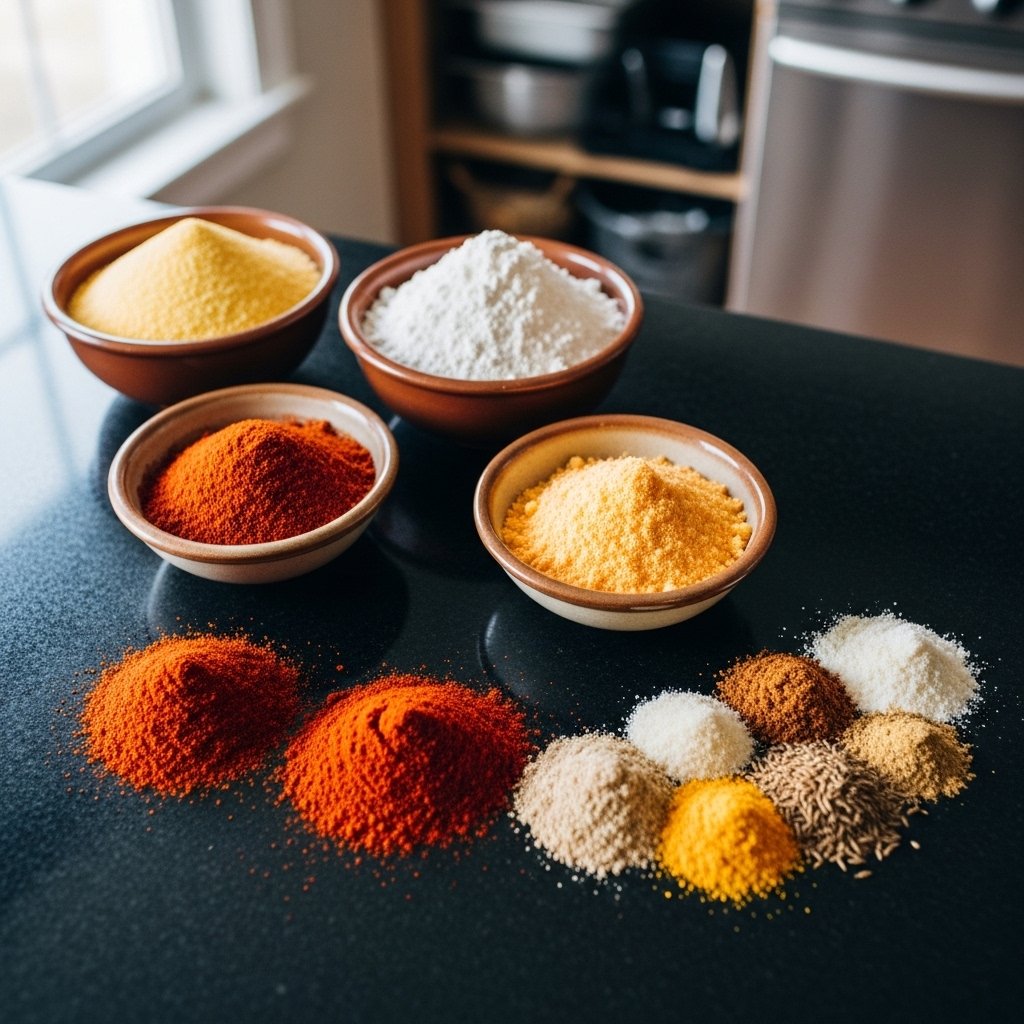
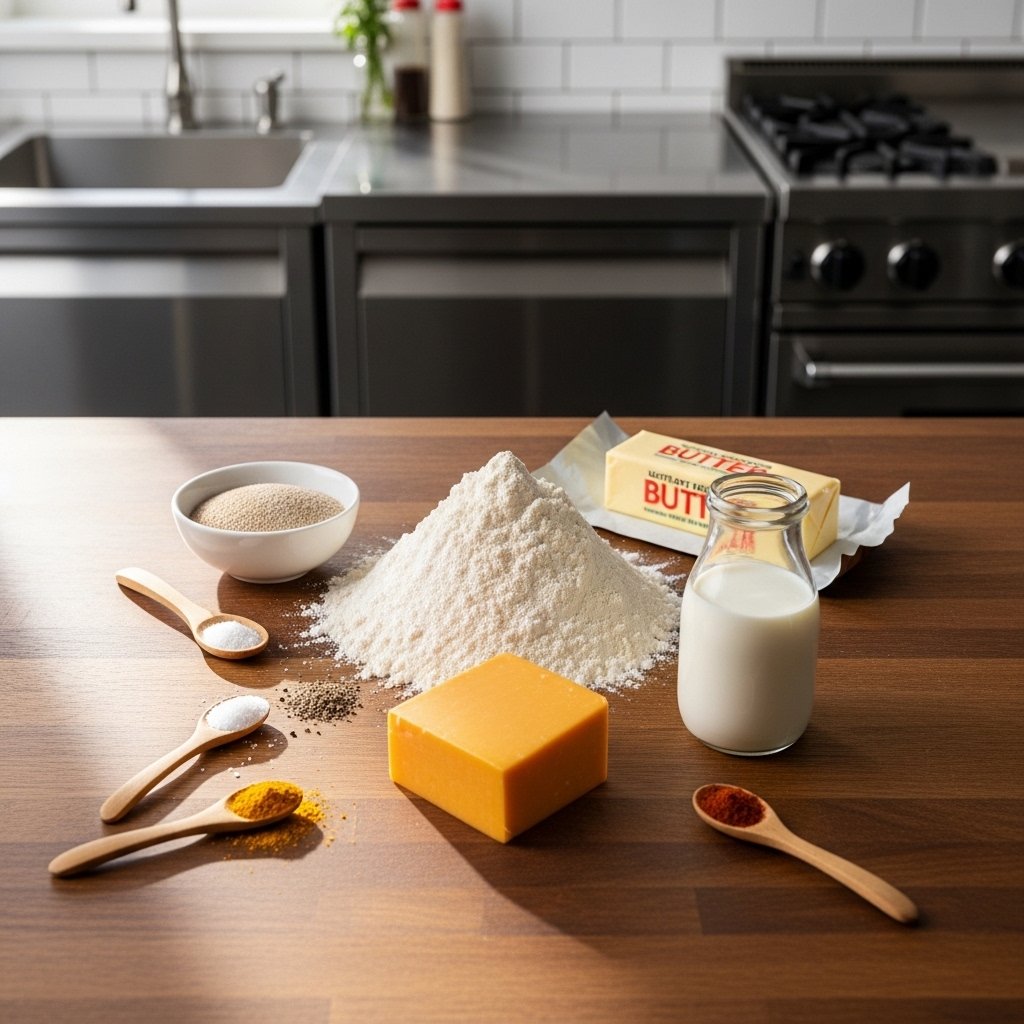

Ingredients

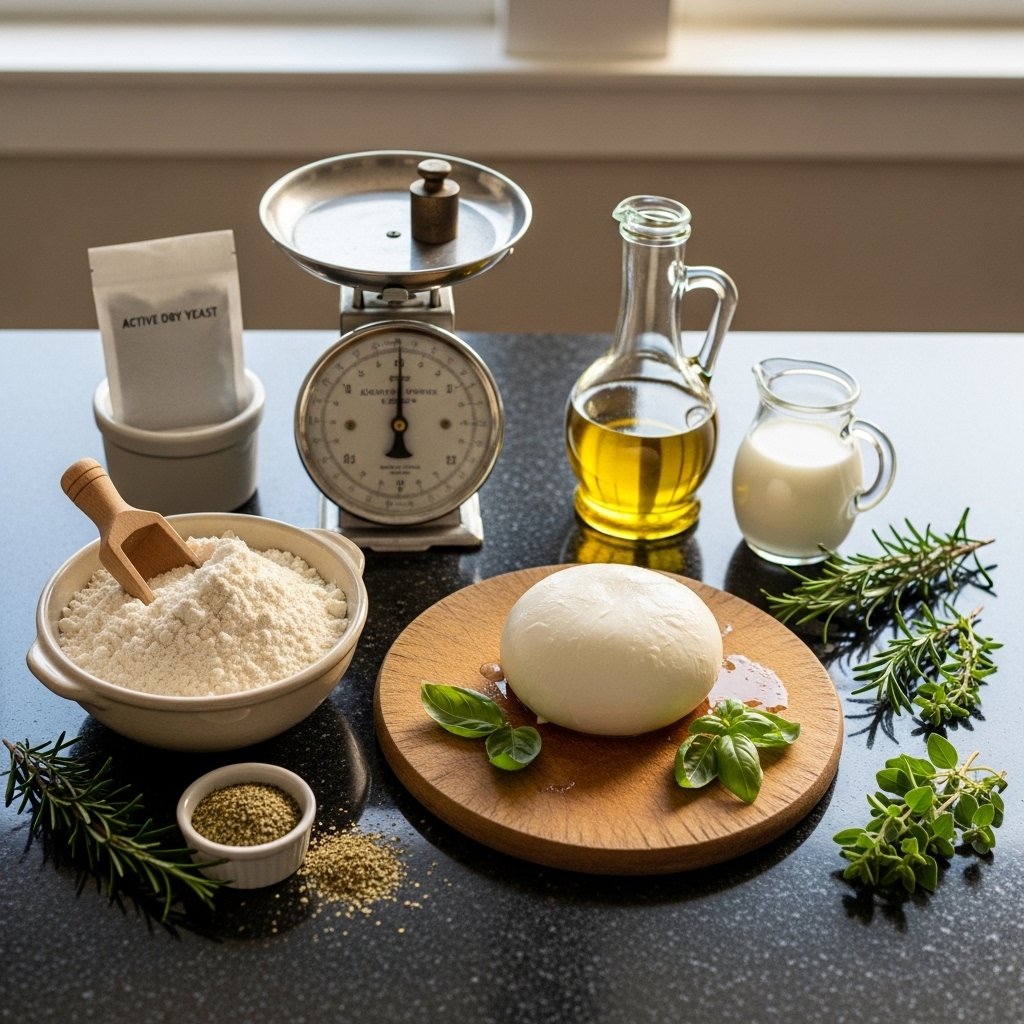
To make this irresistible soft and cheesy mozzarella stuffed bread, gather the following:

  • 3 cups all-purpose flour
  • 1 packet (2 ¼ tsp) active dry yeast
  • 1 cup warm milk
  • 2 tbsp sugar
  • 1 tsp salt
  • 2 tbsp olive oil
  • 1 ½ cups mozzarella cheese (shredded or sticks)
  • 1 tsp garlic powder
  • 1 tsp Italian seasoning
  • Optional: fresh parsley for garnish


Ingredient Notes

The magic of this soft and cheesy mozzarella stuffed bread lies in its simple ingredients. The yeast creates a light, airy dough, while mozzarella provides that signature stretch and melt.

For best results, use whole milk for a richer dough and high-quality mozzarella for maximum cheesiness. You can also experiment with adding parmesan or cheddar for extra depth of flavor.


Step-by-Step Instructions

1. Activate the Yeast

In a bowl, combine warm milk, sugar, and yeast. Let it sit for 5–10 minutes until foamy.

2. Make the Dough

Add flour, salt, and olive oil. Mix and knead until a smooth dough forms.
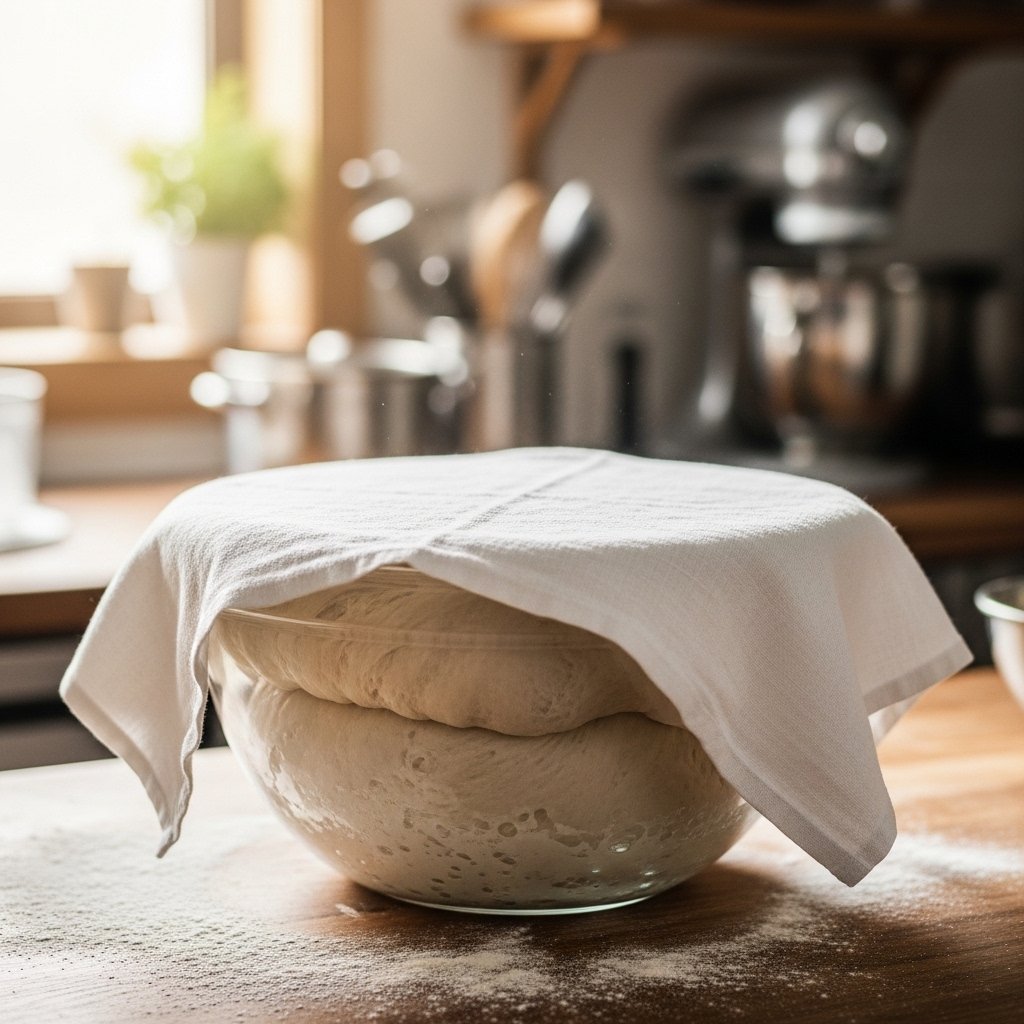
3. Let It Rise

Cover and let the dough rise for 1 hour or until doubled in size.
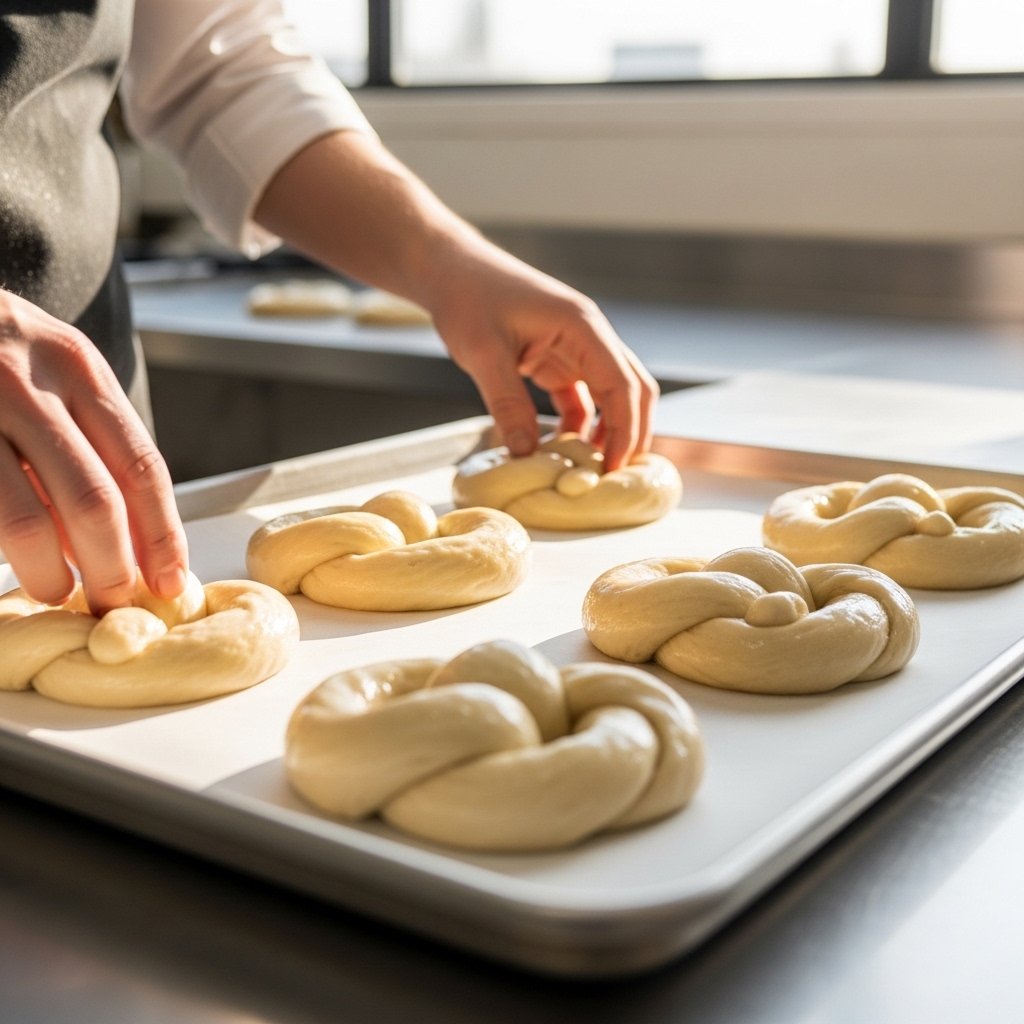
4. Shape and Fill

Roll out the dough and place mozzarella in the center. Fold and seal the edges.
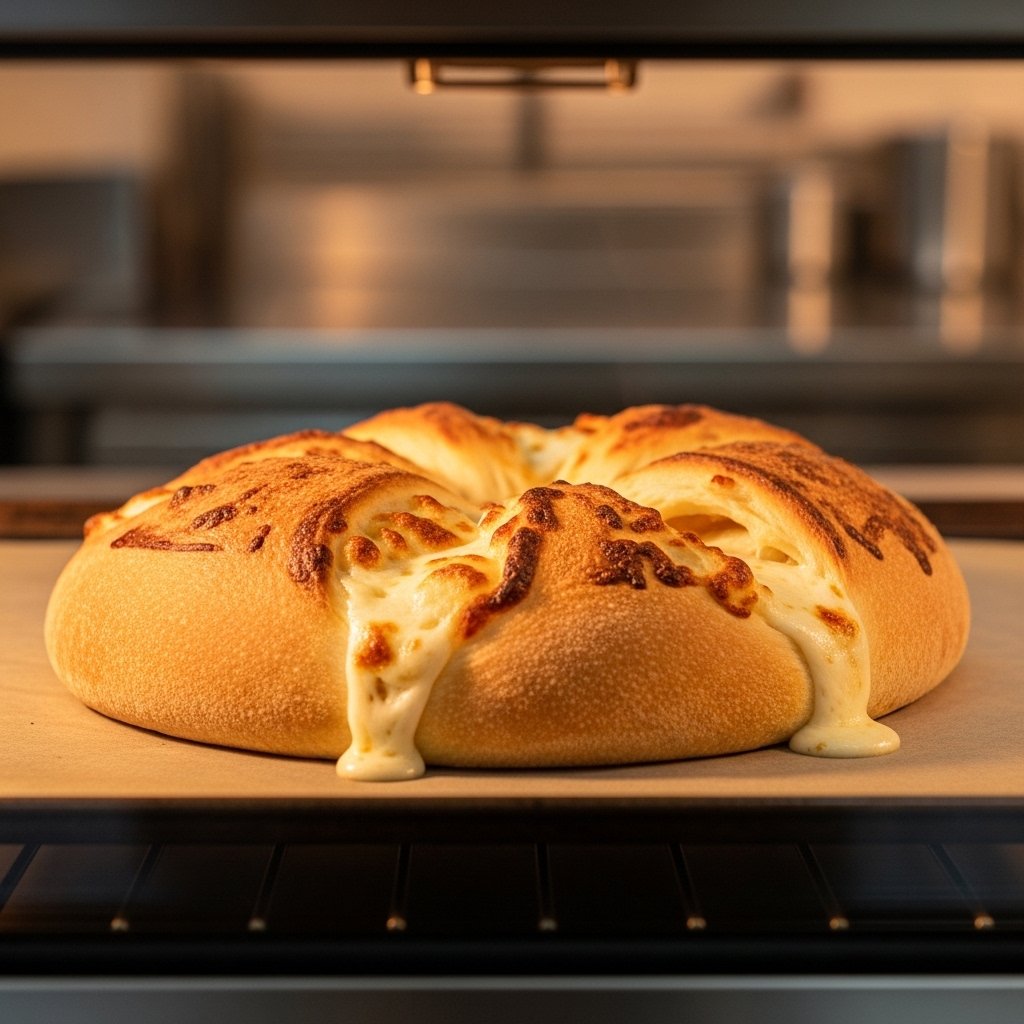
5. Bake

Place on a baking tray and bake at 375°F for 20–25 minutes until golden brown.


Tips for Perfect Results

To perfect your soft and cheesy mozzarella stuffed bread, follow these tips:

  • Seal the edges well to prevent cheese leakage
  • Don’t overfill with cheese
  • Let the dough rise properly for fluffiness
  • Brush with olive oil or butter for a golden crust

These small details make a big difference in the final result.


Variations to Try

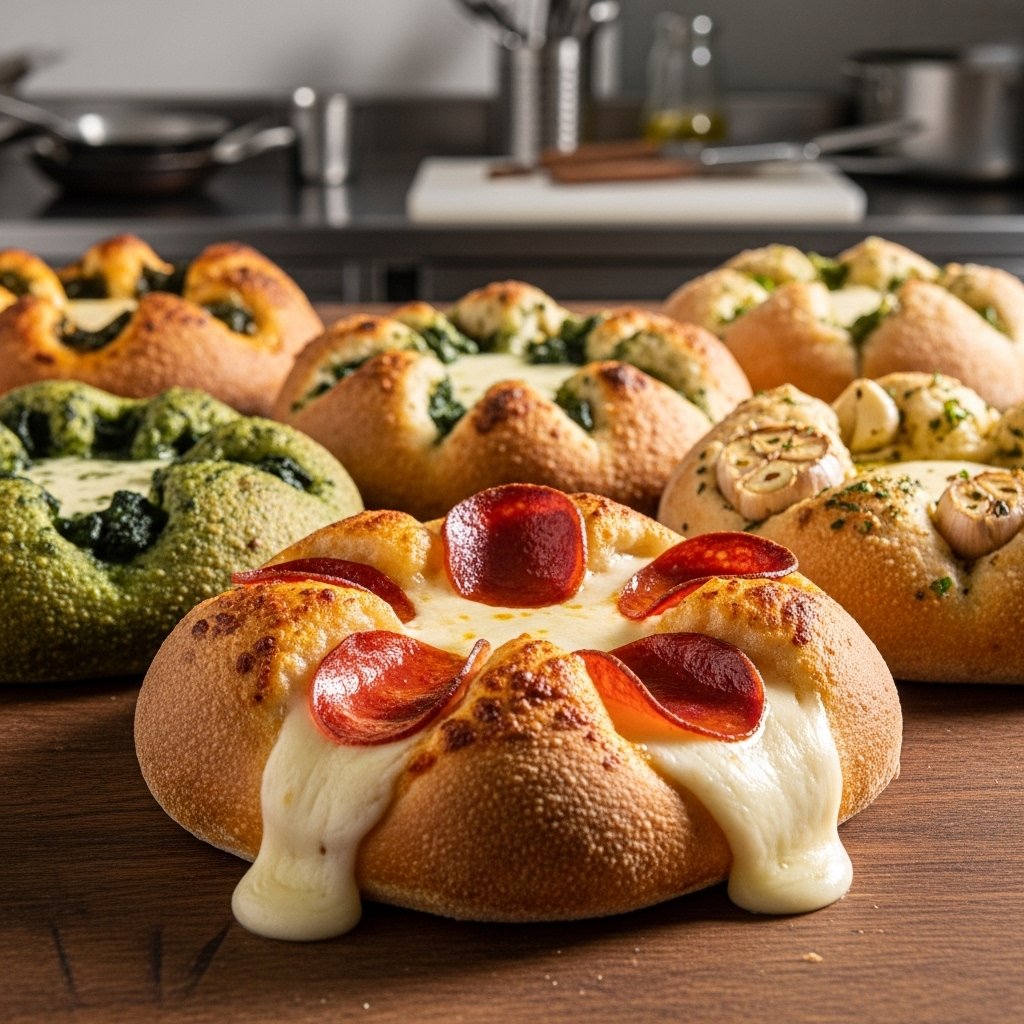
You can easily customize this soft and cheesy mozzarella stuffed bread:

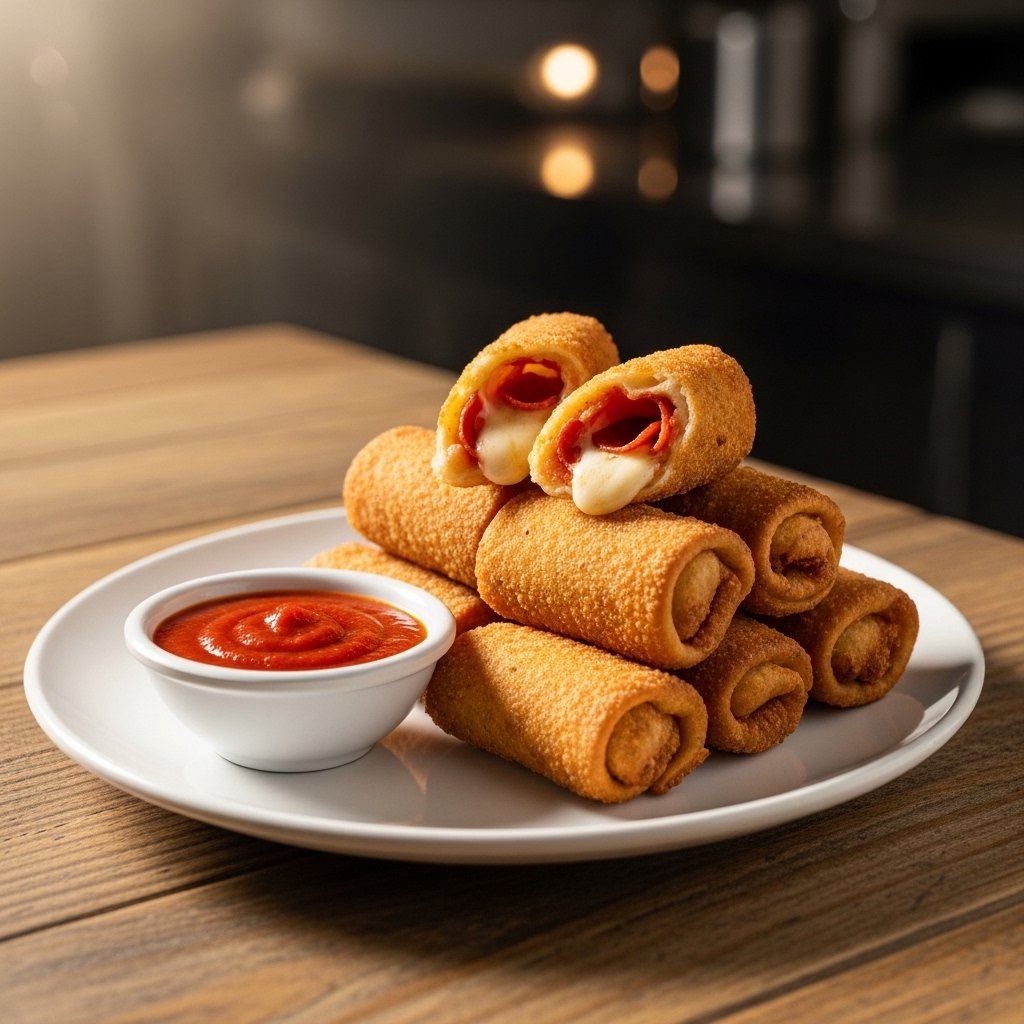
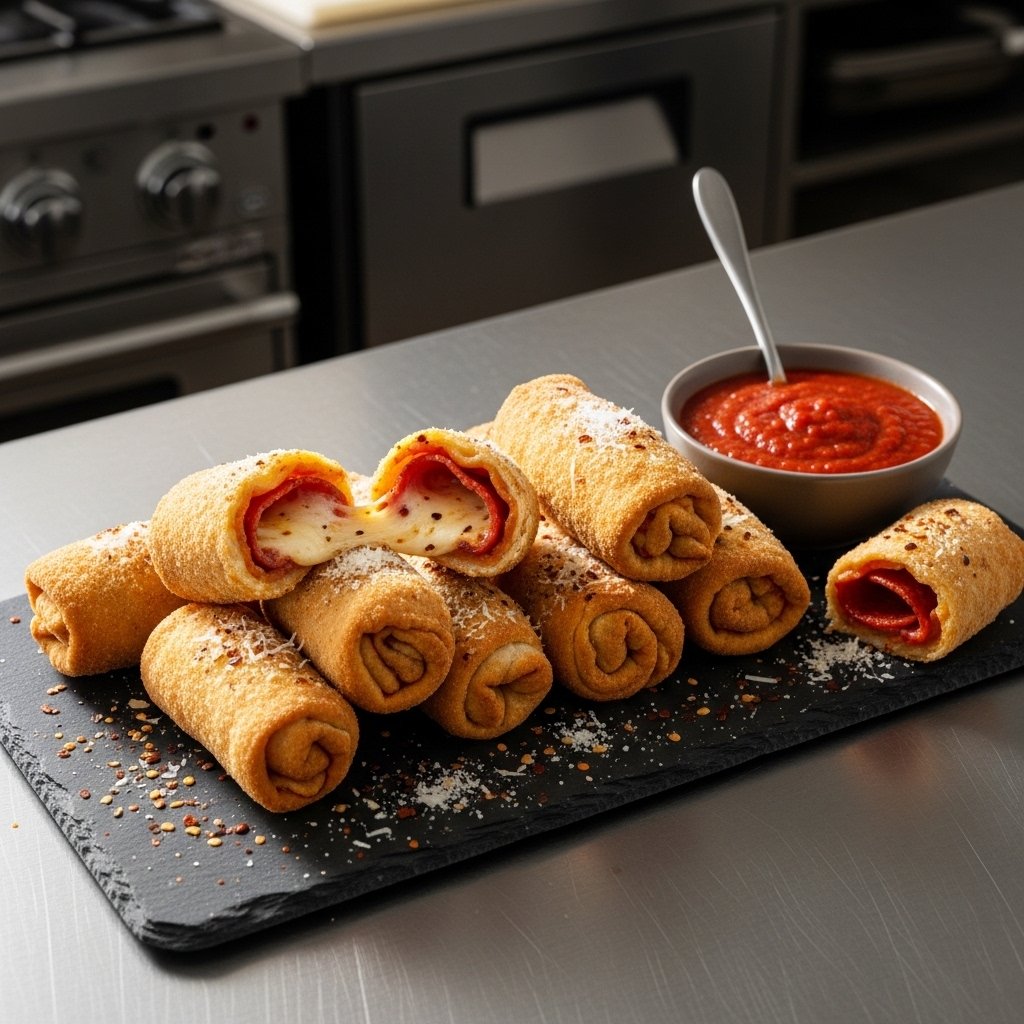
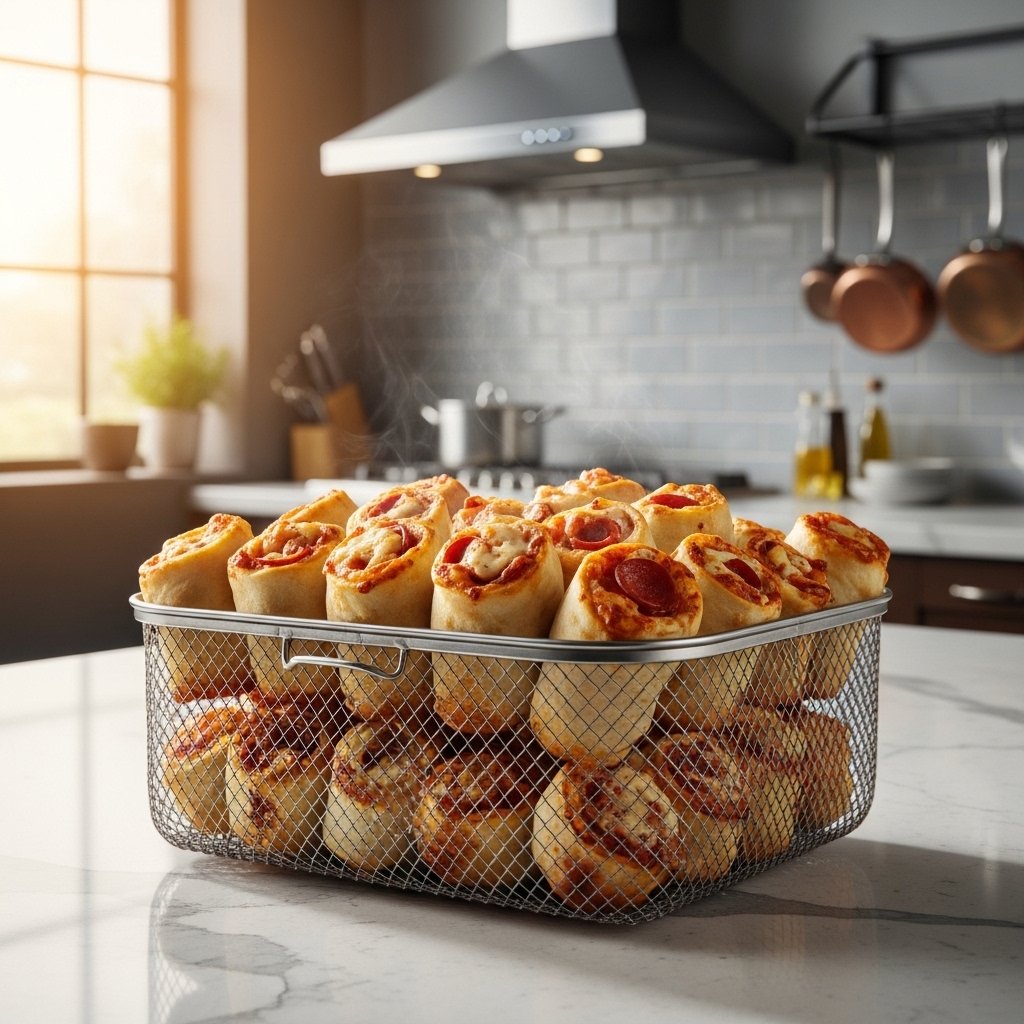
  • Add pepperoni for a pizza-style version
  • Mix in spinach for a veggie twist
  • Use garlic butter for extra flavor
  • Try different cheeses like cheddar or provolone


What to Serve With It

This soft and cheesy mozzarella stuffed bread pairs beautifully with:

  • Marinara or pizza sauce for dipping
  • Fresh salads
  • Soups like tomato or minestrone
  • Pasta dishes

It’s a versatile side that complements many meals.
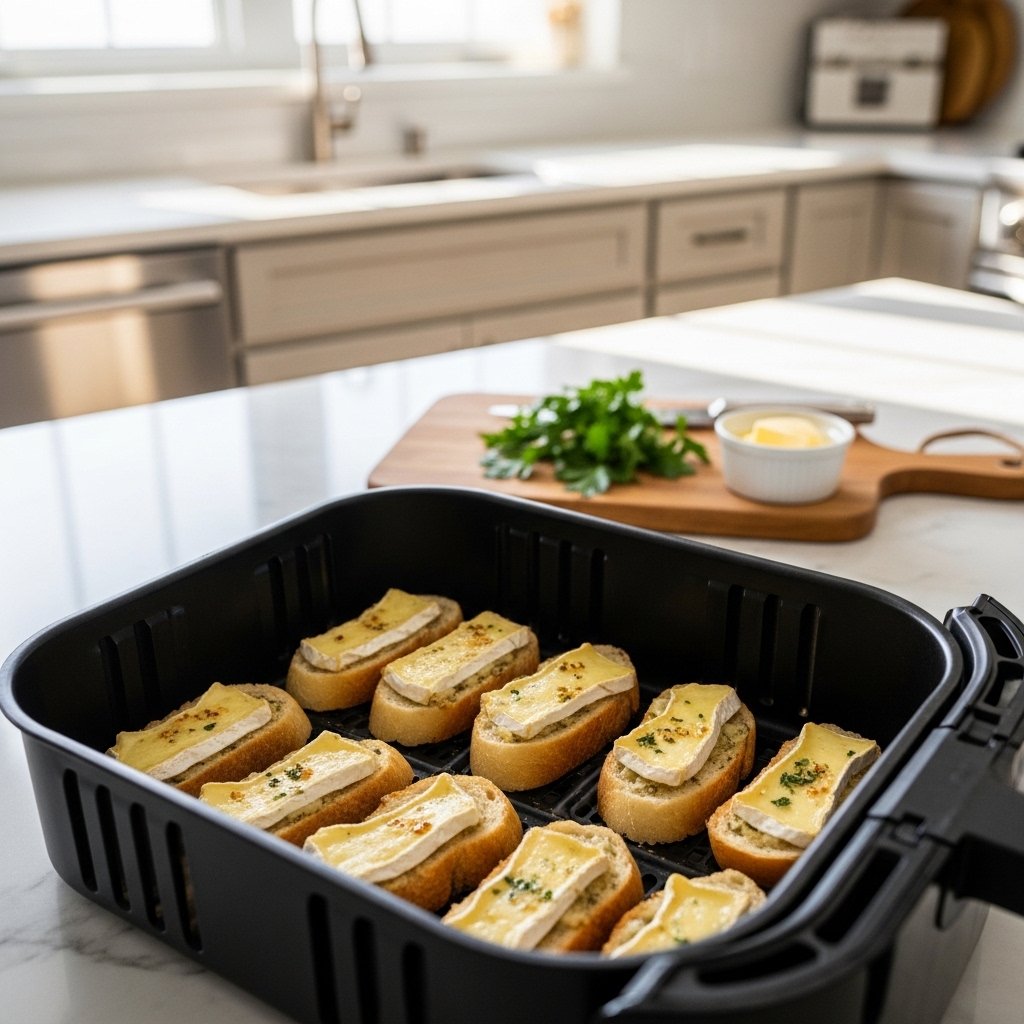
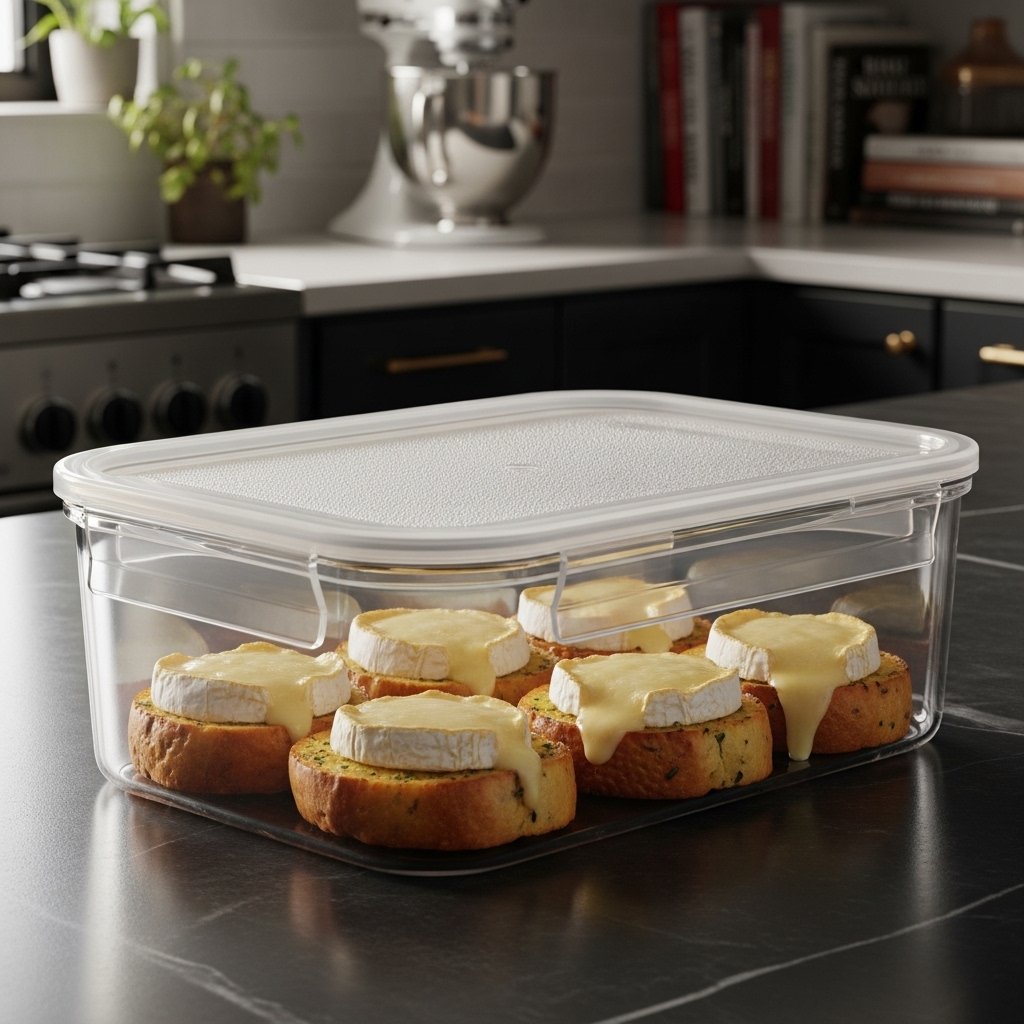

Storage & Reheating

To keep your soft and cheesy mozzarella stuffed bread fresh:

  • Store in an airtight container at room temperature for 2 days
  • Refrigerate for up to 5 days
  • Reheat in the oven or air fryer for best texture


Common Mistakes to Avoid

Avoid these common mistakes:

  • Not activating yeast properly
  • Overworking the dough
  • Underbaking the bread
  • Using low-quality cheese

Paying attention to these details ensures success every time.


FAQs

Can I make this dough ahead of time?

Yes, you can refrigerate the dough overnight and bake the next day.

Can I freeze mozzarella stuffed bread?

Absolutely, freeze it after baking and reheat when needed.

What’s the best cheese to use?

Mozzarella is ideal, but you can mix in other cheeses.

How do I prevent cheese from leaking?

Seal the dough tightly and avoid overfilling.


Final Thoughts

This soft and cheesy mozzarella stuffed bread is the ultimate comfort food—simple, satisfying, and incredibly delicious. It’s the kind of recipe that brings people together, whether you’re serving it at a gathering or enjoying it fresh out of the oven at home.

Once you master this recipe, you’ll find yourself making it again and again. With endless variations and unbeatable flavor, it’s a must-have in your baking collection!

13 No-Bake Summer Treats Kids Can Make Themselves (Fun, Easy & Mess-Free!)

When the summer heat hits, the last thing anyone wants to do is turn on the oven. That’s why these 13 no-bake summer treats kids can make themselves are such a lifesaver. They’re simple, safe, and designed so kids can get involved in the kitchen while having fun creating their own delicious snacks.

These no-bake treats are perfect for playdates, summer afternoons, or even just a creative way to keep kids entertained. With minimal prep and no cooking required, they’re as easy for parents as they are exciting for kids.


Why You’ll Love These No-Bake Summer Treats

These 13 no-bake summer treats kids can make themselves are all about simplicity and fun.

  • No oven required (perfect for hot days)
  • Kid-friendly and safe to prepare
  • Quick and easy recipes
  • Minimal cleanup
  • Endless creativity and customization

They’re the perfect way to encourage independence while keeping snack time exciting.


Essential Ingredients for No-Bake Treats

To make the best 13 no-bake summer treats kids can make themselves, keep these ingredients handy:

  • Fresh fruits (strawberries, bananas, blueberries)
  • Yogurt and whipped cream
  • Chocolate chips or melted chocolate
  • Crackers, cookies, or granola
  • Nut butters or alternatives


Ingredient Notes

The beauty of these 13 no-bake summer treats kids can make themselves is their flexibility. You can easily swap ingredients based on what you have at home or your child’s preferences.

For example, use dairy-free yogurt for a vegan option, or switch peanut butter for sunflower seed butter if allergies are a concern. The goal is to keep things simple, safe, and fun.


13 No-Bake Summer Treats Kids Can Make Themselves

Here are some fun and easy ideas kids will love:

Sweet & Fruity Treats

  • Fruit skewers
  • Frozen banana pops
  • Yogurt parfaits
  • Strawberry shortcake cups

Chocolatey Favorites

  • Chocolate-dipped strawberries
  • No-bake cookie balls
  • S’mores snack mix
  • Chocolate banana bites

Fun & Creative Snacks

  • DIY trail mix
  • Ice cream sandwiches
  • Peanut butter energy bites
  • Frozen yogurt bark
  • Mini dessert cups


Step-by-Step Example: Chocolate Banana Bites

1. Slice the Bananas

Cut bananas into bite-sized pieces.

2. Dip in Chocolate

Dip each piece into melted chocolate.

3. Add Toppings

Sprinkle with nuts, coconut, or sprinkles.

4. Chill and Serve

Place in the fridge until set, then enjoy.


Tips for Perfect Results

To get the most out of these 13 no-bake summer treats kids can make themselves:

  • Use pre-cut ingredients for younger kids
  • Keep instructions simple
  • Supervise when using knives or melted chocolate
  • Let kids decorate and personalize

These tips make the experience fun and stress-free.


Variations to Try

Keep things interesting with these variations:

  • Use different fruits depending on the season
  • Try white or dark chocolate instead of milk
  • Add colorful toppings like sprinkles or crushed cookies
  • Create themed treats for parties


What to Serve With These Treats

Pair these treats with:

  • Lemonade or fruit juice
  • Milk or chocolate milk
  • Smoothies

These drinks make the treats even more refreshing.


Storage Tips

Keep your 13 no-bake summer treats kids can make themselves fresh:

  • Store in airtight containers
  • Refrigerate when needed
  • Consume within 2–3 days
  • Keep frozen treats in the freezer


Common Mistakes to Avoid

Avoid these common issues:

  • Overcomplicating recipes
  • Not supervising younger kids
  • Using ingredients that melt too quickly
  • Skipping chilling time

Simple steps lead to the best results.


FAQs

Are these treats safe for kids to make alone?

Most are, but younger kids should have supervision.

Can I make these treats ahead of time?

Yes, many can be prepared in advance.

What are the easiest treats for beginners?

Fruit skewers and yogurt parfaits are great starting points.

How do I make these treats healthier?

Use natural ingredients and limit added sugar.


Final Thoughts

These 13 no-bake summer treats kids can make themselves are the perfect combination of fun, creativity, and delicious flavor. They make summer days more exciting while giving kids a chance to explore the kitchen in a safe and enjoyable way.

Whether you’re looking for quick snacks, fun activities, or refreshing desserts, these no-bake ideas are sure to become family favorites. Give them a try and turn snack time into a summer adventure!

27 Simple After School Snack Recipes Kids Enjoy (Quick, Easy & Fun!)

After a long day at school, kids come home hungry and ready for something delicious. That’s where these 27 simple after school snack recipes kids enjoy come in. They’re quick to make, packed with flavor, and designed to keep kids satisfied until dinner.

Whether you’re dealing with picky eaters or just need easy snack inspiration, these recipes are all about simplicity and fun. From sweet treats to savory bites, you’ll find plenty of options to keep snack time exciting and stress-free.


Why You’ll Love These After School Snack Recipes

These 27 simple after school snack recipes kids enjoy are perfect for busy families.

  • Quick and easy to prepare
  • Made with simple ingredients
  • Kid-approved flavors
  • Great for meal prep
  • Balanced and satisfying

They’re designed to make afternoons easier while keeping kids happy and energized.


Essential Ingredients for After School Snacks

To create the best 27 simple after school snack recipes kids enjoy, keep these ingredients on hand:

  • Fresh fruits (apples, bananas, berries)
  • Yogurt and cheese
  • Bread, crackers, and wraps
  • Nut butters or alternatives
  • Simple proteins like eggs or turkey


Ingredient Notes

The secret to great 27 simple after school snack recipes kids enjoy is combining flavors and textures. Kids love snacks that are creamy, crunchy, and slightly sweet.

Using fresh, wholesome ingredients ensures snacks are both nutritious and appealing. You can also easily adapt recipes based on dietary needs or preferences.


27 Simple After School Snack Recipes Kids Enjoy

Here are some easy and delicious ideas:

Sweet Snack Ideas

  • Apple slices with peanut butter
  • Banana and yogurt parfait
  • Fruit skewers
  • Smoothie cups

Savory Snack Ideas

  • Cheese and crackers
  • Turkey roll-ups
  • Mini quesadillas
  • Veggies with dip

Fun & Creative Snacks

  • Mini sandwiches
  • DIY snack boards
  • Trail mix
  • Frozen yogurt bites


Step-by-Step Example: Apple & Peanut Butter Snack

1. Slice the Apples

Cut apples into thin slices.

2. Add Peanut Butter

Spread peanut butter on each slice.

3. Add Toppings

Optional: add granola or chocolate chips.

4. Serve Immediately

Arrange on a plate and serve.


Tips for Perfect Snack Time

To make the most of these 27 simple after school snack recipes kids enjoy:

  • Keep snacks simple and quick
  • Use colorful ingredients
  • Let kids help prepare snacks
  • Prep ingredients ahead of time

These tips help make snack time fun and stress-free.


Variations to Try

Keep things exciting with these variations:

  • Use different fruits and dips
  • Try dairy-free or nut-free options
  • Add fun shapes with cookie cutters
  • Create themed snack plates


What to Serve With These Snacks

Pair your snacks with:

  • Milk or chocolate milk
  • Fresh juice
  • Smoothies
  • Water with fruit slices

These drinks complement the snacks perfectly.


Storage & Reheating Tips

To keep your 27 simple after school snack recipes kids enjoy fresh:

  • Store in airtight containers
  • Refrigerate perishable snacks
  • Prep snacks in advance
  • Keep grab-and-go options ready


Common Mistakes to Avoid

Avoid these common mistakes:

  • Overcomplicating snacks
  • Ignoring presentation
  • Using ingredients kids dislike
  • Not planning ahead

Simple and fun snacks always work best.


FAQs

What are the best after school snacks?

Simple options like fruit, yogurt, and sandwiches are great.

Can I prepare snacks ahead of time?

Yes, many snacks can be prepped in advance.

How do I make snacks healthier?

Use fresh ingredients and limit processed foods.

What snacks are good for picky eaters?

Stick to familiar flavors and simple combinations.


Final Thoughts

These 27 simple after school snack recipes kids enjoy make snack time easy, fun, and delicious. With just a little planning, you can create snacks that kids look forward to every day.

Whether you’re feeding one child or a whole group, these ideas will help you keep everyone happy and satisfied. Try them out and make after school snack time something special!

Friday Night Dinner Ideas: Easy, Delicious Meals to Kick Off Your Weekend

There’s something special about Friday nights—the workweek is over, the weekend is just beginning, and it’s the perfect time to unwind with a satisfying meal. These Friday night dinner ideas are designed to make your evenings easier, tastier, and a lot more enjoyable without spending hours in the kitchen.

Whether you’re cooking for your family, hosting friends, or just treating yourself, these Friday night dinner ideas offer a variety of flavors and styles to match any mood. From cozy comfort foods to lighter, fresh options, you’ll always have something exciting to look forward to.

Why You’ll Love These Friday Night Dinner Ideas

These Friday night dinner ideas are all about convenience, flavor, and fun. After a long week, you deserve meals that don’t feel like a chore.

Here’s why they work so well:

  • Quick and easy to prepare
  • Family-friendly and customizable
  • Perfect for relaxing or entertaining
  • Minimal cleanup required
  • Endless variety of flavors

With these Friday night dinner ideas, you can turn an ordinary evening into something special.

Ingredients You’ll Commonly Use

Many Friday night dinner ideas rely on simple, accessible ingredients you likely already have:

  • Pasta and sauces
  • Fresh vegetables
  • Chicken, beef, or seafood
  • Cheese varieties
  • Bread or tortillas
  • Herbs and spices

These staples make it easy to whip up a delicious meal without extra shopping.

Popular Friday Night Dinner Ideas

Here are some go-to Friday night dinner ideas that never disappoint:

Comfort Food Favorites

  • Creamy mac and cheese
  • Homemade pizza
  • Chicken alfredo
  • Cheeseburgers and fries

Quick & Easy Meals

  • Tacos or fajitas
  • Stir-fry with rice
  • Sheet pan chicken and veggies
  • Quesadillas

Light & Fresh Options

  • Grilled salmon with salad
  • Pasta primavera
  • Buddha bowls
  • Wraps and sandwiches

These Friday night dinner ideas offer something for everyone.

Ingredient Notes & Tips

Keep It Simple

Use ingredients you’re familiar with to save time.

Balance Flavors

Combine protein, carbs, and veggies for a complete meal.

Prep Ahead

Chop vegetables or marinate proteins earlier in the day.

Use Shortcuts

Store-bought sauces can save time without sacrificing taste.

These tips make your Friday night dinner ideas even easier to execute.

Step-by-Step Approach to a Perfect Friday Dinner

Step 1: Choose Your Dish

Pick a recipe based on your mood and time.

Step 2: Prep Ingredients

Wash, chop, and measure everything before cooking.

Step 3: Cook Efficiently

Use one-pan or quick-cook methods when possible.

Step 4: Plate красиво

Serve your dish nicely—it enhances the experience.

Step 5: Enjoy

Sit back, relax, and enjoy your meal.

Tips for Perfect Results

To make the most of your Friday night dinner ideas, keep these in mind:

  • Don’t overcomplicate recipes
  • Taste as you cook
  • Use fresh ingredients whenever possible
  • Keep portions balanced

Small adjustments can make a big difference in flavor and presentation.

Variations to Try

These Friday night dinner ideas are highly adaptable:

Family Night

Make build-your-own tacos or pizza.

Date Night

Try a more elegant dish like steak or seafood.

Vegetarian Option

Use plant-based proteins and fresh veggies.

Comfort Mode

Go all-in with creamy, cheesy dishes.

These variations help keep your dinners exciting every week.

What to Serve With It

Pair your Friday night dinner ideas with:

  • Fresh salads
  • Garlic bread
  • Roasted vegetables
  • Refreshing drinks or mocktails

These sides complete the meal beautifully.

Storage & Reheating

Storage

  • Store leftovers in airtight containers for up to 3 days

Reheating

  • Reheat in the oven or microwave until warmed through

Freshness Tip

  • Store sauces separately when possible

Common Mistakes to Avoid

When preparing Friday night dinner ideas, avoid:

  • Overcooking proteins
  • Using too many ingredients
  • Skipping seasoning
  • Not planning ahead

Avoiding these mistakes ensures a stress-free cooking experience.

Frequently Asked Questions

What’s the easiest Friday night dinner?

Tacos, pasta, or stir-fry are quick and easy options.

Can I prep dinner ahead of time?

Yes, prepping ingredients earlier saves time later.

Are these meals family-friendly?

Absolutely, most recipes can be customized for all ages.

How do I make dinner feel special?

Set the table nicely and add simple sides or drinks.

What if I’m short on time?

Choose one-pan or 30-minute recipes.

Final Thoughts

These Friday night dinner ideas are all about making your evenings enjoyable, stress-free, and delicious. Whether you’re craving comfort food or something light and fresh, there’s always a perfect option waiting for you.

By keeping things simple and focusing on flavor, you can turn any Friday night into a memorable dining experience. Try out these Friday night dinner ideas, and make every weekend start on a delicious note!

The Most Popular Snack Mix Recipes – Inspired By Charm Recipes

If you love easy, crowd-pleasing treats, these most popular snack mix recipes – inspired by Charm recipes are about to become your new obsession. Snack mixes are the ultimate combination of convenience and flavor, bringing together sweet, salty, crunchy, and chewy elements in every bite.

Inspired by the charm and creativity of classic homemade treats, these most popular snack mix recipes are perfect for everything from holiday gatherings to casual movie nights. They’re simple to make, endlessly customizable, and guaranteed to disappear fast once served.

Why You’ll Love These Snack Mix Recipes

These most popular snack mix recipes – inspired by Charm recipes are beloved for a reason—they’re incredibly versatile and always satisfying.

Here’s why they stand out:

  • Easy to prepare with minimal effort
  • Perfect for parties and gifting
  • Customizable for any taste
  • Great balance of sweet and savory
  • Kid-friendly and adult-approved

Once you try these most popular snack mix recipes, you’ll always keep the ingredients stocked.

Ingredients

To create these most popular snack mix recipes, you’ll need a mix of pantry staples:

  • Pretzels
  • Popcorn
  • Chex or similar cereal
  • Nuts (almonds, peanuts, cashews)
  • Chocolate chips or candy pieces
  • White or dark chocolate for coating
  • Dried fruit
  • Crackers

These ingredients are the foundation of many most popular snack mix recipes.

Ingredient Notes & Tips

Sweet vs Savory Balance

A mix of both creates the best flavor experience.

Texture Variety

Combine crunchy, crispy, and chewy elements.

Freshness Matters

Use fresh ingredients for the best taste.

Coatings

Chocolate or caramel can elevate your mix.

These tips help you perfect your most popular snack mix recipes every time.

Step-by-Step Instructions

Step 1: Choose Your Base

Start with cereal, popcorn, or pretzels.

Step 2: Add Mix-Ins

Include nuts, chocolate, or dried fruit.

Step 3: Add Coating

Drizzle melted chocolate or seasoning mix.

Step 4: Toss Thoroughly

Mix until everything is evenly coated.

Step 5: Let Set

Allow coated mixes to harden before serving.

Tips for Perfect Results

To master these most popular snack mix recipes, keep these tips in mind:

  • Don’t overcrowd with too many ingredients
  • Use high-quality chocolate
  • Mix gently to avoid breaking ingredients
  • Let coatings fully set before storing

These simple techniques make your snack mixes look and taste professional.

Variations to Try

These most popular snack mix recipes – inspired by Charm recipes can be easily customized:

Holiday Mix

Add seasonal candies and sprinkles.

Healthy Version

Use dark chocolate, nuts, and unsweetened dried fruit.

Spicy Mix

Add chili powder or cayenne for heat.

Dessert Mix

Focus on chocolate, marshmallows, and cookies.

These variations keep your snack mixes exciting and fresh.

What to Serve With It

These most popular snack mix recipes pair perfectly with:

  • Fresh fruit platters
  • Ice cream desserts
  • Coffee or hot chocolate
  • Party appetizer spreads

They’re versatile enough for any occasion.

Storage & Reheating

Storage

  • Store in airtight containers for up to one week

Reheating

  • Not required—these are no-bake recipes

Freshness Tip

  • Keep in a cool, dry place

Common Mistakes to Avoid

When making most popular snack mix recipes, avoid:

  • Using stale ingredients
  • Adding too much coating
  • Not mixing evenly
  • Skipping the setting time

Avoiding these ensures perfect texture and flavor.

Frequently Asked Questions

How long do snack mixes stay fresh?

They typically last up to a week when stored properly.

Can I make these ahead of time?

Yes, they’re perfect for prepping in advance.

Are these snack mixes kid-friendly?

Absolutely! Kids love both making and eating them.

Can I make them healthier?

Yes, use natural ingredients and reduce added sugar.

Do I need special tools?

No, just a large bowl and mixing spoon.

Final Thoughts

These most popular snack mix recipes – inspired by Charm recipes prove that simple ingredients can create something truly special. With their perfect balance of flavors and textures, they’re a go-to option for any occasion.

Whether you’re hosting a party, preparing snacks for the week, or just indulging a craving, these most popular snack mix recipes are easy, delicious, and endlessly customizable. Once you start making them, you’ll never run out of creative snack ideas again!

15 Easy No-Bake Snack Mix Recipes You’ll Want to Make Again and Again

If you’re looking for quick, crowd-pleasing treats that don’t require turning on the oven, these 15 easy no-bake snack mix recipes are exactly what you need. Whether you’re prepping for a party, packing school lunches, or just craving something crunchy and satisfying, snack mixes are one of the simplest solutions out there.

The beauty of these easy no-bake snack mix recipes lies in their versatility. You can go sweet, savory, or a little bit of both—all with minimal effort. Plus, they’re incredibly customizable, making them perfect for picky eaters, dietary preferences, or whatever ingredients you already have on hand.

Why You’ll Love These Easy No-Bake Snack Mix Recipes

These easy no-bake snack mix recipes are designed for convenience without sacrificing flavor. They’re perfect for busy lifestyles and spontaneous cravings.

Here’s why they’re a must-try:

  • No oven required
  • Quick to prepare
  • Perfect for all ages
  • Great for meal prep
  • Endless flavor combinations

Once you try these easy no-bake snack mix recipes, you’ll always have a go-to snack idea ready.

Ingredients You’ll Commonly Use

To make these easy no-bake snack mix recipes, you’ll typically need a mix of pantry staples:

  • Pretzels
  • Popcorn
  • Cereal (like Cheerios or Chex)
  • Nuts and seeds
  • Chocolate chips or candy
  • Dried fruit
  • Crackers
  • Peanut butter or caramel

These ingredients are easy to find and perfect for mixing and matching.

15 Easy No-Bake Snack Mix Recipes

Here are some of the best easy no-bake snack mix recipes to try:

Sweet Snack Mixes

  • Chocolate peanut butter mix
  • S’mores snack mix
  • Caramel popcorn mix
  • White chocolate party mix
  • Cinnamon sugar cereal mix

Savory Snack Mixes

  • Classic ranch mix
  • Spicy pretzel mix
  • Garlic parmesan mix
  • BBQ snack mix
  • Cheese cracker mix

Sweet & Salty Combos

  • Chocolate-covered pretzel mix
  • Trail mix with nuts and candy
  • Yogurt-covered snack mix
  • Honey roasted nut mix
  • Maple popcorn mix

These easy no-bake snack mix recipes offer something for every craving.

Ingredient Notes & Tips

Balance Flavors

Combine sweet and salty elements for the best taste.

Texture Matters

Mix crunchy, chewy, and crispy ingredients.

Use Fresh Ingredients

Freshness makes a big difference in flavor.

Customize Freely

Swap ingredients based on preference or availability.

These tips help elevate your easy no-bake snack mix recipes.

Step-by-Step Instructions

Step 1: Choose Your Base

Start with cereal, popcorn, or pretzels.

Step 2: Add Mix-Ins

Include nuts, chocolate, or dried fruit.

Step 3: Add Flavor

Drizzle melted chocolate, caramel, or seasoning.

Step 4: Mix Well

Toss everything together evenly.

Step 5: Let Set (if needed)

Allow coatings to harden before serving.

Tips for Perfect Results

To get the best from your easy no-bake snack mix recipes, keep these tips in mind:

  • Don’t overload with too many ingredients
  • Mix thoroughly for even flavor
  • Let coated mixes set completely
  • Store properly to maintain freshness

These simple steps ensure delicious results every time.

Variations to Try

These easy no-bake snack mix recipes are easy to customize:

Healthier Option

Use unsweetened dried fruit and dark chocolate.

Kid-Friendly Version

Add colorful candies and mini marshmallows.

Holiday Theme

Use seasonal colors and flavors.

High-Protein Mix

Add extra nuts and seeds.

These variations keep your snack mixes exciting and versatile.

What to Serve With It

These easy no-bake snack mix recipes pair well with:

  • Fresh fruit
  • Smoothies
  • Milk or hot chocolate
  • Party platters

They’re perfect for snacking anytime, anywhere.

Storage & Reheating

Storage

  • Store in airtight containers for up to 1 week

Reheating

  • Not needed—these are no-bake snacks

Freshness Tip

  • Keep in a cool, dry place

Common Mistakes to Avoid

When making easy no-bake snack mix recipes, avoid:

  • Using stale ingredients
  • Overmixing delicate items
  • Adding too much coating
  • Not letting mixtures set

Avoiding these ensures perfect texture and flavor.

Frequently Asked Questions

How long do snack mixes last?

Most last up to a week when stored properly.

Can I make snack mixes ahead of time?

Yes, they’re perfect for meal prep.

Are these recipes kid-friendly?

Absolutely! Kids love helping and eating them.

Can I make them healthier?

Yes, use natural sweeteners and whole ingredients.

Do I need special equipment?

No, just a bowl and spoon will do.

Final Thoughts

These 15 easy no-bake snack mix recipes prove that delicious snacks don’t have to be complicated. With simple ingredients and endless combinations, you can create treats that are perfect for any occasion.

Whether you’re prepping for a party or just need a quick snack, these easy no-bake snack mix recipes are reliable, customizable, and always satisfying. Once you start making them, you’ll never run out of snack ideas again!

Crispy Air Fryer Pizza Rolls Your New Favorite Snack!

If you’re searching for a quick, satisfying snack that delivers maximum flavor with minimal effort, these crispy air fryer pizza rolls are exactly what you need. Perfectly golden on the outside and filled with gooey, cheesy goodness on the inside, they’re a hit with both kids and adults.

What makes these crispy air fryer pizza rolls so irresistible is the air fryer magic—no deep frying required. You get that crunchy texture without the extra oil, making them a lighter yet equally delicious option. Whether you’re hosting a game night or craving a late-night bite, this recipe has you covered.

Why You’ll Love These Crispy Air Fryer Pizza Rolls

These crispy air fryer pizza rolls are more than just a snack—they’re a game changer for quick meals and entertaining.

Here’s why you’ll love them:

  • Super crispy without deep frying
  • Quick and easy to prepare
  • Perfect for parties and gatherings
  • Kid-friendly and customizable
  • Less greasy than traditional methods

Once you try these crispy air fryer pizza rolls, you’ll never go back to the oven version.

Ingredients

To make these delicious crispy air fryer pizza rolls, you’ll need:

  • Frozen pizza rolls (store-bought or homemade)
  • Cooking spray or a light oil
  • Marinara sauce (for dipping)
  • Optional: grated Parmesan cheese
  • Optional: Italian seasoning

Simple ingredients, big flavor.

Ingredient Notes & Tips

Pizza Rolls

Use your favorite brand or homemade version for best results.

Oil Spray

A light spray helps achieve that perfect crispiness.

Seasoning

Adding Italian herbs enhances the pizza flavor.

Dipping Sauce

Warm marinara or ranch dressing pairs perfectly.

These tips ensure your crispy air fryer pizza rolls come out perfect every time.

Step-by-Step Instructions

Step 1: Preheat the Air Fryer

Set your air fryer to 380°F and let it preheat.

Step 2: Arrange Pizza Rolls

Place pizza rolls in a single layer in the basket.

Step 3: Lightly Spray

Spray with a small amount of oil for crispiness.

Step 4: Cook

Air fry for 6–8 minutes, shaking halfway through.

Step 5: Serve

Remove, cool slightly, and serve with dipping sauce.

Tips for Perfect Results

To make the best crispy air fryer pizza rolls, follow these tips:

  • Don’t overcrowd the basket
  • Shake halfway through cooking
  • Let them cool before eating (they’re hot inside!)
  • Adjust time based on your air fryer

These small steps make a big difference in texture and flavor.

Variations to Try

These crispy air fryer pizza rolls are easy to customize:

Cheesy Upgrade

Add extra mozzarella on top after cooking.

Spicy Version

Sprinkle red pepper flakes or serve with spicy sauce.

Homemade Rolls

Use pizza dough with your favorite fillings.

Gluten-Free Option

Use gluten-free pizza rolls.

These variations keep your crispy air fryer pizza rolls exciting and versatile.

What to Serve With It

Pair your crispy air fryer pizza rolls with:

  • Fresh salads
  • Garlic bread
  • Veggie sticks
  • Dipping sauces like ranch or marinara

They’re perfect as a snack, appetizer, or even a quick meal.

Storage & Reheating

Storage

  • Store leftovers in an airtight container in the fridge for up to 3 days

Reheating

  • Reheat in the air fryer at 350°F for 3–4 minutes

Tip

  • Avoid microwaving to keep them crispy

Common Mistakes to Avoid

When making crispy air fryer pizza rolls, avoid:

  • Overcrowding the air fryer
  • Skipping the shake halfway
  • Overcooking (they can burst)
  • Not letting them cool before eating

Avoiding these ensures perfect results every time.

Frequently Asked Questions

How long do you cook pizza rolls in an air fryer?

Typically 6–8 minutes at 380°F, depending on your air fryer.

Do I need to preheat the air fryer?

Yes, preheating helps achieve even cooking.

Can I cook homemade pizza rolls?

Absolutely! Just adjust cooking time slightly.

Are air fryer pizza rolls healthier?

Yes, they use less oil compared to deep frying.

Can I freeze leftovers?

It’s best to cook fresh, but you can freeze and reheat if needed.

Final Thoughts

These crispy air fryer pizza rolls are everything you want in a snack—quick, crunchy, cheesy, and incredibly satisfying. With minimal prep and maximum flavor, they’re perfect for busy days, parties, or anytime cravings hit.

Once you try making crispy air fryer pizza rolls at home, you’ll wonder why you didn’t start sooner. It’s a simple recipe that delivers big on taste and convenience every single time.

Air Fryer Honey Butter & Brie Garlic Bread – A Luxurious Bite You’ll Crave

If you’re ready to elevate your appetizer game, this air fryer honey butter & brie garlic bread is pure magic. It combines crispy golden bread, creamy melted brie, rich garlic butter, and a drizzle of sweet honey for a flavor combination that feels indulgent yet incredibly easy to make.

This recipe brings gourmet vibes to your kitchen without requiring complicated techniques. Whether you’re entertaining guests or treating yourself, this dish delivers a luxurious bite every single time.

Why You’ll Love This Recipe

This air fryer honey butter & brie garlic bread is the perfect balance of sweet, savory, and creamy textures. It’s quick to prepare and guaranteed to impress.

Here’s why it stands out:

  • Ready in minutes using an air fryer
  • Perfect mix of sweet and savory flavors
  • Crispy outside, creamy inside
  • Ideal for appetizers or snacks
  • Elegant yet easy to make

Once you try it, it’ll become your go-to crowd-pleaser.

Ingredients

To make this air fryer honey butter & brie garlic bread, you’ll need:

  • French bread or baguette
  • Brie cheese
  • Butter
  • Garlic (minced)
  • Honey
  • Fresh parsley (optional)
  • Salt and pepper

These simple ingredients come together to create something truly special.

Ingredient Notes & Substitutions

Bread Choice

A crusty baguette works best for texture, but sourdough is a great alternative.

Brie Cheese

Keep the rind on—it melts beautifully and adds flavor.

Honey

Use high-quality honey for the best sweetness.

Butter

Unsalted butter allows better control of seasoning.

These tips help perfect your air fryer honey butter & brie garlic bread.

Step-by-Step Instructions

Step 1: Prepare the Bread

Slice your baguette into even pieces and arrange them on a tray.

Step 2: Make Garlic Butter

Mix softened butter with minced garlic, salt, and pepper.

Step 3: Assemble

Spread garlic butter on each slice and top with brie cheese.

Step 4: Air Fry

Place in air fryer and cook until bread is crispy and cheese is melted.

Step 5: Finish with Honey

Drizzle honey over the warm bread and garnish with parsley.

Tips for Perfect Results

To get the best air fryer honey butter & brie garlic bread, keep these tips in mind:

  • Don’t overcrowd the air fryer basket
  • Use room temperature butter for easy spreading
  • Watch closely to avoid burning
  • Serve immediately for best texture

These small details make a big difference.

Variations to Try

Add Nuts

Sprinkle chopped walnuts or pecans for crunch.

Spicy Twist

Add chili flakes for a sweet-heat combo.

Fruity Version

Top with sliced figs or apples.

Herb Upgrade

Use rosemary or thyme for deeper flavor.

These variations make your air fryer honey butter & brie garlic bread even more exciting.

What to Serve With It

This dish pairs beautifully with:

  • Fresh salads
  • Charcuterie boards
  • Soups like tomato or butternut squash
  • A glass of white wine

It’s perfect as an appetizer or side dish.

Storage & Reheating

Storage

  • Store leftovers in an airtight container for up to 2 days

Reheating

  • Reheat in air fryer for a few minutes to restore crispiness

Common Mistakes to Avoid

When making air fryer honey butter & brie garlic bread, avoid:

  • Using too much honey (can overpower flavors)
  • Overcooking the bread
  • Skipping seasoning
  • Not preheating the air fryer

Avoiding these ensures perfect results every time.

Frequently Asked Questions

Can I use a different cheese?

Yes, camembert or mozzarella works well too.

Do I need to remove the brie rind?

No, the rind is edible and adds flavor.

Can I make this ahead of time?

You can prep it ahead, but cook just before serving.

What bread works best?

Baguette or any crusty bread is ideal.

Can I bake instead of air fry?

Yes, bake in the oven at 375°F until golden and bubbly.

Final Thoughts

This air fryer honey butter & brie garlic bread is the perfect combination of simplicity and indulgence. With its crispy base, creamy cheese, and sweet drizzle of honey, it delivers a restaurant-quality experience right at home.

Whether you’re hosting guests or treating yourself, this recipe is guaranteed to impress—and disappear quickly from the table!

How To Make Hot Cheetos (Homemade Spicy Cheese Snacks)

If you’ve ever wondered how to make Hot Cheetos at home, you’re in for a fun and flavorful treat. These iconic spicy snacks are known for their bold heat, cheesy coating, and addictive crunch—but making them yourself means you can control the ingredients, spice level, and freshness.

This homemade version captures everything you love about the original while adding a personal touch. Whether you’re making them for a party, movie night, or just to satisfy a craving, learning how to make Hot Cheetos is easier than you might think.

Why You’ll Love This Recipe

Making your own Hot Cheetos at home comes with plenty of benefits. Not only are they fun to make, but they’re also customizable and incredibly satisfying.

Here’s why you’ll love this recipe:

  • Control the spice level
  • Use simple, pantry-friendly ingredients
  • Fresh and crispy texture
  • No artificial additives
  • Perfect for snacking or sharing

Once you learn how to make Hot Cheetos, you may never go back to store-bought.

Ingredients

To make homemade Hot Cheetos, you’ll need:

For the Base:

  • Cornmeal
  • Flour
  • Baking powder
  • Salt
  • Water

For the Coating:

  • Cheese powder or finely grated cheese
  • Chili powder
  • Paprika
  • Cayenne pepper
  • Garlic powder
  • Oil or melted butter

These ingredients come together to create that signature spicy, cheesy coating.

Ingredient Notes & Substitutions

Cheese Powder

Gives the classic flavor—can substitute with finely grated cheddar.

Spice Blend

Adjust chili and cayenne levels to control heat.

Oil

Helps the seasoning stick and enhances flavor.

Cornmeal

Creates the signature crunchy texture.

These adjustments make your homemade Hot Cheetos flexible and customizable.

Step-by-Step Instructions

Step 1: Make the Dough

Mix cornmeal, flour, baking powder, and salt. Add water to form a dough.

Step 2: Shape the Snacks

Roll dough into small sticks or puff shapes.

Step 3: Cook Until Crispy

Bake or fry until golden and crispy.

Step 4: Prepare the Coating

Mix cheese powder, spices, and oil or butter.

Step 5: Toss and Coat

Toss warm snacks in the spicy cheese mixture until fully coated.

Tips for Perfect Results

To master how to make Hot Cheetos, keep these tips in mind:

  • Coat snacks while still warm for best flavor
  • Don’t overcrowd during cooking
  • Use fine spices for even coating
  • Adjust spice gradually to taste

These tips ensure your homemade version is just as addictive.

Variations to Try

Mild Version

Reduce cayenne for a kid-friendly snack.

Extra Spicy

Add hot sauce or more chili powder.

Baked Option

Skip frying and bake for a lighter version.

Cheesy Twist

Add extra cheese powder for bold flavor.

These variations keep your Hot Cheetos recipe exciting and versatile.

What to Serve With It

Pair your homemade Hot Cheetos with:

  • Dips like ranch or cheese sauce
  • Sandwiches or burgers
  • Cold drinks like soda or lemonade
  • Movie night snacks

They’re perfect for casual gatherings or solo snacking.

Storage & Reheating

Storage

  • Store in an airtight container for up to 3 days

Reheating

  • Reheat in oven for a few minutes to restore crispiness

Common Mistakes to Avoid

When learning how to make Hot Cheetos, avoid:

  • Not seasoning evenly
  • Overcooking or burning
  • Using too much oil
  • Skipping proper shaping

Avoiding these mistakes helps you get the perfect snack every time.

Frequently Asked Questions

Can I bake instead of fry?

Yes, baking is a healthier option and still yields crispy results.

How do I make them extra crunchy?

Cook slightly longer and let them cool completely.

Can I make them gluten-free?

Yes, use gluten-free flour alternatives.

What cheese works best?

Cheddar or cheese powder gives the best flavor.

Can I store them long-term?

They’re best fresh but can be stored short-term in airtight containers.

Final Thoughts

Now that you know how to make Hot Cheetos, you can enjoy this spicy, cheesy snack anytime you want—fresh, customizable, and made right in your kitchen. It’s a fun recipe that delivers bold flavor and satisfying crunch in every bite.

Whether you’re making them for a party or just indulging a craving, these homemade Hot Cheetos are guaranteed to impress!

Cheesy Pretzels and Cheese Dip

If you’re looking for the ultimate comfort snack, cheesy pretzels and cheese dip deliver everything you could want—soft, golden-brown pretzels paired with a rich, creamy dip that’s impossible to resist. This classic combination is perfect for game days, parties, or cozy nights at home when you’re craving something warm and satisfying.

Making homemade pretzels might sound intimidating, but this recipe breaks it down into simple, manageable steps. The result? Bakery-style pretzels with a gooey cheese dip that tastes even better than your favorite stadium snack.

Why You’ll Love This Recipe

These cheesy pretzels and cheese dip are a must-try for anyone who loves savory snacks with bold flavor and comforting textures.

Here’s why they stand out:

  • Soft and chewy pretzels with a golden crust
  • Creamy, rich cheese dip
  • Perfect for sharing
  • Fun to make at home
  • Great for parties and gatherings

Once you try them, you’ll want to make them again and again.

Ingredients

To make these cheesy pretzels and cheese dip, you’ll need:

For the Pretzels:

  • All-purpose flour
  • Warm water
  • Yeast
  • Sugar
  • Salt
  • Baking soda (for boiling)
  • Butter

For the Cheese Dip:

  • Cheddar cheese
  • Milk
  • Butter
  • Flour
  • Garlic powder
  • Paprika (optional)

These ingredients come together to create a delicious, indulgent snack.

Ingredient Notes & Substitutions

Cheese Choices

Cheddar is classic, but you can mix in mozzarella or gouda for extra flavor.

Flour Options

All-purpose flour works best, but bread flour gives a chewier texture.

Milk Alternatives

Use plant-based milk if needed, though it may slightly change the flavor.

These options make your cheesy pretzels and cheese dip adaptable to your preferences.

Step-by-Step Instructions

Step 1: Make the Dough

Combine warm water, yeast, and sugar. Let it sit until foamy, then mix with flour and salt to form a dough.

Step 2: Knead and Rise

Knead the dough until smooth and let it rise until doubled in size.

Step 3: Shape the Pretzels

Divide the dough and roll into ropes, then shape into pretzels.

Step 4: Boil and Bake

Boil pretzels briefly in baking soda water, then bake until golden brown.

Step 5: Prepare the Cheese Dip

Melt butter, add flour, then whisk in milk and cheese until smooth and creamy.

Tips for Perfect Results

To make the best cheesy pretzels and cheese dip, follow these tips:

  • Don’t skip the boiling step—it creates the classic texture
  • Use freshly grated cheese for smoother dip
  • Bake until deep golden for best flavor
  • Serve immediately for maximum freshness

These tips ensure your pretzels turn out perfectly every time.

Variations to Try

Garlic Butter Pretzels

Brush baked pretzels with garlic butter.

Spicy Cheese Dip

Add jalapeños or hot sauce to the dip.

Stuffed Pretzels

Fill with cheese before baking for extra indulgence.

Whole Wheat Version

Use part whole wheat flour for a healthier twist.

These variations keep your cheesy pretzels and cheese dip exciting and versatile.

What to Serve With It

Pair your pretzels with:

  • Mustard or honey mustard
  • Marinara sauce
  • Fresh veggie sticks
  • Cold beverages like soda or beer

They’re perfect as a snack or party centerpiece.

Storage & Reheating

Storage

  • Store pretzels in an airtight container for up to 2 days

Reheating

  • Reheat in oven for a few minutes to restore softness

Cheese Dip

  • Store separately and reheat gently on the stove

Common Mistakes to Avoid

When making cheesy pretzels and cheese dip, avoid:

  • Skipping the yeast activation step
  • Overbaking the pretzels
  • Using pre-shredded cheese (can affect texture)
  • Not seasoning the dough properly

Avoiding these mistakes ensures the best results.

Frequently Asked Questions

Can I make pretzels without yeast?

Yes, but they won’t have the same texture.

Why do I need to boil pretzels?

Boiling gives them their signature chewy crust.

Can I freeze pretzels?

Yes, freeze after baking and reheat when needed.

How do I keep cheese dip smooth?

Use low heat and stir constantly.

Can I make this recipe ahead of time?

Yes, prepare dough in advance and bake when ready.

Final Thoughts

These cheesy pretzels and cheese dip are the ultimate comfort snack—soft, flavorful, and incredibly satisfying. With a little effort, you can recreate this classic treat at home and impress everyone at the table.

Whether you’re serving them at a party or enjoying a quiet night in, these pretzels are guaranteed to be a hit.