Simple and Satisfying Egg Breakfast Recipes: Ready in Minutes!

If you’re searching for quick, nutritious, and delicious morning meals, these simple and satisfying egg breakfast recipes ready in minutes are exactly what you need. Eggs are one of the most versatile ingredients in the kitchen, making them perfect for fast breakfasts that don’t sacrifice flavor or nutrition.

From fluffy scrambled eggs to veggie-packed omelets and quick egg muffins, these recipes are designed to help you start your day with energy and satisfaction. Whether you’re rushing out the door or enjoying a slow morning, eggs can be transformed into endless breakfast options in just a few minutes.


Why You’ll Love These Egg Breakfast Recipes

These simple and satisfying egg breakfast recipes ready in minutes are perfect for busy lifestyles and healthy eating.

  • Ready in 5–15 minutes
  • High in protein and keeps you full longer
  • Budget-friendly and easy to find ingredients
  • Endless flavor combinations and variations
  • Perfect for meal prep or quick mornings

Once you start cooking eggs this way, breakfast becomes the easiest meal of the day.
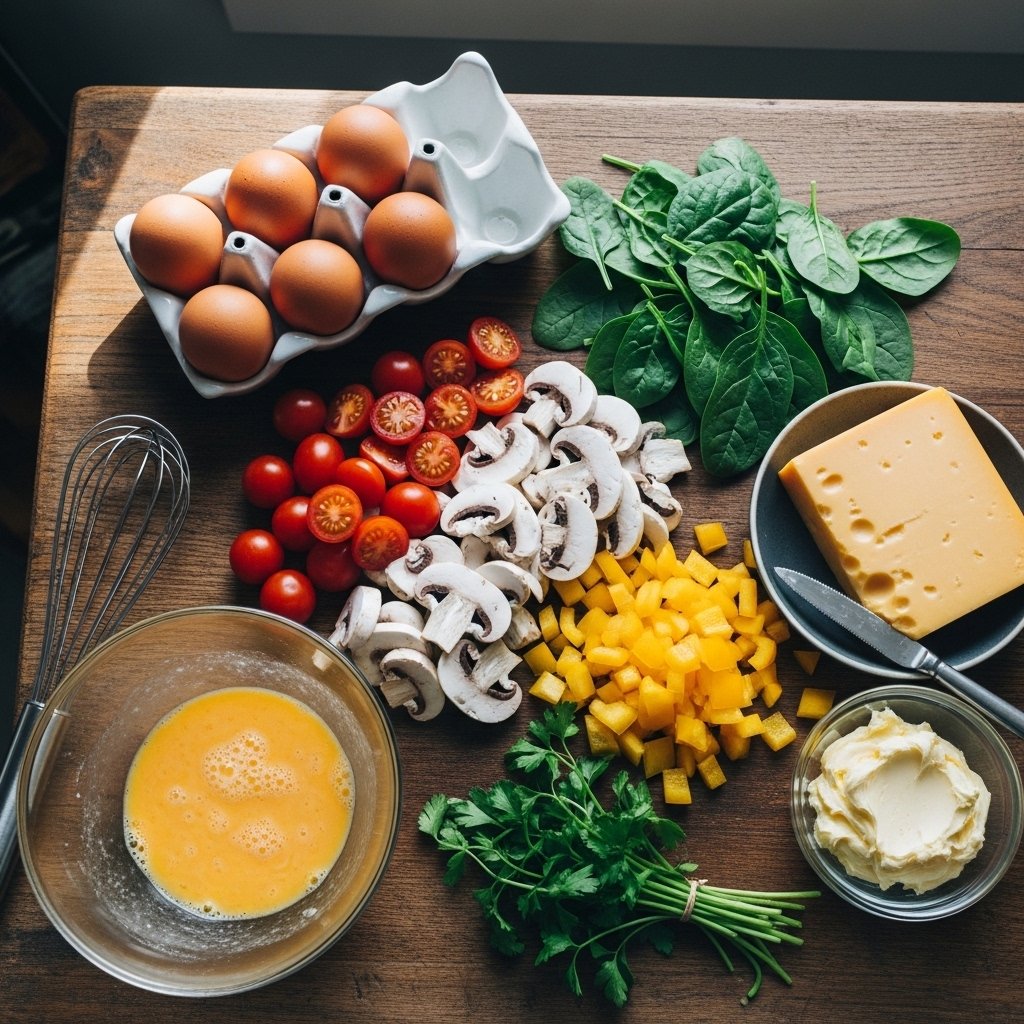

Ingredients

To create a variety of egg breakfast recipes, here are the basic ingredients you’ll often use:

  • 6–8 large eggs
  • Salt and black pepper
  • 1–2 tablespoons butter or olive oil
  • ¼ cup milk or cream (optional for fluffiness)
  • Fresh vegetables (spinach, peppers, onions, tomatoes)
  • Cheese (cheddar, mozzarella, feta)
  • Optional proteins (ham, bacon, sausage)
  • Fresh herbs (parsley, chives, or green onions)


Ingredient Notes

The key to making simple and satisfying egg breakfast recipes ready in minutes is using fresh, high-quality ingredients. Eggs are the star, so freshness matters.

Helpful tips:

  • Use room-temperature eggs for fluffier texture
  • Add milk or cream for softer scrambled eggs
  • Fresh herbs elevate flavor instantly
  • Don’t overload with too many fillings in omelets
  • Use real butter for richer taste

Step-by-Step Egg Breakfast Recipes

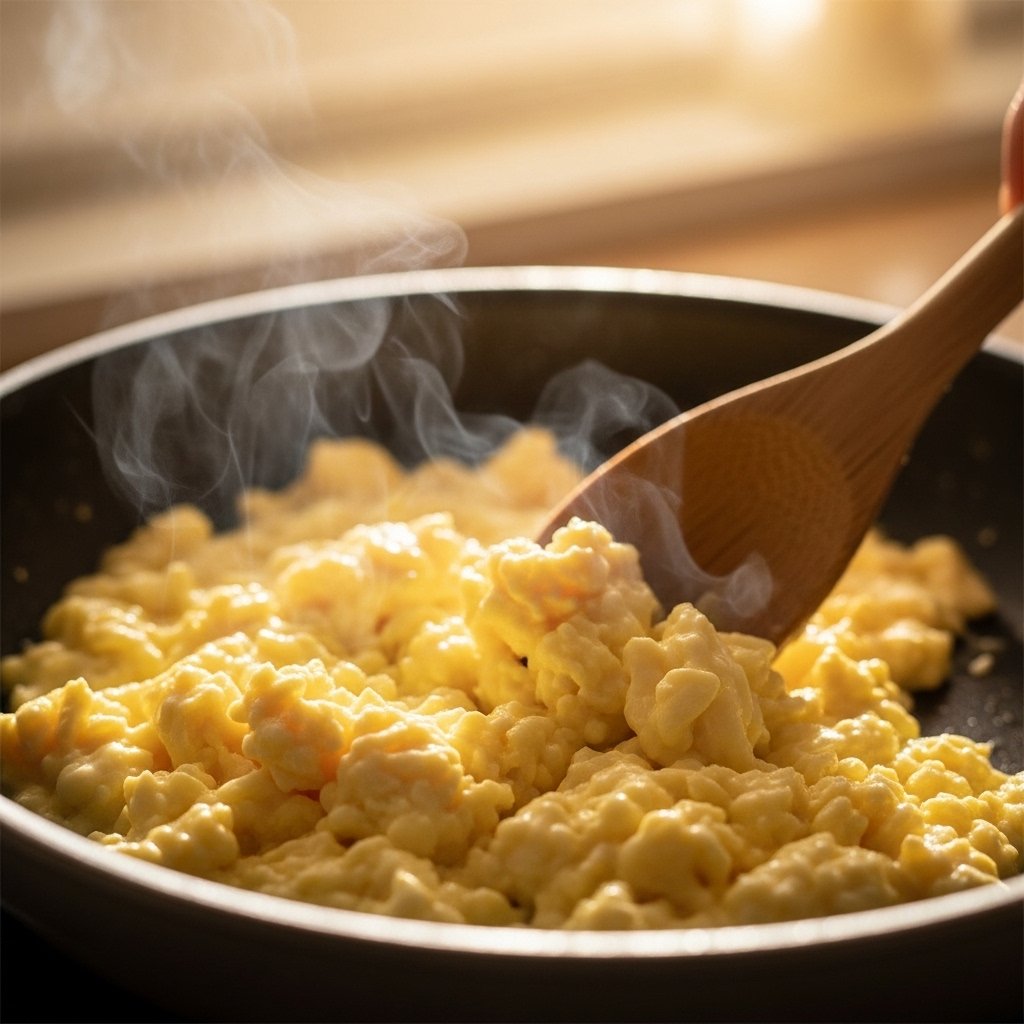
1. Classic Fluffy Scrambled Eggs

Whisk eggs with salt, pepper, and a splash of milk. Cook over low heat with butter, stirring gently until soft and creamy.


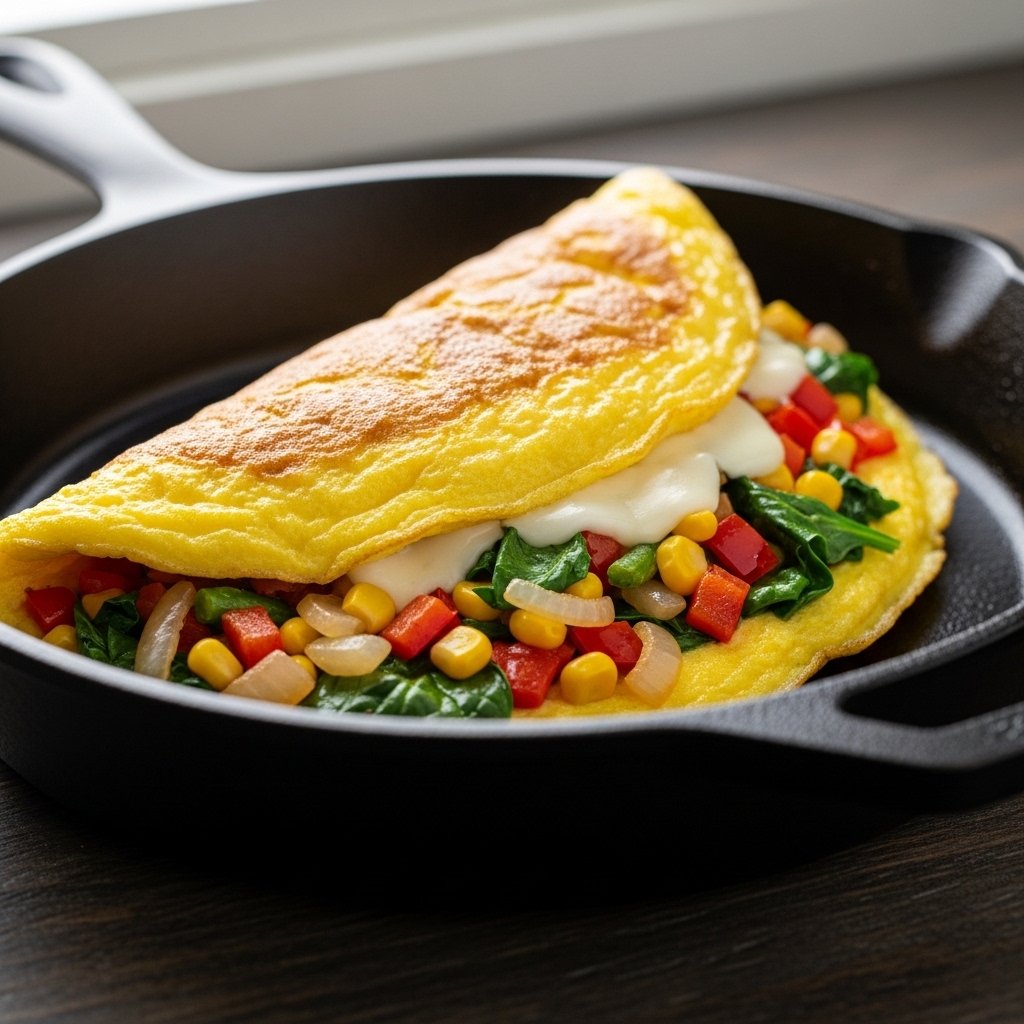
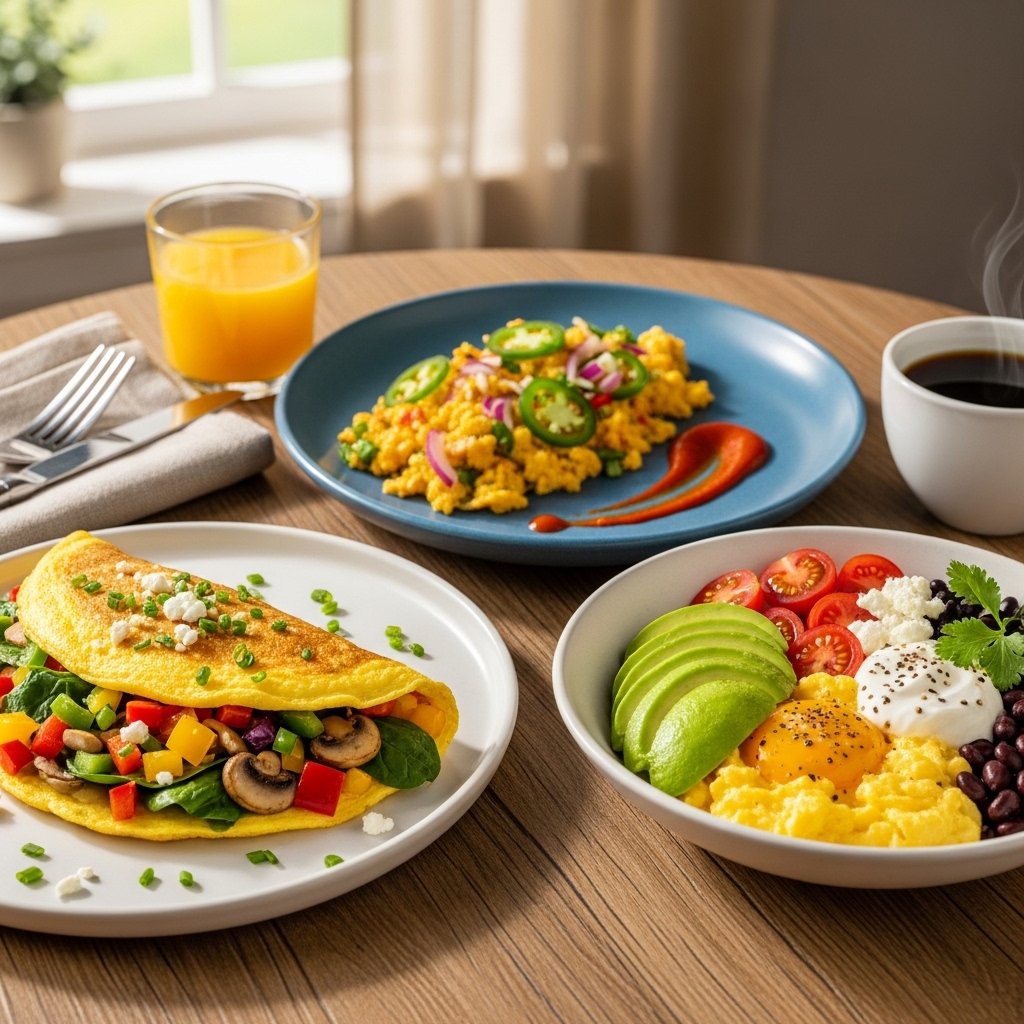
2. Quick Veggie Omelet

Beat eggs and pour into a heated pan. Add chopped vegetables and cheese, fold once set, and cook until fluffy and golden.


3. 5-Minute Egg Breakfast Wrap

Scramble eggs and place them in a warm tortilla with cheese and salsa. Roll it up for a portable breakfast.


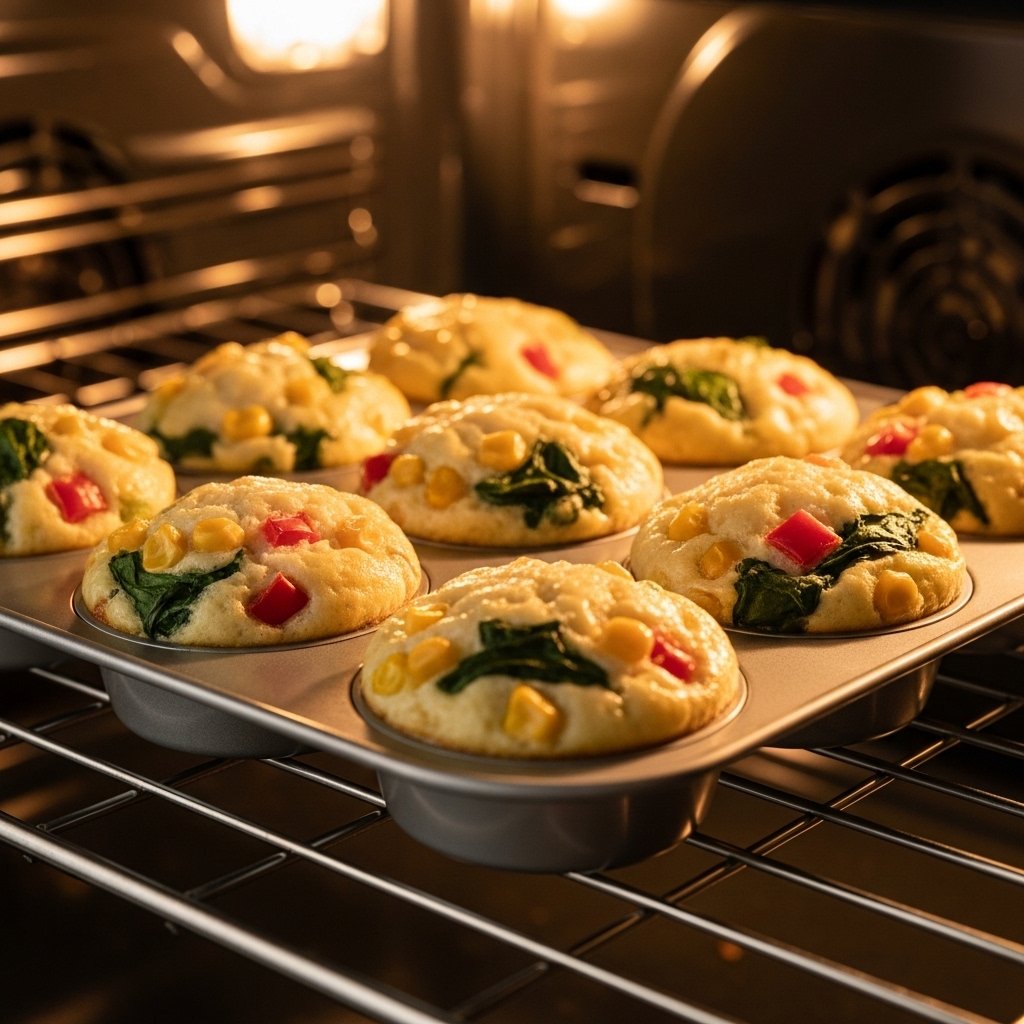
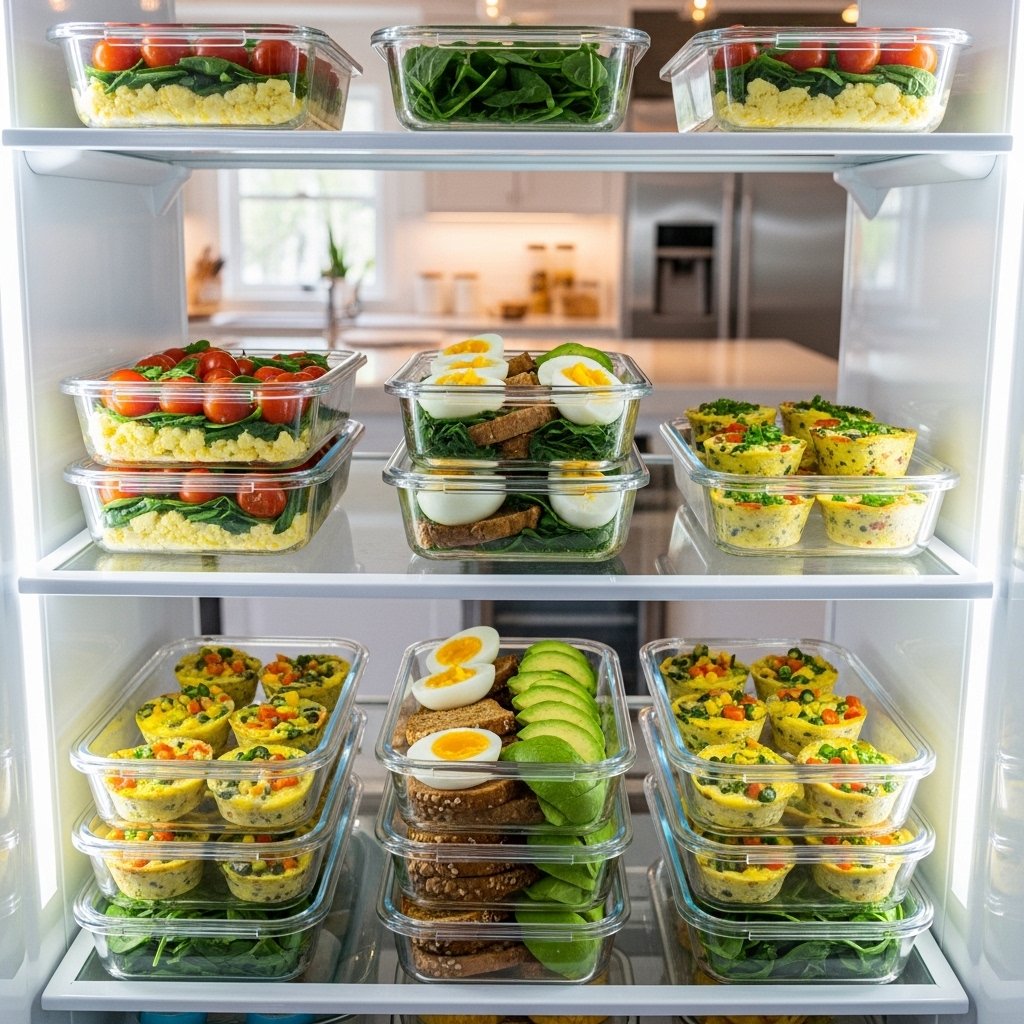
4. Baked Egg Muffins (Meal Prep Favorite)

Whisk eggs, pour into muffin tins, and add veggies and cheese. Bake at 350°F for 15–18 minutes.


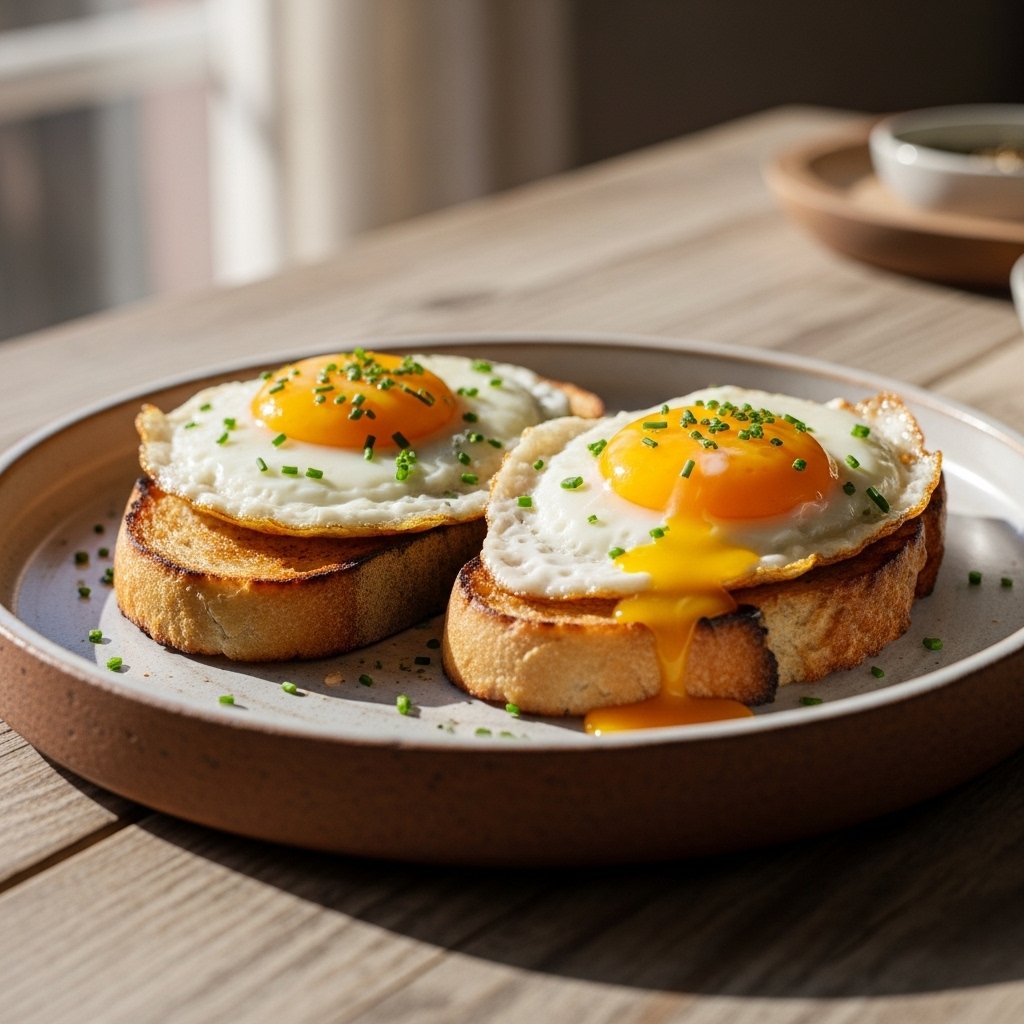
5. Sunny-Side-Up Eggs with Toast

Fry eggs gently until whites are set and yolks are runny. Serve with toasted bread and seasoning.


Tips for Perfect Results

To make the best simple and satisfying egg breakfast recipes ready in minutes, follow these expert tips:

  • Cook eggs on low heat for softness
  • Don’t overmix scrambled eggs
  • Use nonstick pans for easy cooking
  • Season at the end for better flavor control
  • Add cheese while eggs are still warm

Variations

Egg breakfasts are incredibly flexible and can be customized in many ways.

High-Protein Version

Add turkey, chicken, or lean sausage.

Vegetarian Option

Load with spinach, mushrooms, peppers, and onions.

Low-Carb Option

Skip bread and serve eggs with avocado.

Spicy Kick

Add hot sauce, jalapeños, or chili flakes.


What to Serve With It

These egg breakfast recipes pair perfectly with:

  • Toast or sourdough bread
  • Fresh fruit bowls
  • Avocado slices
  • Hash browns or roasted potatoes
  • Coffee, tea, or fresh juice

They can be a full breakfast or part of a bigger morning spread.
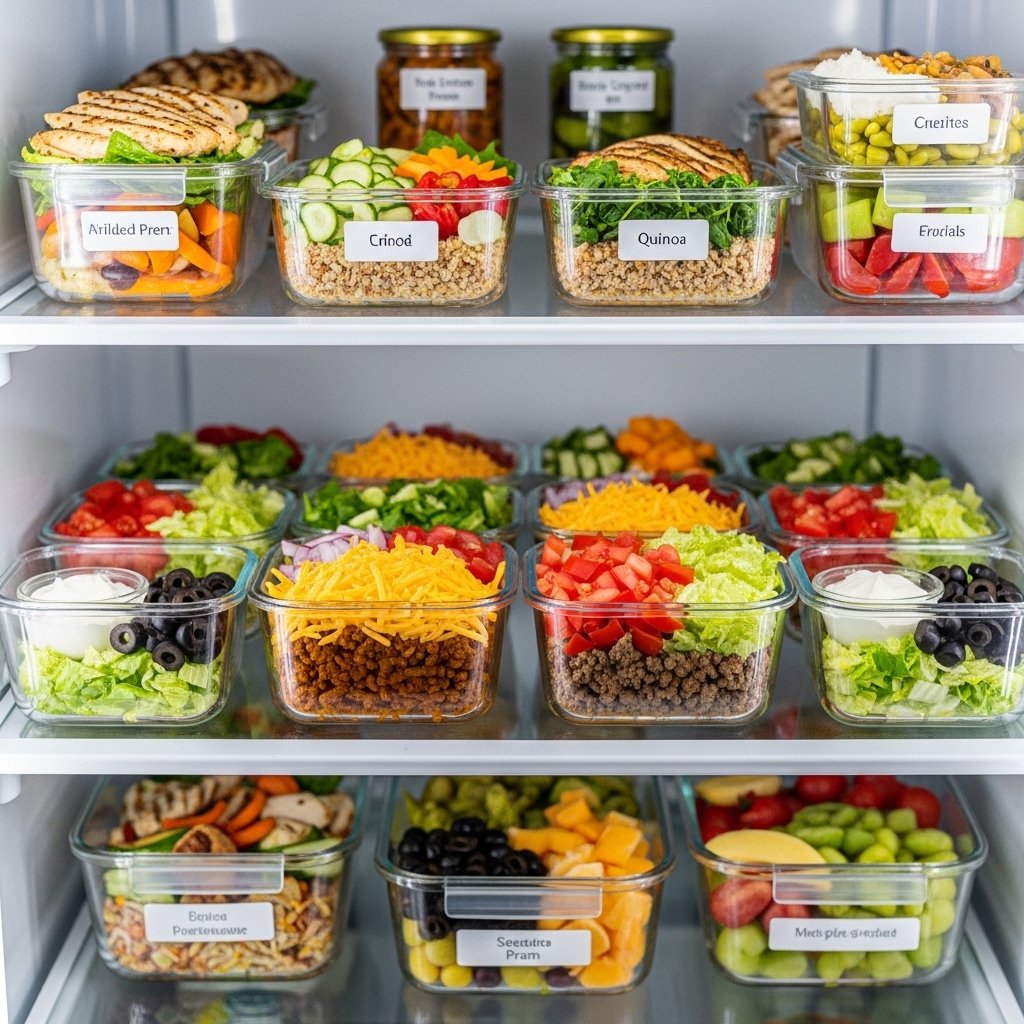

Storage & Reheating

Egg dishes can be stored easily for meal prep:

  • Refrigerator: Store cooked eggs for up to 3 days
  • Meal prep muffins: Last up to 5 days refrigerated
  • Reheating: Warm gently in microwave for 20–30 seconds
  • Freezing: Egg muffins freeze well for up to 2 months


Common Mistakes to Avoid

Avoid these mistakes when making simple and satisfying egg breakfast recipes ready in minutes:

  • Cooking eggs on high heat (makes them rubbery)
  • Overcooking scrambled eggs
  • Adding salt too early in omelets
  • Overfilling egg dishes
  • Not greasing pans properly

FAQs

1. What is the fastest egg breakfast to make?

Scrambled eggs are the quickest, ready in about 5 minutes.

2. Are egg breakfasts healthy?

Yes, eggs are high in protein, vitamins, and healthy fats.

3. Can I meal prep egg breakfasts?

Absolutely—egg muffins and wraps store very well.

4. How do I make eggs more flavorful?

Use herbs, cheese, spices, and vegetables for extra taste.


Final Thoughts

These simple and satisfying egg breakfast recipes ready in minutes are the perfect solution for busy mornings. They’re quick, healthy, and endlessly customizable, making them a must-have for any kitchen routine.

Whether you prefer scrambled, baked, or wrapped, eggs offer a delicious and reliable way to start your day with energy and flavor. Once you try these ideas, breakfast will never feel boring again.

Loaded Bacon Cheeseburger Pasta You’ll Crave Again and Again

If you love the bold, comforting flavors of a classic bacon cheeseburger, this loaded bacon cheeseburger pasta you’ll crave again and again is going to be your new favorite dinner obsession. It takes everything you love about a juicy cheeseburger—savory beef, smoky bacon, melted cheese, and tangy sauce—and transforms it into a creamy, satisfying pasta dish.

Even better, this recipe is made in one pot, which means fewer dishes and more time enjoying a meal that tastes like pure comfort. It’s rich, hearty, and perfect for busy weeknights when you want something filling but easy.


Why You’ll Love This Recipe

This loaded bacon cheeseburger pasta you’ll crave again and again is more than just a meal—it’s comfort food at its best.

  • One-pot recipe = easy cleanup
  • Combines cheeseburger flavors with creamy pasta
  • Loaded with beef, bacon, and melted cheese
  • Family-friendly and kid-approved
  • Ready in about 30–35 minutes

Once you try it, you’ll understand why it earns a permanent spot in your dinner rotation.


Ingredients

To make this delicious bacon cheeseburger pasta, you’ll need:

  • 1 lb ground beef
  • 6 slices bacon (cooked and chopped)
  • 12 oz pasta (penne, rotini, or elbow)
  • 1 small onion (diced)
  • 2 cloves garlic (minced)
  • 2 cups beef broth
  • 1 cup milk
  • 1 cup tomato sauce
  • 1 tablespoon ketchup
  • 1 teaspoon mustard
  • 2 cups shredded cheddar cheese
  • Salt and pepper to taste
  • Optional: pickles for topping


Ingredient Notes

The flavor of loaded bacon cheeseburger pasta you’ll crave again and again comes from balancing creamy, savory, and tangy elements.

  • Ground beef provides hearty richness
  • Bacon adds smoky crunch and depth
  • Cheddar cheese creates creamy, melty texture
  • Ketchup and mustard mimic classic cheeseburger flavor
  • Short pasta shapes hold sauce best

For best results, always shred cheese fresh from the block for smoother melting.


Step-by-Step Instructions

1. Cook the Bacon

In a large pot, cook bacon until crispy. Remove, chop, and set aside. Leave a small amount of bacon fat in the pot for extra flavor.


2. Brown the Beef

Add ground beef and diced onions to the same pot. Cook until browned and fully cooked, breaking it apart as it cooks. Add garlic and stir for 30 seconds.


3. Build the Flavor Base

Stir in beef broth, milk, tomato sauce, ketchup, and mustard. Mix until smooth and well combined.


4. Cook the Pasta

Add uncooked pasta directly into the pot. Bring to a simmer and cook until pasta is tender and sauce thickens, stirring occasionally to prevent sticking.


5. Add Cheese and Bacon

Stir in shredded cheddar cheese until melted and creamy. Add chopped bacon back into the pot and mix well.


6. Serve Hot

Serve immediately topped with extra cheese, bacon bits, or pickles for that true cheeseburger experience.


Tips for Perfect Results

To make the best loaded bacon cheeseburger pasta you’ll crave again and again, follow these tips:

  • Stir pasta frequently while simmering
  • Use freshly shredded cheese for smooth melting
  • Don’t overcook pasta—keep it slightly firm
  • Reserve some bacon for topping
  • Adjust seasoning at the end for perfect balance

Variations

This recipe is flexible and easy to customize.

Spicy Version

Add jalapeños or hot sauce for heat.

BBQ Bacon Cheeseburger Pasta

Replace ketchup with BBQ sauce for smoky sweetness.

Veggie Boost

Add mushrooms, spinach, or bell peppers.

Turkey Option

Use ground turkey instead of beef for a lighter version.


What to Serve With It

This loaded bacon cheeseburger pasta you’ll crave again and again pairs well with:

  • Garlic bread
  • Simple green salad
  • Pickles or coleslaw
  • Roasted vegetables
  • Iced tea or soda

It’s hearty enough to be a full meal on its own.


Storage & Reheating

This dish stores well for leftovers:

  • Refrigerator: Store in airtight container for up to 4 days
  • Freezer: Freeze for up to 2 months
  • Reheating: Warm on stovetop or microwave with a splash of milk


Common Mistakes to Avoid

Avoid these mistakes when making loaded bacon cheeseburger pasta you’ll crave again and again:

  • Overcooking pasta until mushy
  • Not stirring while simmering
  • Using pre-shredded cheese (won’t melt smoothly)
  • Skipping seasoning adjustments at the end
  • Adding all bacon too early instead of reserving some

FAQs

1. Can I make this ahead of time?

Yes, it reheats very well and is great for meal prep.

2. What pasta works best?

Short pasta like penne, rotini, or elbows works best.

3. Can I make it less rich?

Yes, use lean beef and reduce cheese slightly.

4. Can I add vegetables?

Absolutely—onions, peppers, mushrooms, and spinach all work well.


Final Thoughts

This loaded bacon cheeseburger pasta you’ll crave again and again is the ultimate comfort food mashup. It’s creamy, cheesy, smoky, and packed with bold cheeseburger flavor—all made in one easy pot.

Whether you’re cooking for a busy weeknight or a cozy family dinner, this recipe delivers big flavor with minimal effort. Once you try it, you’ll find yourself coming back to it again and again.

Simple Doritos Taco Salad – The Ultimate Crunchy, Cheesy Family Favorite

If you’re looking for a quick, crowd-pleasing meal that’s packed with flavor and crunch, this simple Doritos taco salad is about to become your new favorite. It combines all the best parts of a classic taco—seasoned ground beef, fresh vegetables, cheese, and zesty dressing—with the bold crunch of Doritos chips.

This recipe is perfect for busy weeknights, potlucks, game days, or even casual family dinners. It’s fun, colorful, and incredibly easy to throw together in under 30 minutes. The combination of savory beef, crisp lettuce, and cheesy chips makes every bite addictive.


Why You’ll Love This Recipe

This simple Doritos taco salad is more than just a salad—it’s a flavor-packed comfort meal.

  • Quick and easy—ready in under 30 minutes
  • Perfect mix of crunchy, savory, and fresh flavors
  • Budget-friendly ingredients
  • Great for parties, potlucks, and family dinners
  • Kid-friendly and highly customizable

Once you try it, you’ll understand why it’s a classic American comfort dish.


Ingredients

To make this delicious Doritos taco salad, you’ll need:

  • 1 lb ground beef
  • 1 packet taco seasoning
  • 1 head romaine lettuce (chopped)
  • 1 cup cherry tomatoes (halved)
  • 1 cup shredded cheddar cheese
  • 1 can black beans (drained and rinsed)
  • ½ cup sour cream or ranch dressing
  • 1 cup salsa
  • 1 bag Nacho Cheese Doritos (crushed)
  • Optional: avocado, jalapeños, green onions


Ingredient Notes

The magic of a simple Doritos taco salad comes from balancing fresh ingredients with bold flavors. Doritos add the signature crunch and cheesy seasoning that makes this dish unforgettable.

Helpful tips:

  • Use freshly cooked ground beef for best flavor
  • Crush Doritos just before serving to keep them crispy
  • Romaine lettuce works best for crunch
  • Add beans for extra protein and texture

You can also adjust spice levels by choosing mild or spicy taco seasoning.


Step-by-Step Instructions

1. Cook the Beef

In a skillet over medium heat, cook ground beef until browned. Drain excess fat, then add taco seasoning and a little water. Simmer until thickened.


2. Prepare the Fresh Ingredients

Chop lettuce, halve cherry tomatoes, rinse black beans, and shred cheese if needed.


3. Crush the Doritos

Lightly crush Doritos into bite-sized pieces. Do not crush too fine—you want texture and crunch.


4. Assemble the Salad

In a large bowl, combine lettuce, tomatoes, beans, cheese, and seasoned beef.


5. Add Dressing and Chips

Drizzle with sour cream and salsa, then top with crushed Doritos just before serving.


Tips for Perfect Results

To make the best simple Doritos taco salad, keep these tips in mind:

  • Add Doritos right before serving to avoid sogginess
  • Drain beef well to prevent greasy salad
  • Use fresh lettuce for maximum crunch
  • Mix dressing lightly so ingredients stay crisp
  • Serve immediately after assembling

Variations

This recipe is super flexible and easy to customize.

Chicken Version

Swap ground beef for shredded chicken or grilled chicken.

Spicy Version

Use spicy Doritos and add jalapeños or hot sauce.

Healthy Twist

Use Greek yogurt instead of sour cream.

Loaded Taco Salad

Add guacamole, corn, and extra cheese for a richer version.


What to Serve With It

This simple Doritos taco salad pairs perfectly with:

  • Mexican rice
  • Refried beans
  • Quesadillas
  • Guacamole and chips
  • Cold soda or iced tea

It’s also great as a standalone meal.


Storage & Reheating

For best results:

  • Refrigerator: Store ingredients separately for up to 3 days
  • Beef: Store cooked beef in airtight container for up to 4 days
  • Doritos: Keep sealed to maintain crunch
  • Reheating: Warm beef only; assemble salad fresh


Common Mistakes to Avoid

Avoid these mistakes when making simple Doritos taco salad:

  • Adding Doritos too early (they get soggy)
  • Overdressing the salad
  • Not draining beef properly
  • Using wilted lettuce
  • Overmixing ingredients

FAQs

1. Can I make Doritos taco salad ahead of time?

Yes, but keep chips and dressing separate until serving.

2. What Doritos flavor works best?

Nacho Cheese is classic, but Cool Ranch also works great.

3. Can I make it healthier?

Yes, use lean meat, Greek yogurt, and baked chips.

4. Is this salad served hot or cold?

The beef is warm, but the rest of the salad is cold and fresh.


Final Thoughts

This simple Doritos taco salad is the perfect mix of crunchy, cheesy, and savory flavors. It’s quick to prepare, budget-friendly, and guaranteed to be a hit with both kids and adults.

Whether you’re making it for a busy weeknight dinner or a fun party dish, this recipe delivers every time. Once you try it, it will become a staple in your recipe collection.