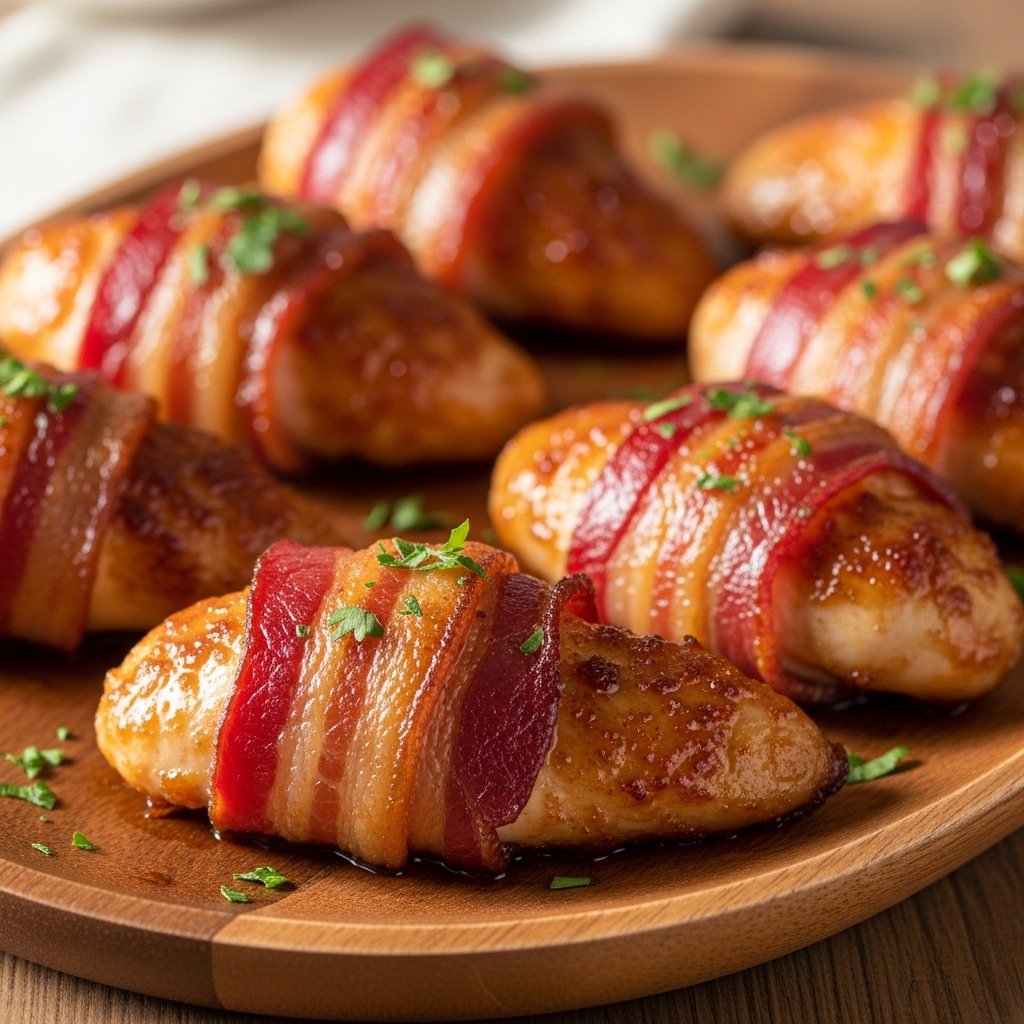
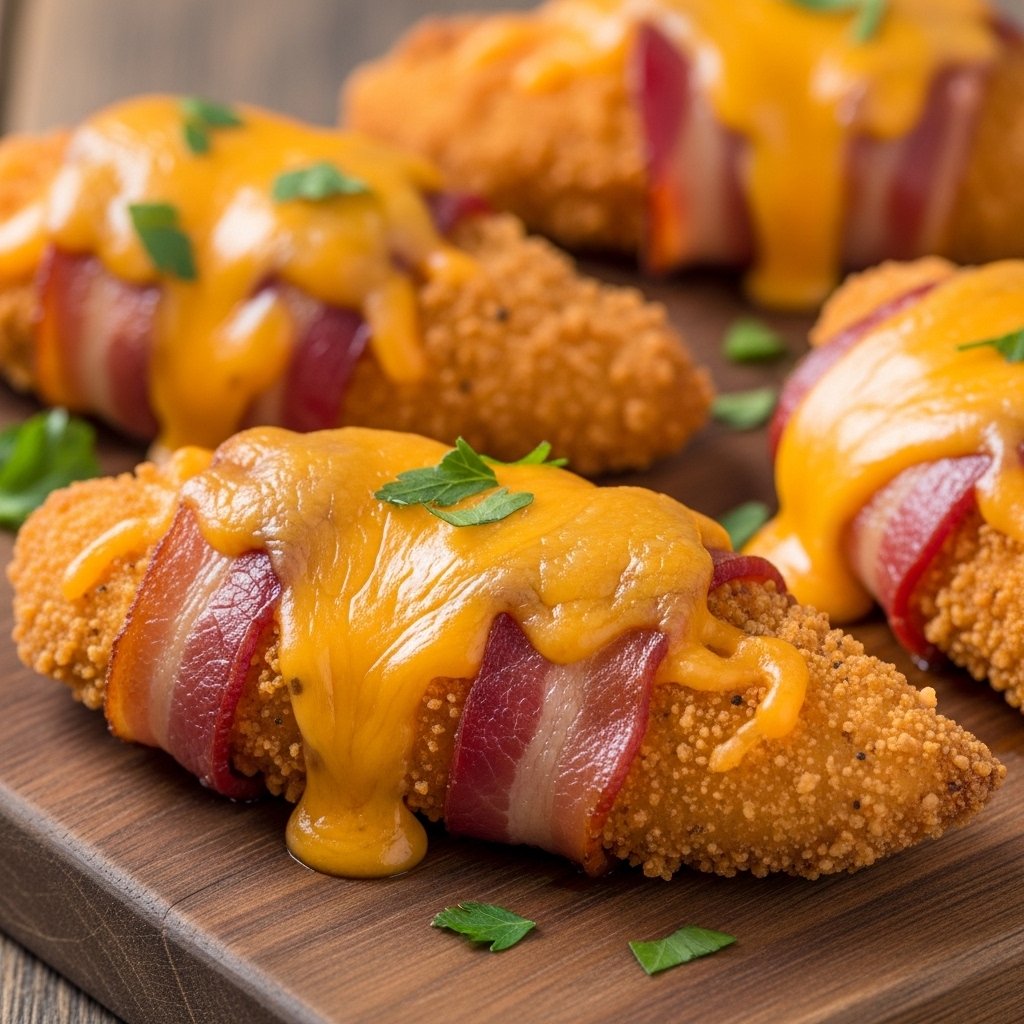
If you love bold, comforting flavors, these cheddar bacon chicken tenders are about to become a regular in your kitchen. Juicy chicken is wrapped in crispy bacon, topped with melted cheddar cheese, and baked until golden and irresistible.
This recipe is the perfect combination of smoky, cheesy, and savory in every bite. It’s simple enough for busy weeknights but also impressive enough for game day snacks or party platters. Once you try them, you’ll understand why they disappear so fast.
Why You’ll Love These Cheddar Bacon Chicken Tenders
These cheddar bacon chicken tenders are a total winner because:
- Crispy bacon wrapped around juicy chicken
- Melted cheddar cheese adds rich, savory flavor
- Easy to make with simple ingredients
- Perfect for dinner, appetizers, or snacks
- Kid-friendly and family-approved
- Great for meal prep or parties
They’re comfort food with maximum flavor and minimal effort.
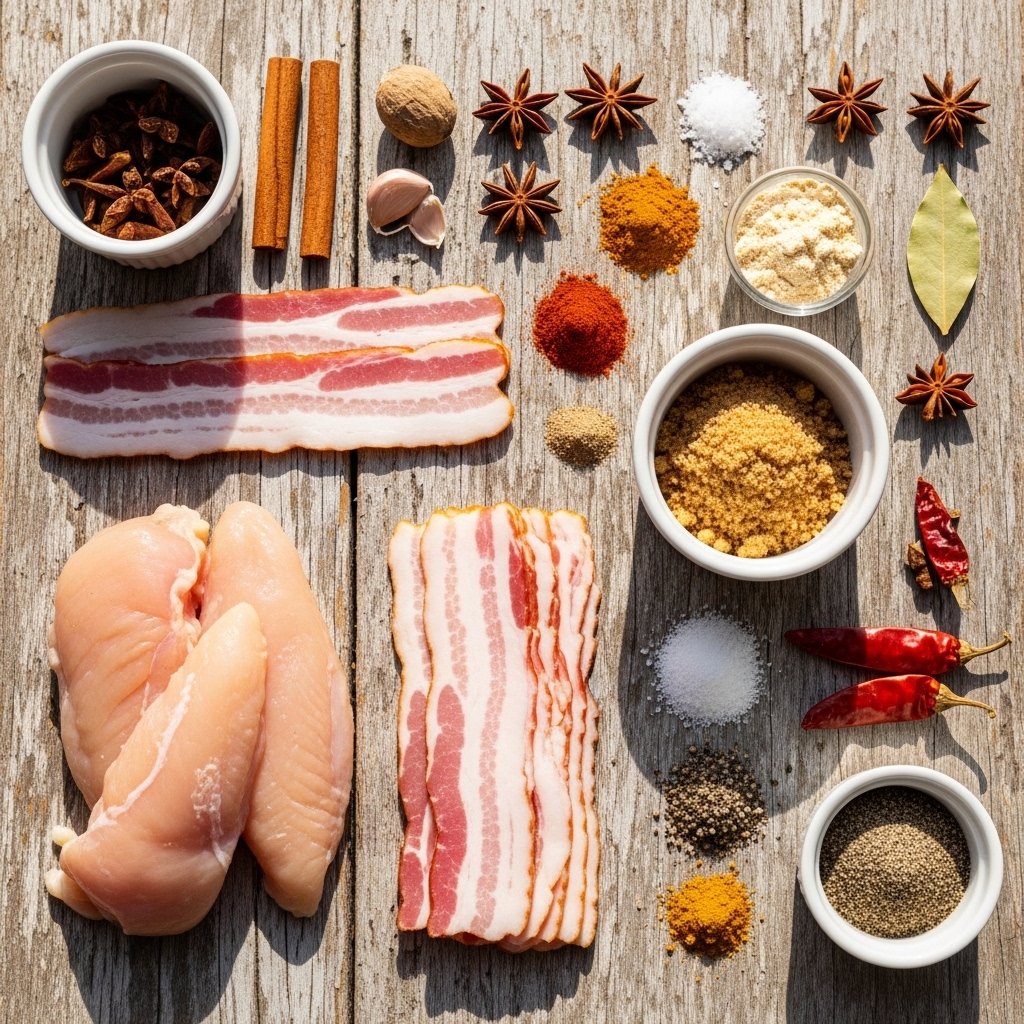
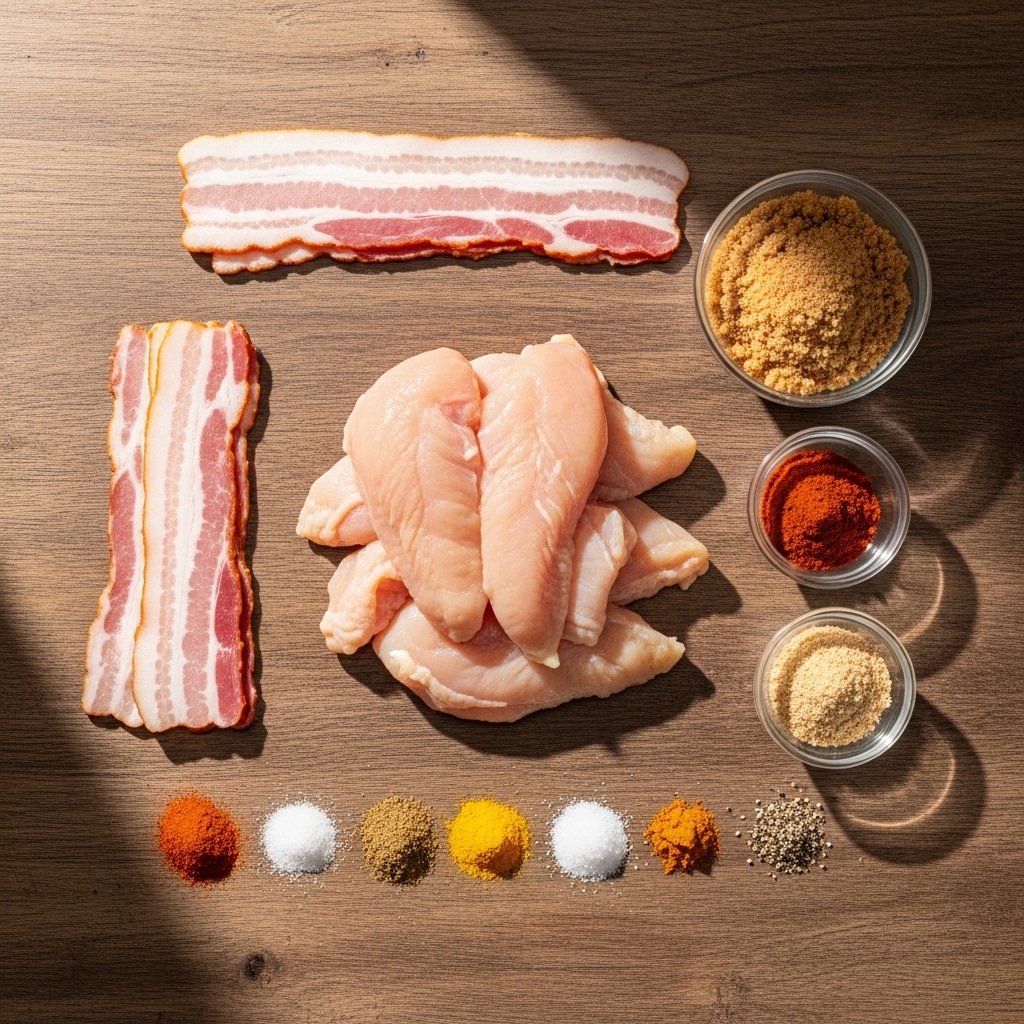
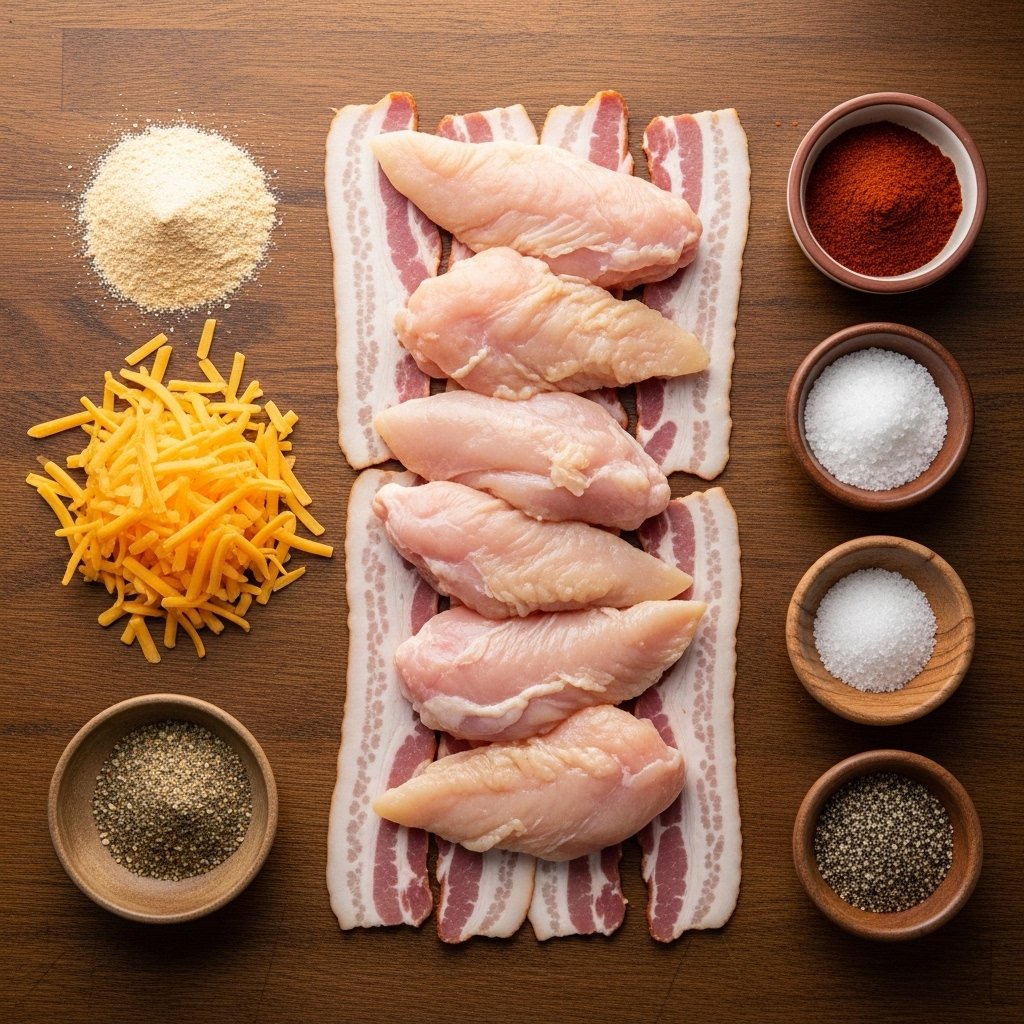
Ingredients
To make these delicious cheddar bacon chicken tenders, you’ll need:
- 1 ½ lbs chicken tenders
- 10–12 slices bacon (thin cut preferred)
- 1 ½ cups shredded cheddar cheese
- 1 tsp garlic powder
- 1 tsp paprika
- ½ tsp black pepper
- ½ tsp salt
- Optional: ranch or BBQ sauce for dipping
Ingredient Notes
The key to perfect cheddar bacon chicken tenders is using thin-cut bacon so it crisps properly while baking. Thick bacon can remain chewy and not cook evenly.
Cheddar cheese brings a sharp, rich flavor that pairs perfectly with smoky bacon. For extra melt, use freshly shredded cheese instead of pre-shredded.
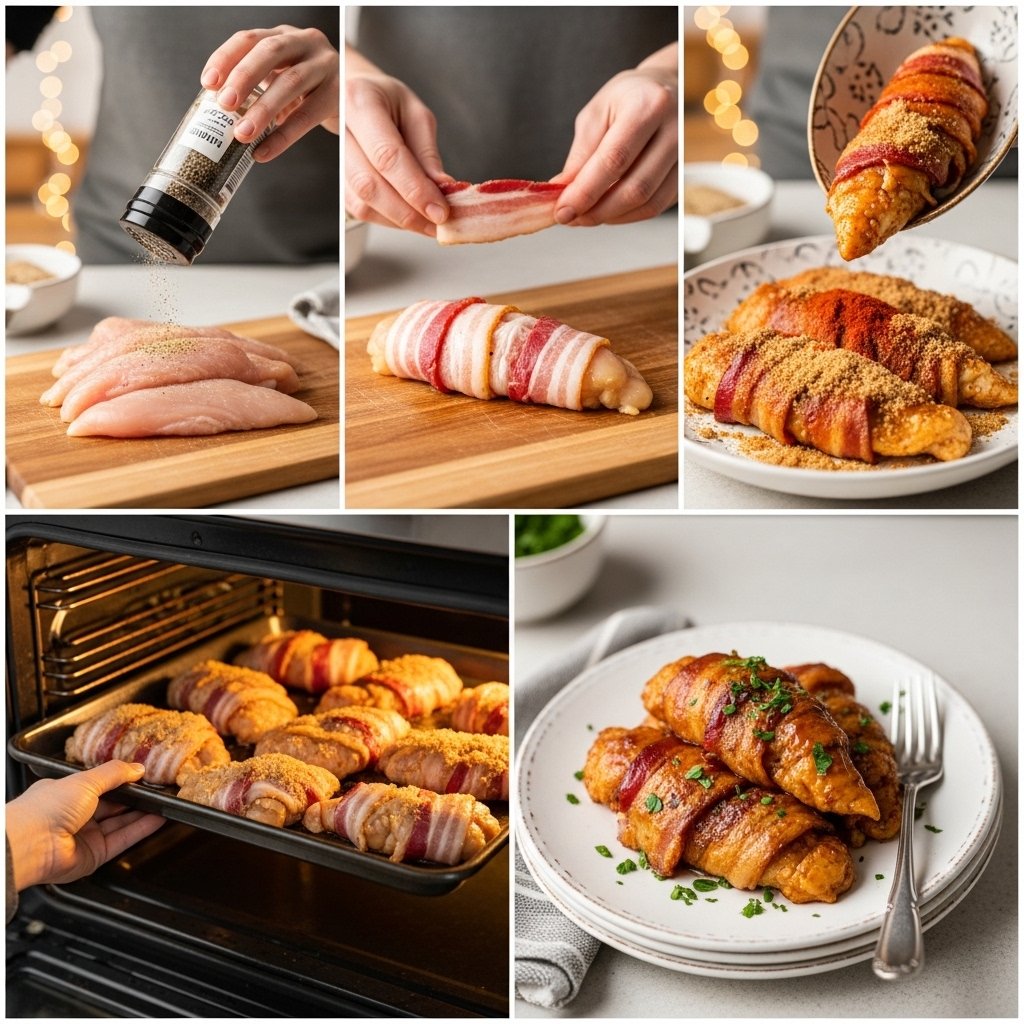
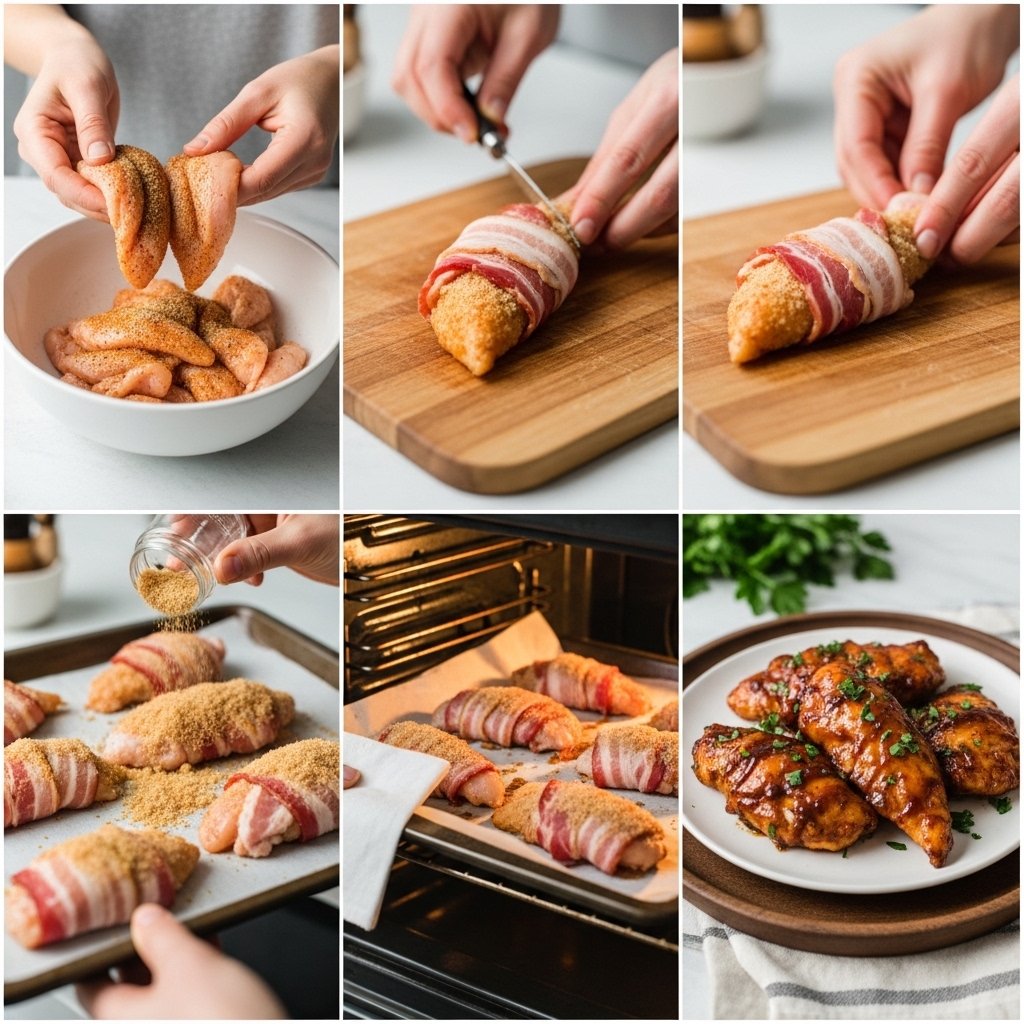
Step-by-Step Instructions
1. Preheat Oven
Set oven to 400°F (200°C) and line a baking sheet with parchment paper.
2. Season Chicken
Pat chicken dry and season with salt, pepper, paprika, and garlic powder.
3. Wrap with Bacon
Wrap each chicken tender with bacon and secure with toothpicks if needed.
4. Bake
Place on baking sheet and bake for 20–25 minutes until bacon is crispy and chicken is cooked through.
5. Add Cheese
Sprinkle cheddar cheese over the tenders and bake for another 3–5 minutes until melted.
6. Serve
Let rest briefly before serving with your favorite dipping sauce.
Tips for Perfect Results
To make the best cheddar bacon chicken tenders, follow these tips:
- Use thin bacon for crisp texture
- Don’t overcook before adding cheese
- Add cheese at the end for best melt
- Flip halfway through baking for even crispiness
- Use parchment paper to prevent sticking
These small steps make a big difference in flavor and texture.
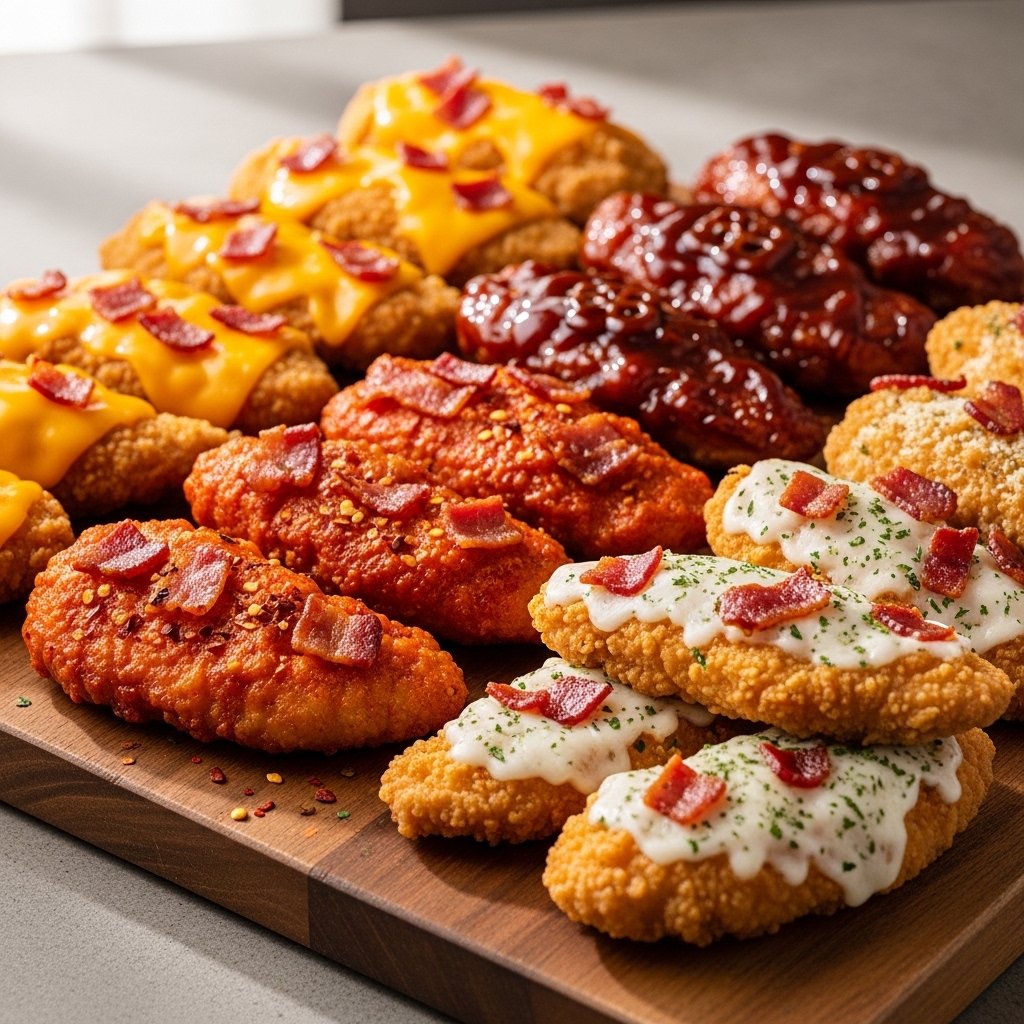
Variations
Customize your cheddar bacon chicken tenders with these ideas:
Spicy Version
Add cayenne pepper or hot sauce to seasoning.
BBQ Version
Brush with BBQ sauce before adding cheese.
Ranch Version
Sprinkle ranch seasoning over chicken before wrapping.
Extra Cheesy Version
Add mozzarella or pepper jack with cheddar.
What to Serve With It
These cheddar bacon chicken tenders pair perfectly with:
- French fries or sweet potato fries
- Mashed potatoes
- Coleslaw or green salad
- Mac and cheese
- Ranch, BBQ, or honey mustard dipping sauces
They work as both main dish and appetizer.
Storage & Reheating
For best results:
- Store in airtight container in fridge up to 3 days
- Reheat in oven or air fryer for crispiness
- Avoid microwaving to keep bacon crispy
- Freeze for up to 1 month
- Reheat at 375°F for 8–10 minutes
Common Mistakes to Avoid
Avoid these when making cheddar bacon chicken tenders:
- Using thick bacon that won’t crisp
- Adding cheese too early (it can burn)
- Overcooking chicken until dry
- Not securing bacon properly
- Skipping parchment paper
FAQs
Can I air fry these chicken tenders?
Yes, cook at 375°F for 12–15 minutes, then add cheese.
Can I use chicken breasts instead?
Yes, slice into strips for similar results.
What cheese works best?
Sharp cheddar melts best and adds bold flavor.
Can I prepare them ahead of time?
Yes, assemble and refrigerate before baking.
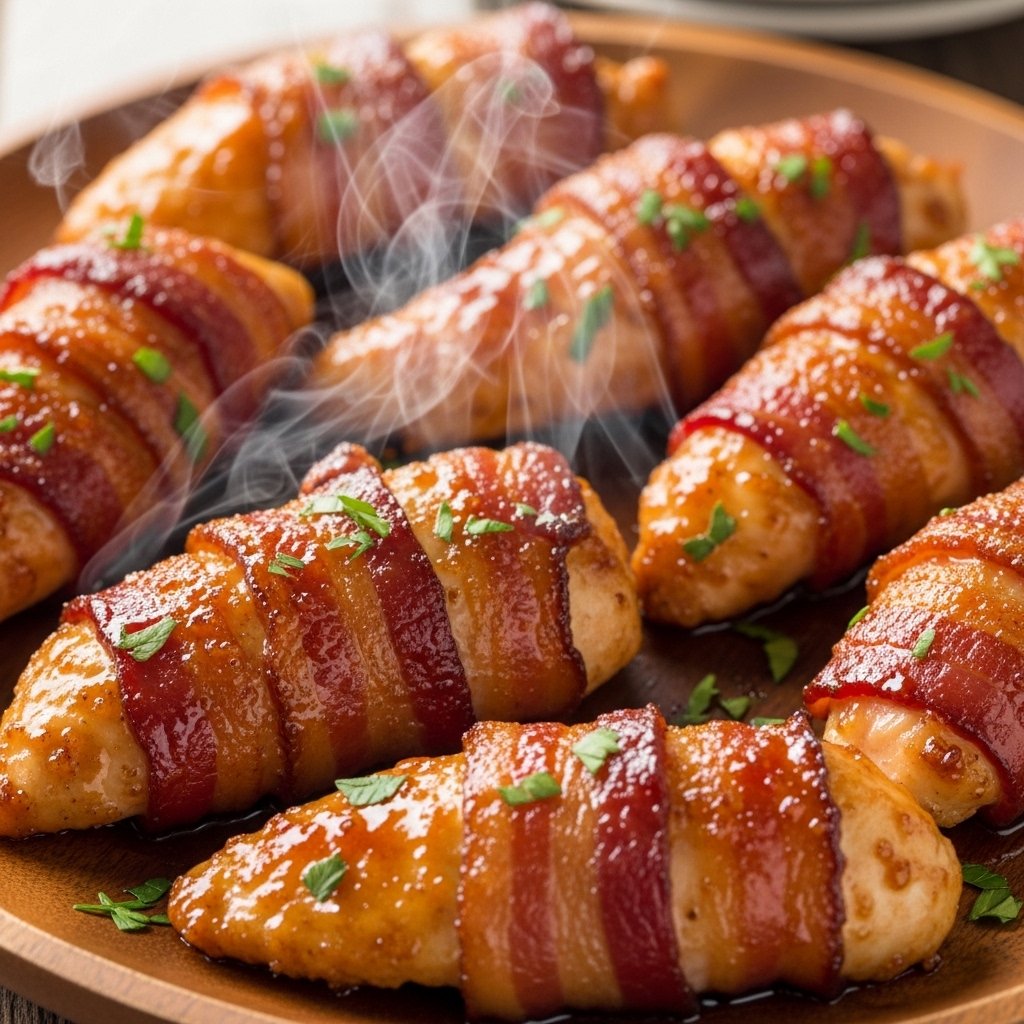
Final Thoughts
These cheddar bacon chicken tenders are everything you want in a comfort food recipe—crispy, cheesy, smoky, and incredibly satisfying. They’re easy to make and guaranteed to impress anyone at the table.
Whether you’re cooking for family dinner, parties, or game night, this recipe is one you’ll keep coming back to. 🧀🥓🍗