🍫 Cadbury Egg Protein Balls That Taste Just Like the Real Treat!

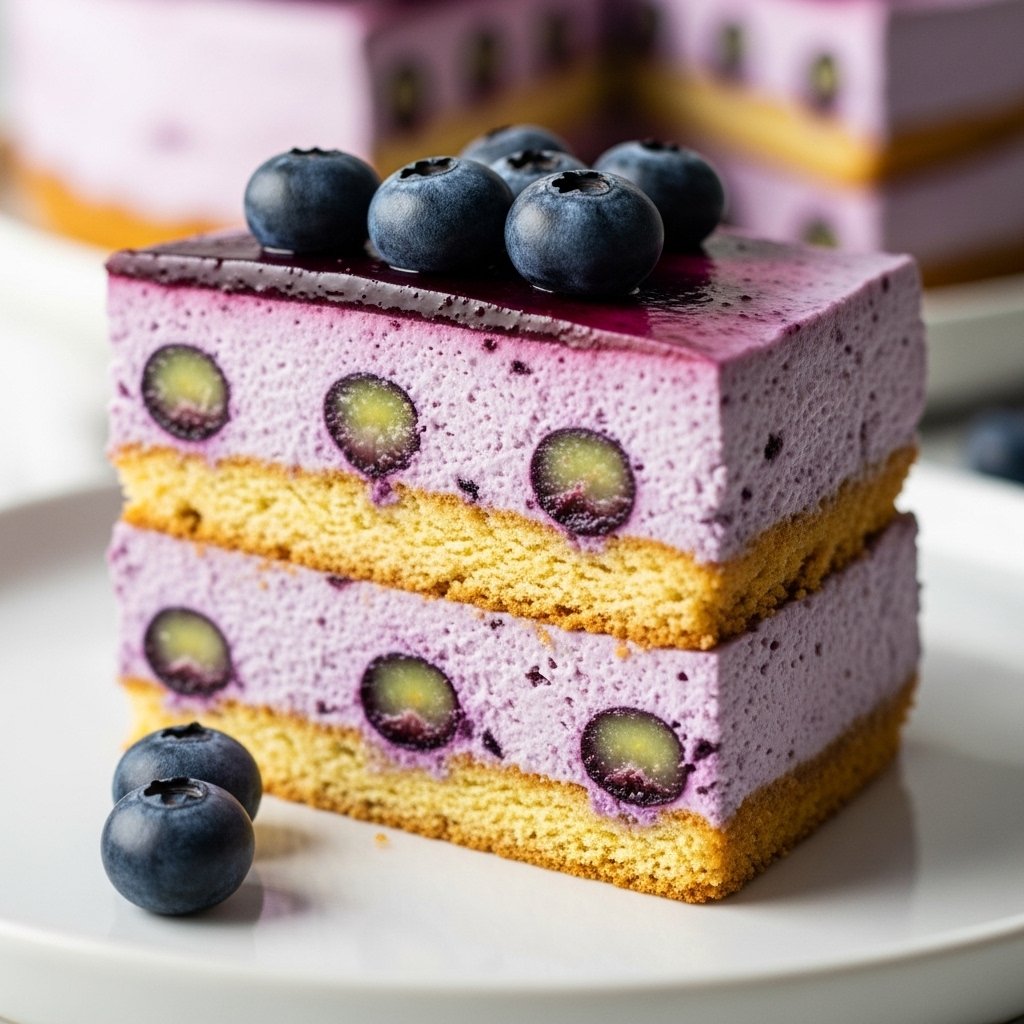
If you love the nostalgic taste of Cadbury Creme Eggs but want something a little more balanced for everyday snacking, these Cadbury Egg protein balls are about to become your new obsession. They have everything you crave in the classic candy: rich chocolate coating, a sweet creamy center, and that unmistakable dessert-like flavor—but in a bite-sized, protein-packed form you can enjoy any time.

These no-bake protein balls are ideal for meal prep, post-workout snacks, lunchbox treats, or healthier holiday desserts. They’re easy to make, require simple ingredients, and store beautifully in the fridge. Best of all, they taste indulgent enough to satisfy your sweet tooth without the sugar crash that usually follows candy.

Why You’ll Love These Cadbury Egg Protein Balls

These protein balls are a smart twist on a seasonal favorite.

What Makes This Recipe So Good

  • No baking required
  • High in protein
  • Easy to meal prep
  • Kid-friendly
  • Perfect for Easter or spring treats
  • Naturally portion-controlled

Unlike store-bought candy, these homemade protein balls let you control the sweetness, ingredients, and texture. You still get that rich chocolate satisfaction, but with more staying power.

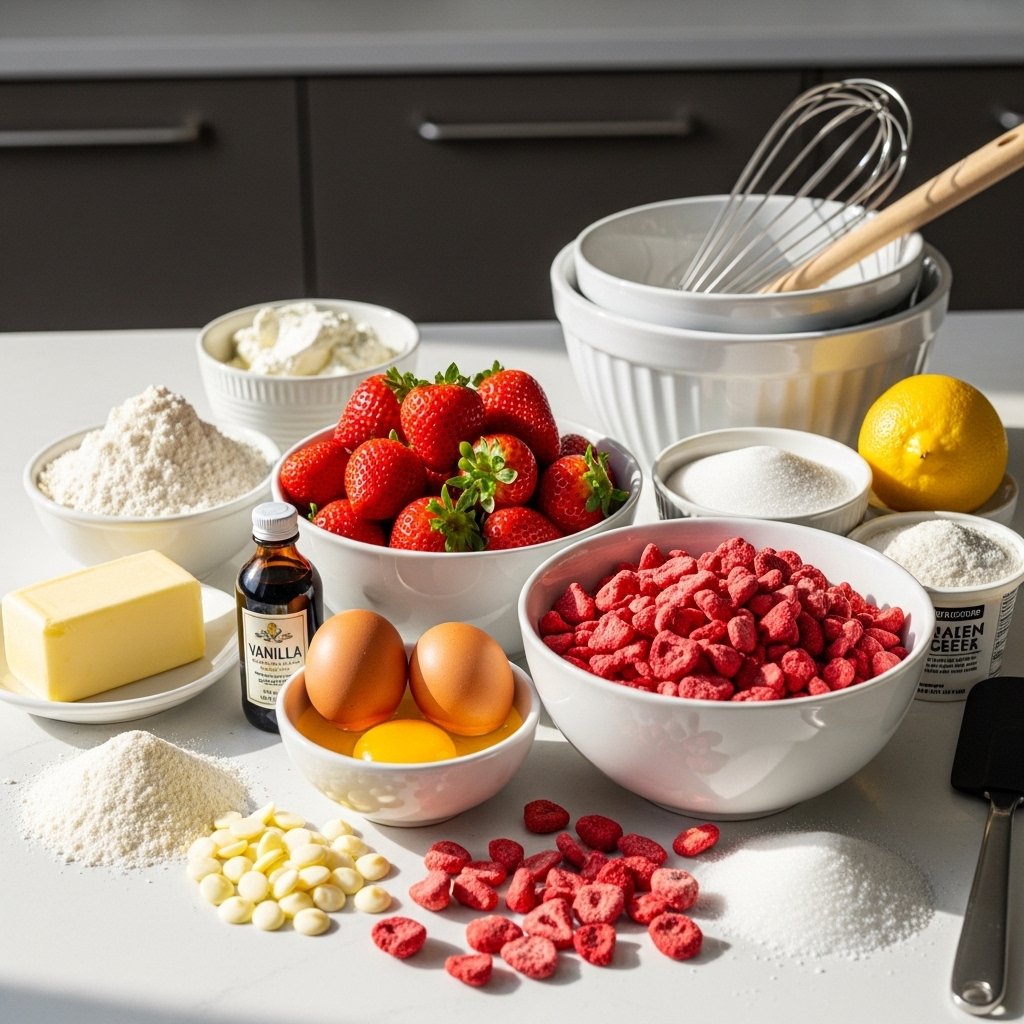
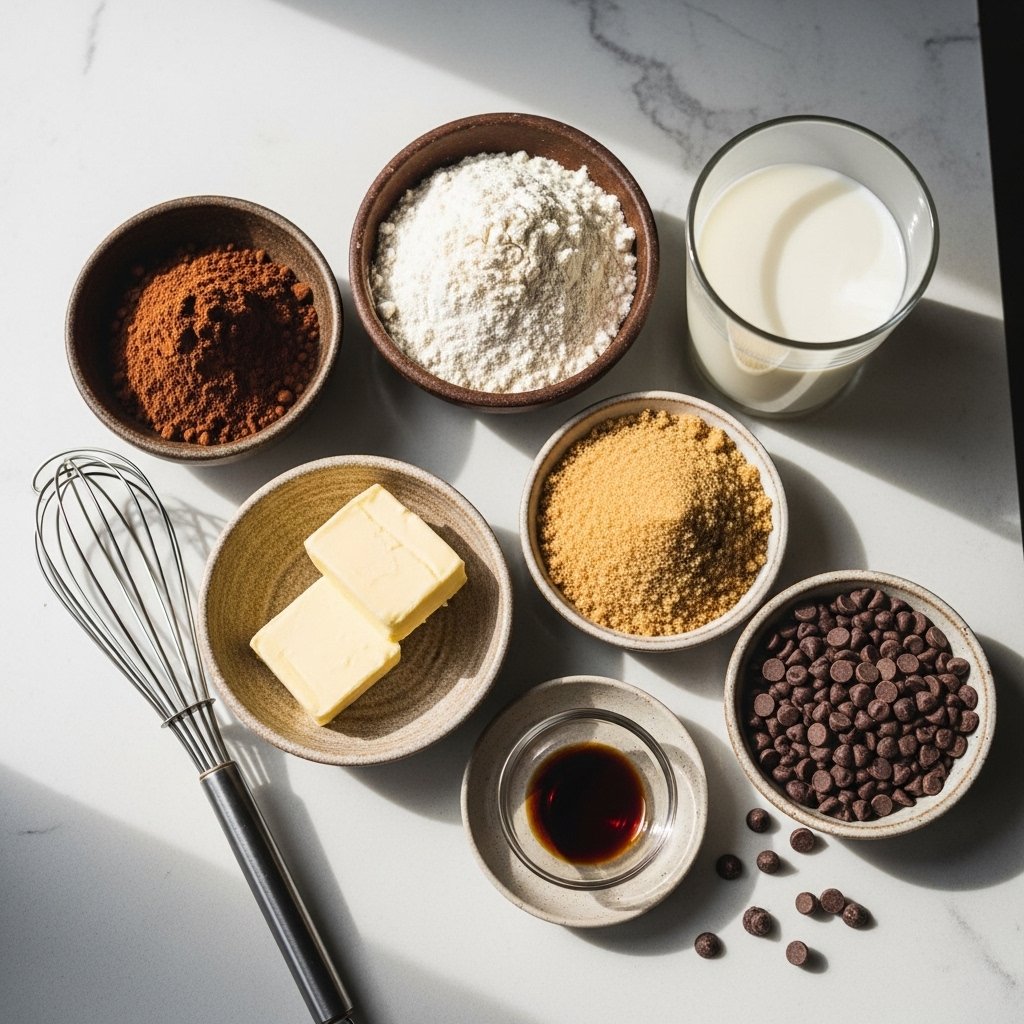
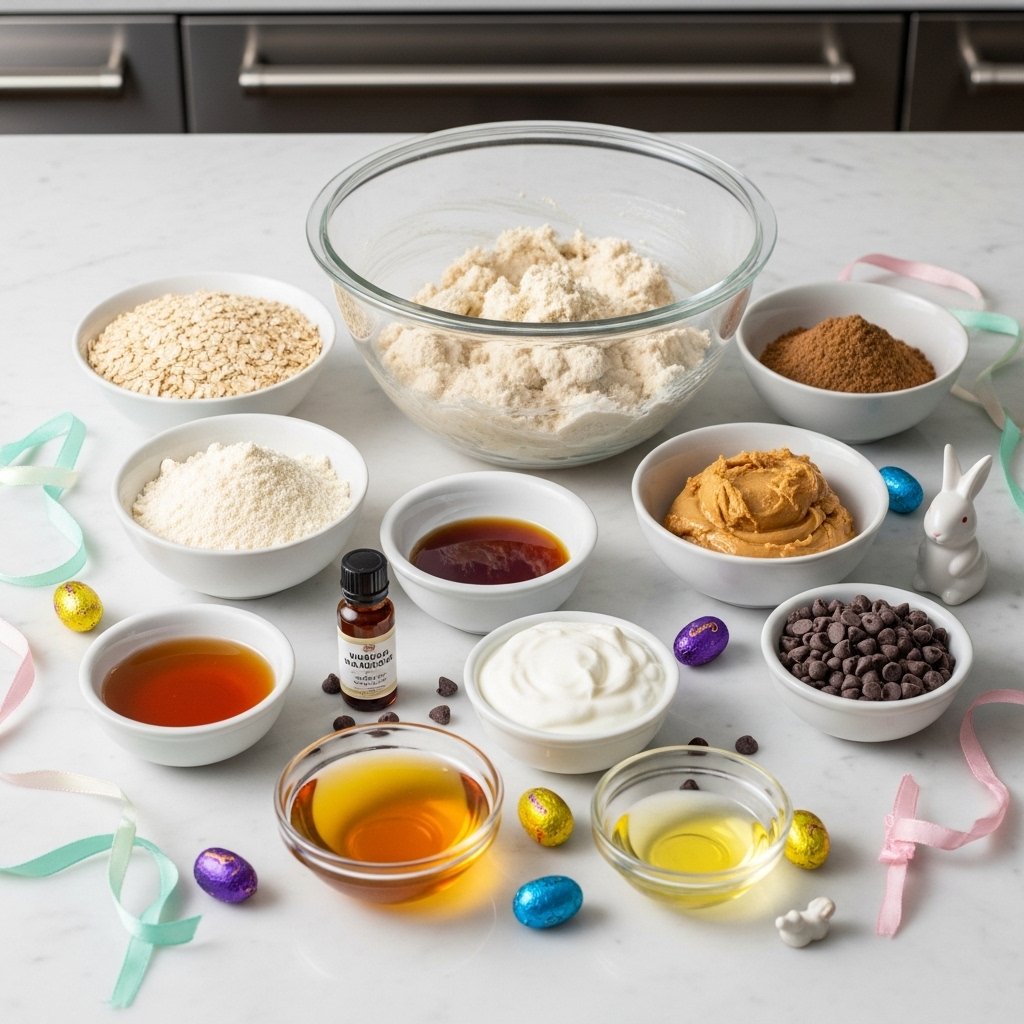
Ingredients for Cadbury Egg Protein Balls

To make these delicious no-bake bites, you’ll need:

For the Protein Ball Base

  • 1 cup rolled oats
  • 1/2 cup vanilla protein powder
  • 1/4 cup almond flour
  • 1/4 cup peanut butter or cashew butter
  • 2 tablespoons maple syrup or honey
  • 1 teaspoon vanilla extract
  • 2 to 3 tablespoons milk of choice

For the Creamy Center

  • 3 tablespoons Greek yogurt or cream cheese
  • 2 tablespoons powdered peanut butter or vanilla protein powder
  • 1 tablespoon honey
  • A few drops yellow natural food coloring (optional)

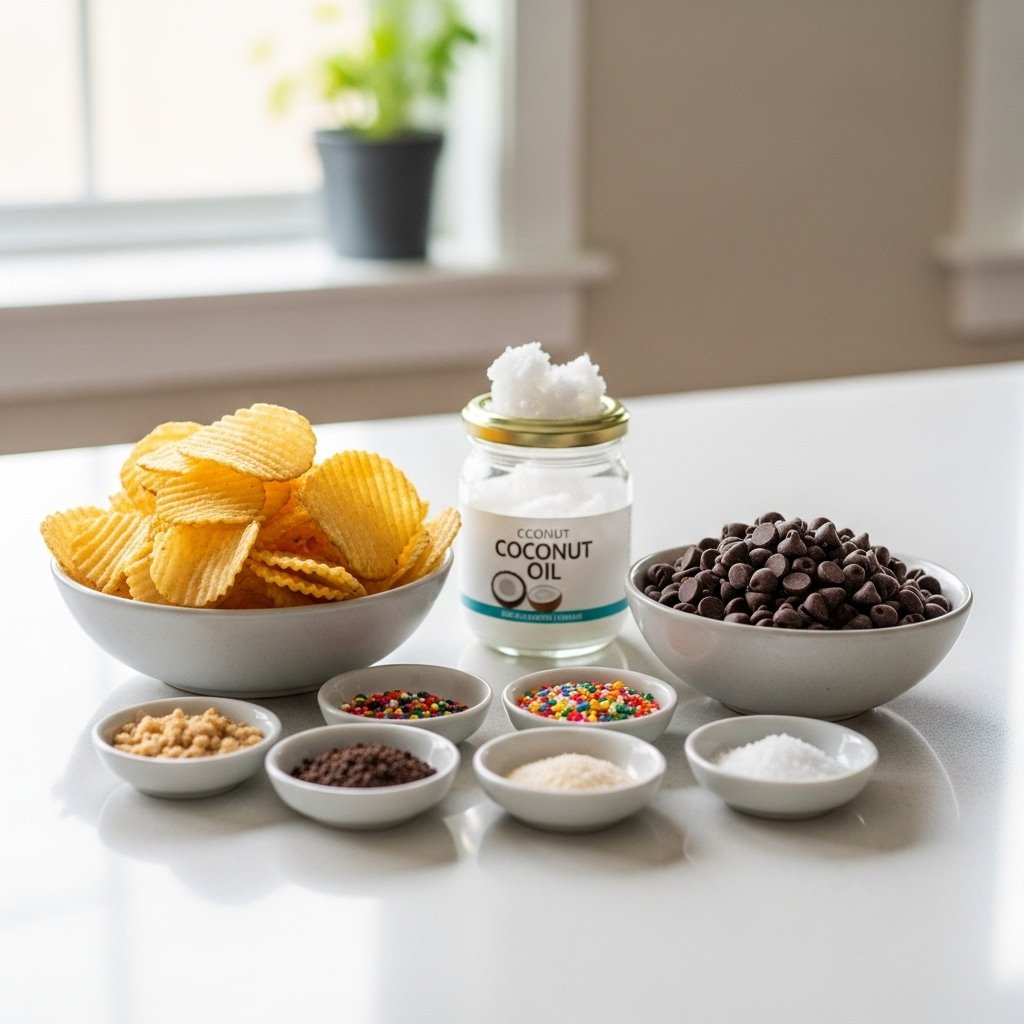
For the Chocolate Coating

  • 1 cup dark or semi-sweet chocolate chips
  • 1 teaspoon coconut oil

The combination of oats, nut butter, and protein powder creates a soft, truffle-like base that’s both filling and satisfying.

Ingredient Notes and Smart Swaps

Best Protein Powder to Use

A smooth vanilla protein powder works best because it complements the candy-inspired flavor. Whey, casein, or plant-based powders can all work, but textures may vary slightly.

Nut Butter Choices

Peanut butter adds richness, but you can also use:

  • Cashew butter for a milder taste
  • Almond butter for nuttiness
  • Sunflower seed butter for nut-free needs

Making the Cream Center Authentic

The creamy filling is what gives these protein balls their Cadbury Egg feel. Using Greek yogurt or a little cream cheese creates:

  • Smooth texture
  • Tangy balance
  • Better richness

A tiny drop of yellow coloring helps mimic the classic look.

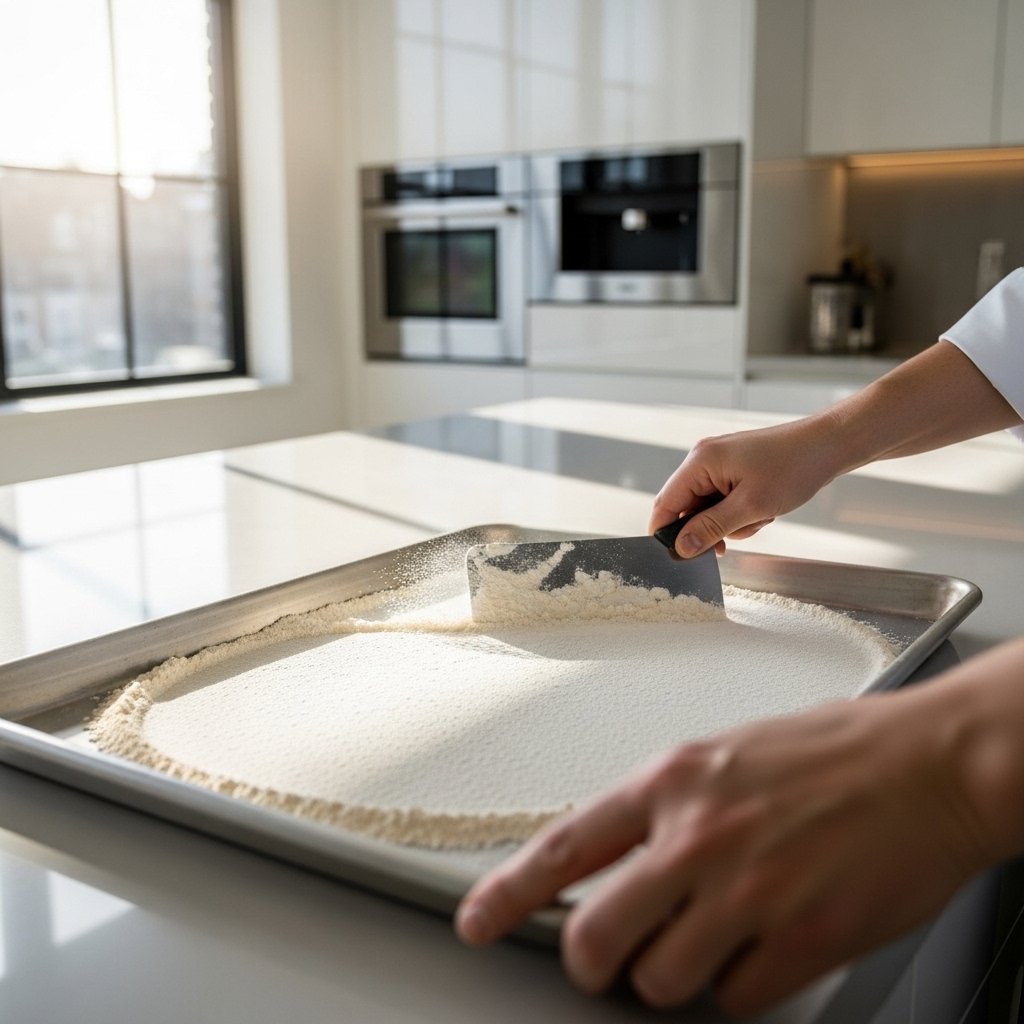
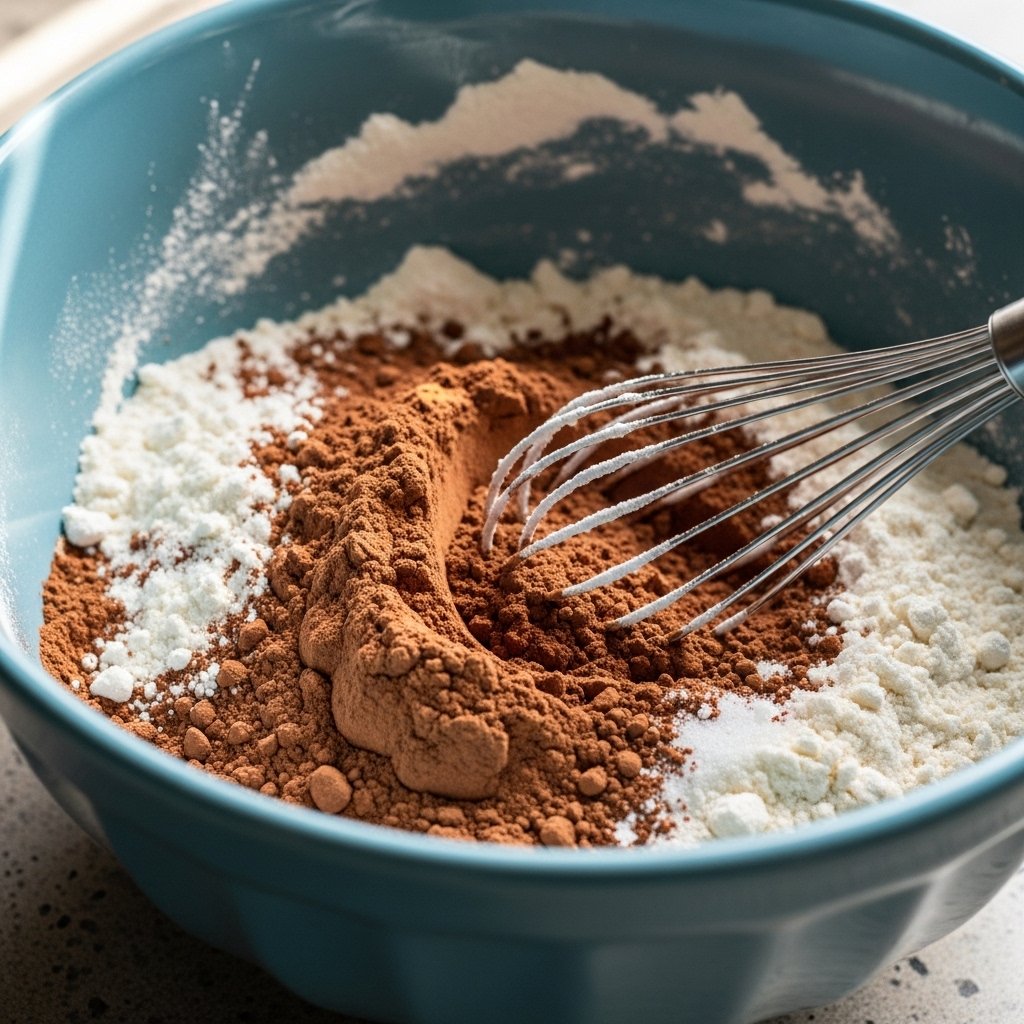
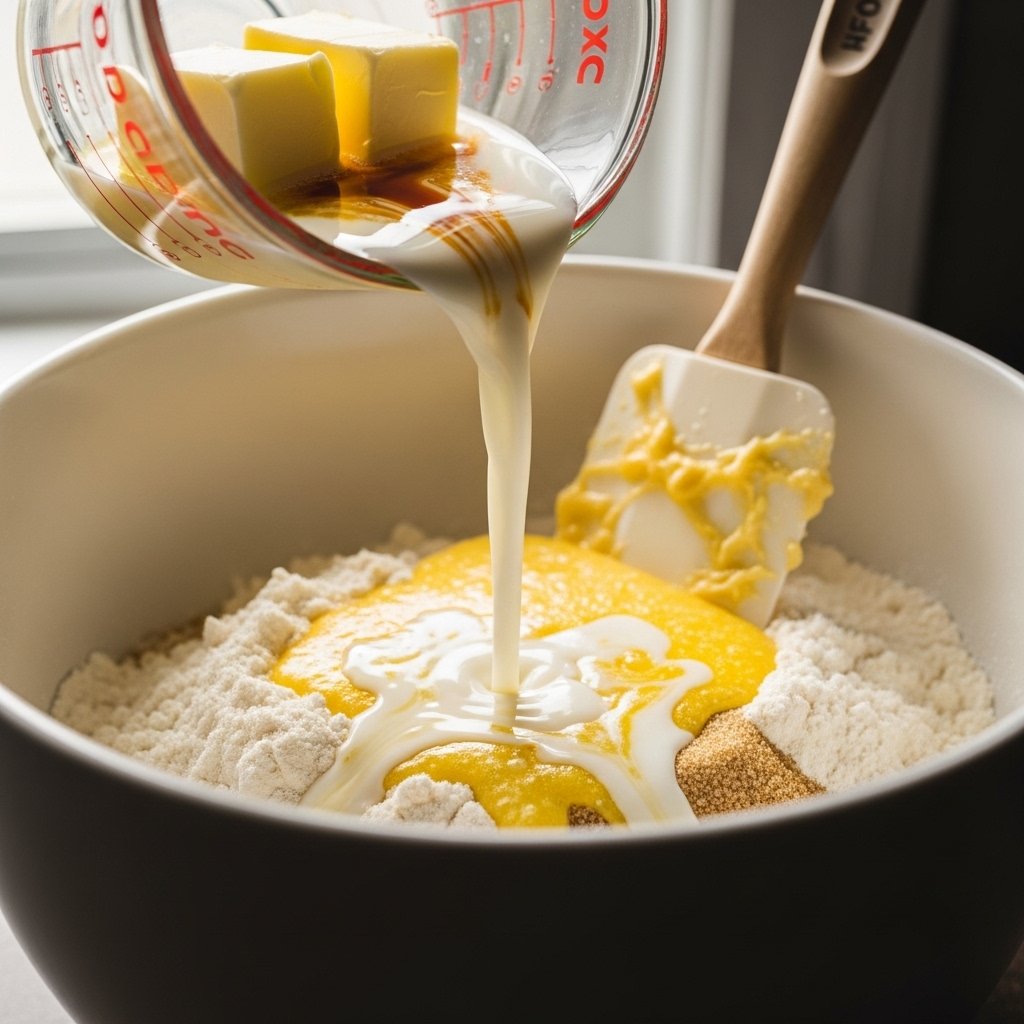
How to Make Cadbury Egg Protein Balls

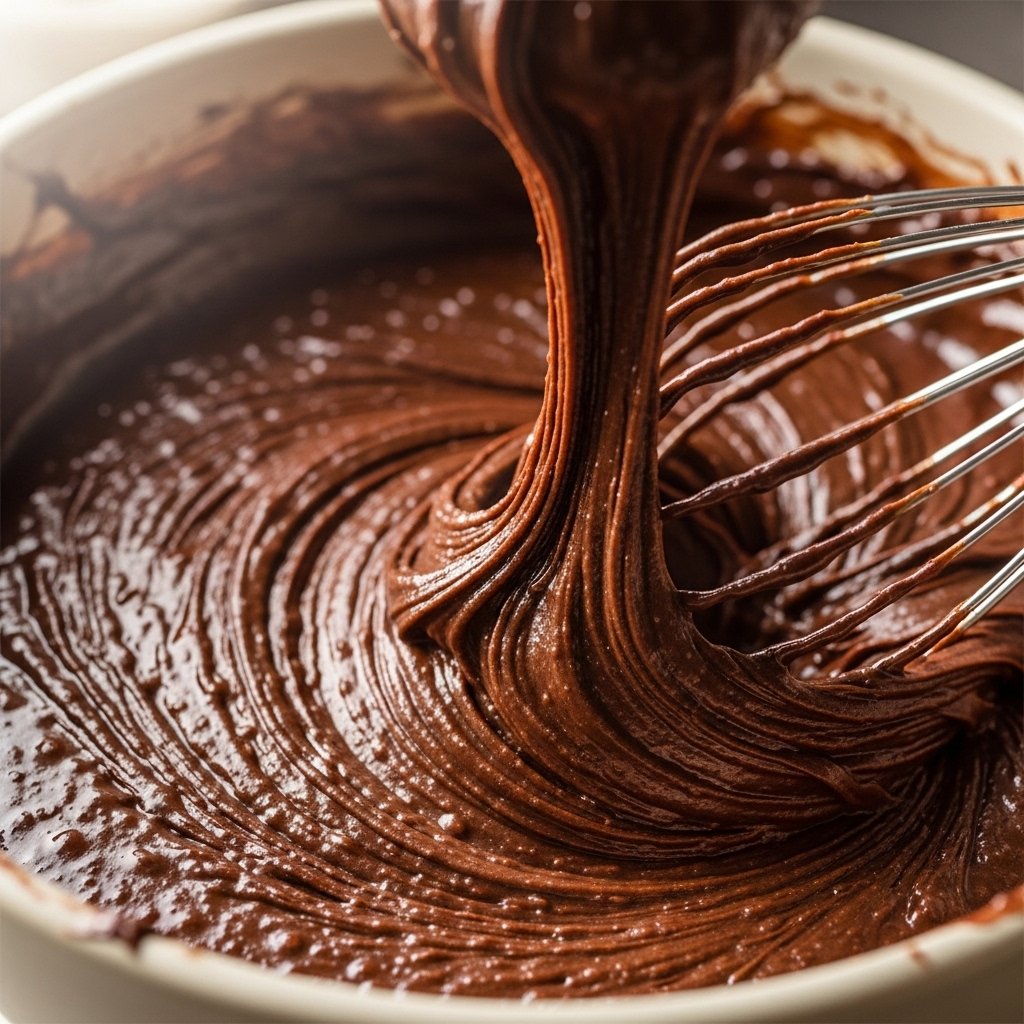
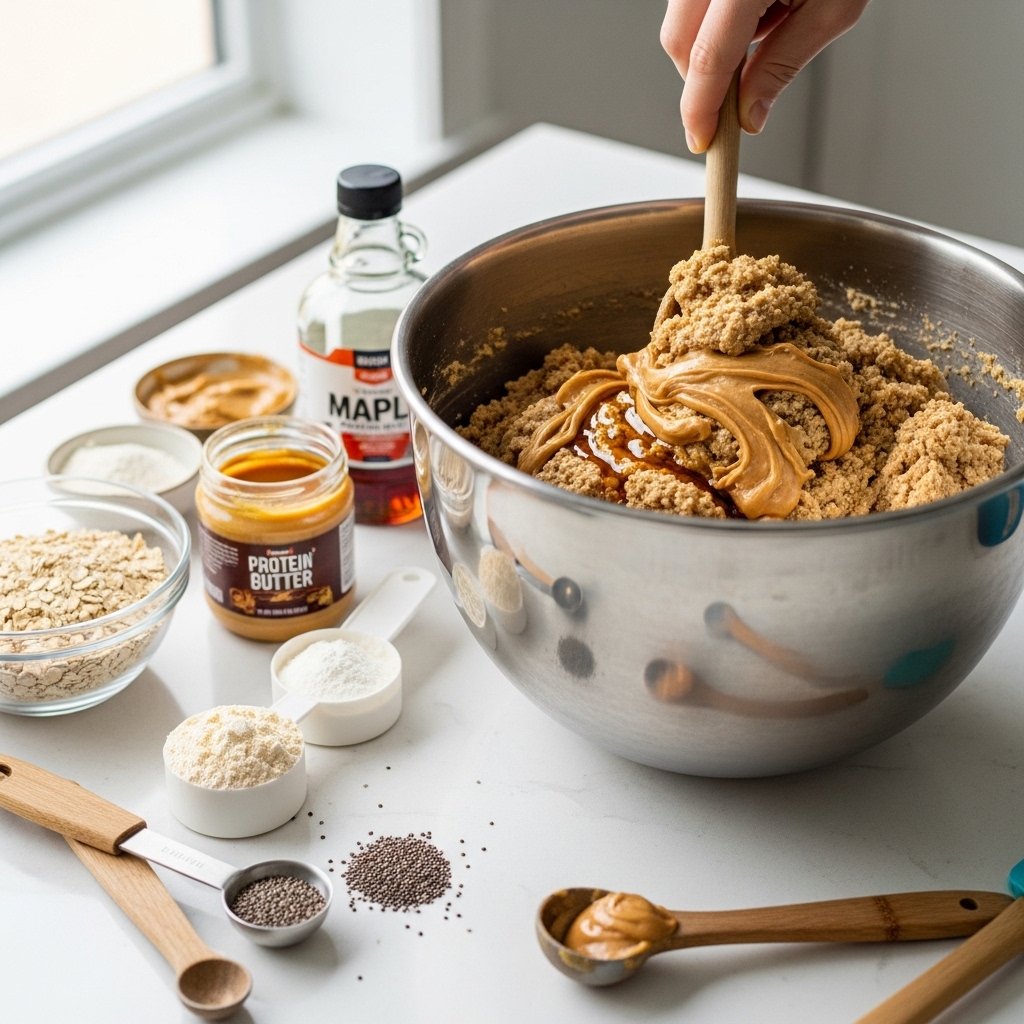
Step 1: Make the Protein Dough

In a large bowl, combine oats, protein powder, almond flour, peanut butter, maple syrup, and vanilla. Add milk gradually until the mixture comes together into a soft dough.

It should hold when pressed but not feel sticky.

If needed:

  • Add more oats if too wet
  • Add a splash more milk if too dry

Mixing by hand works well because you can better feel the texture.

Step 2: Prepare the Cream Filling

In a small bowl, mix Greek yogurt, powdered peanut butter, honey, and optional food coloring until smooth.

Chill for 10 to 15 minutes if it feels too soft.

The filling should be thick enough to scoop into small dollops.

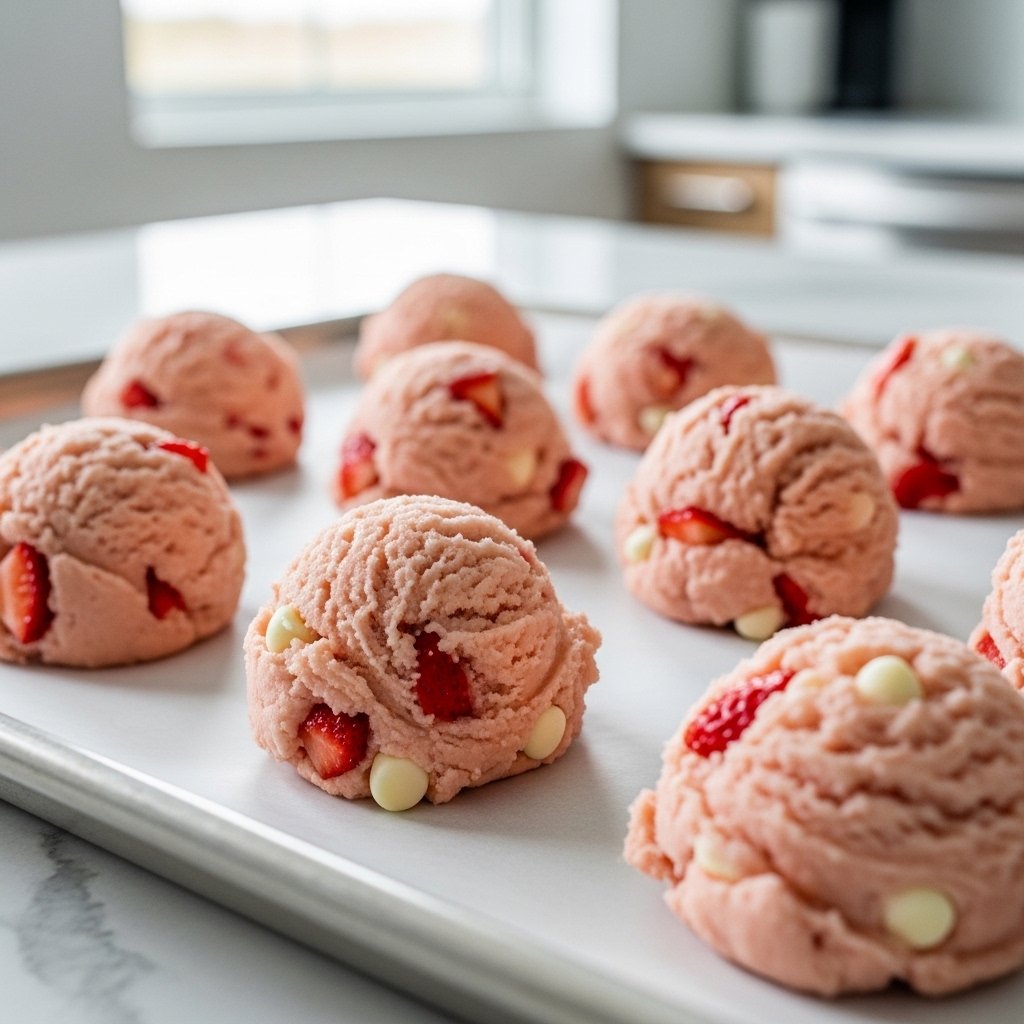
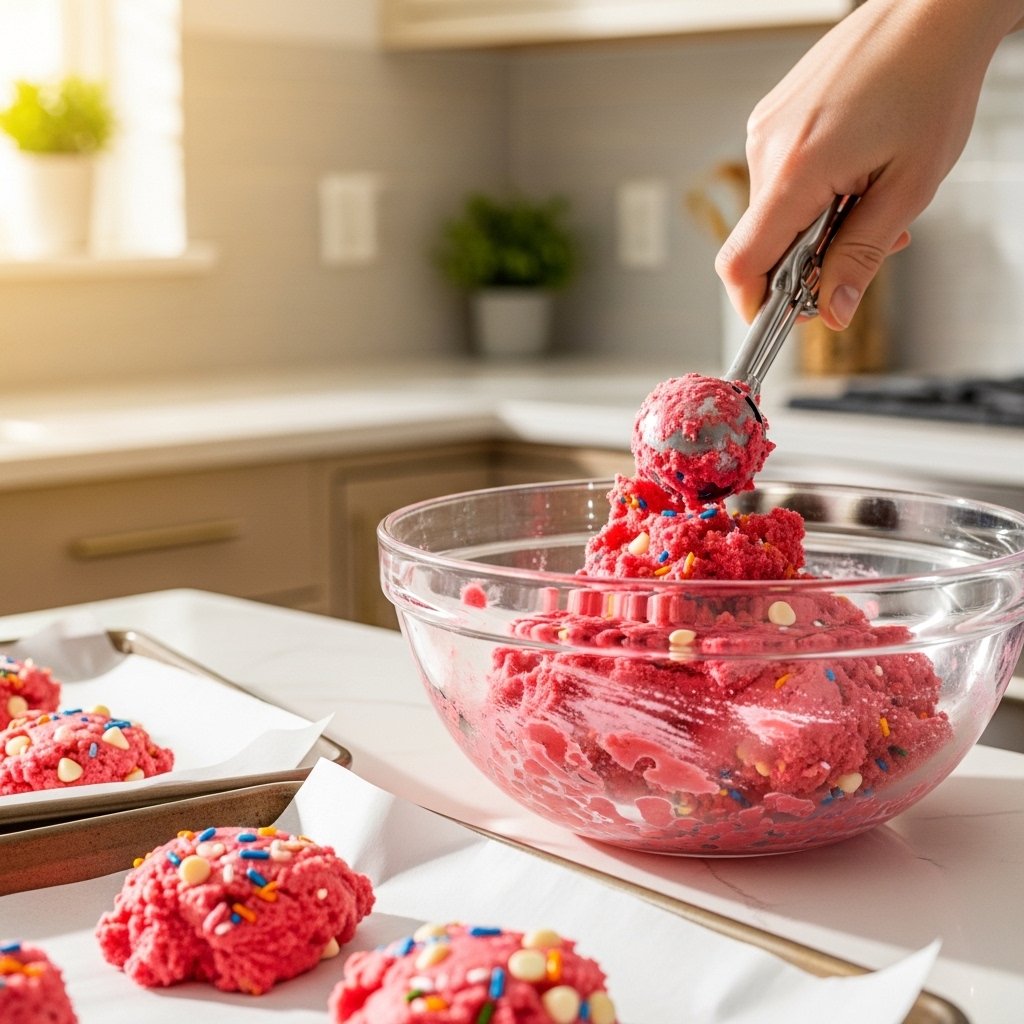
Step 3: Shape the Protein Balls

Scoop a small amount of protein dough and flatten it in your palm. Add a tiny bit of creamy filling to the center, then wrap the dough around it and roll into an egg or ball shape.

Repeat with the remaining mixture.

Place the shaped balls on a parchment-lined tray and chill for 20 to 30 minutes so they firm up before coating.

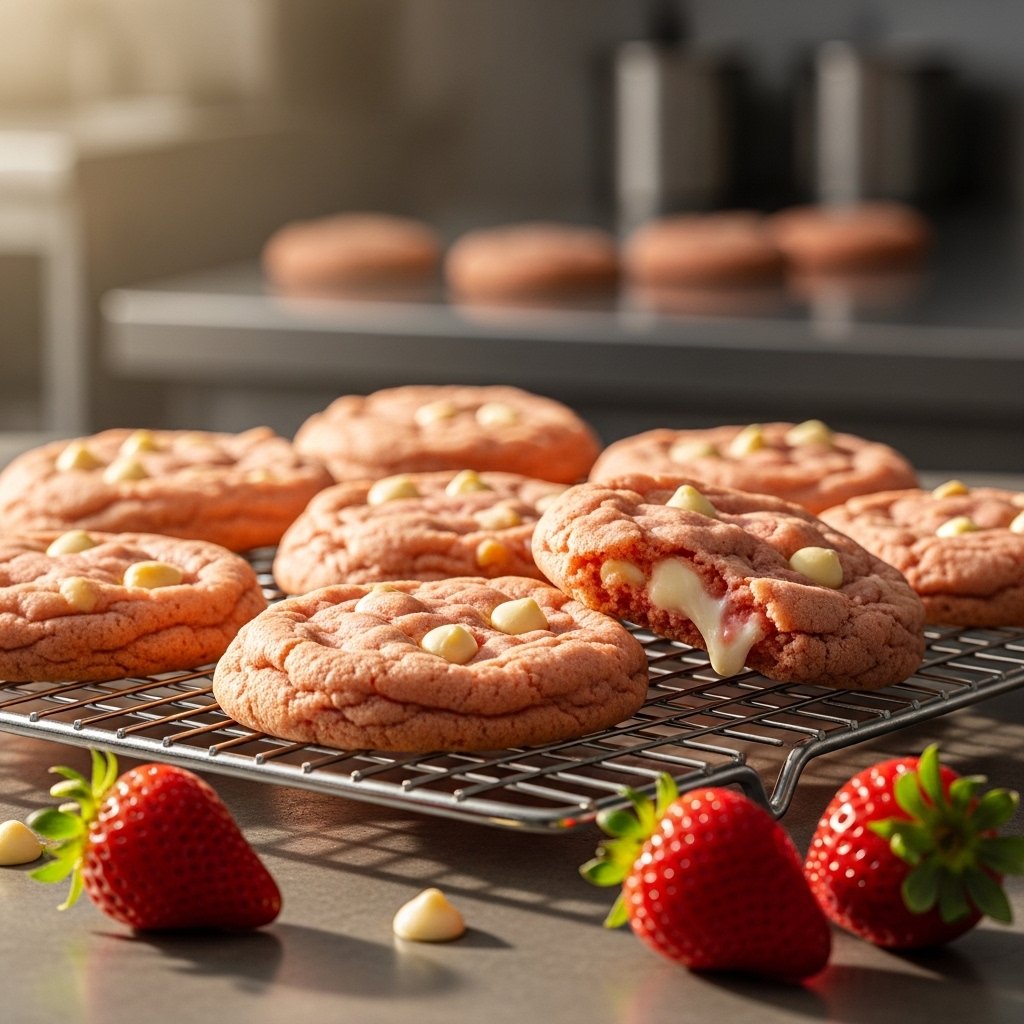
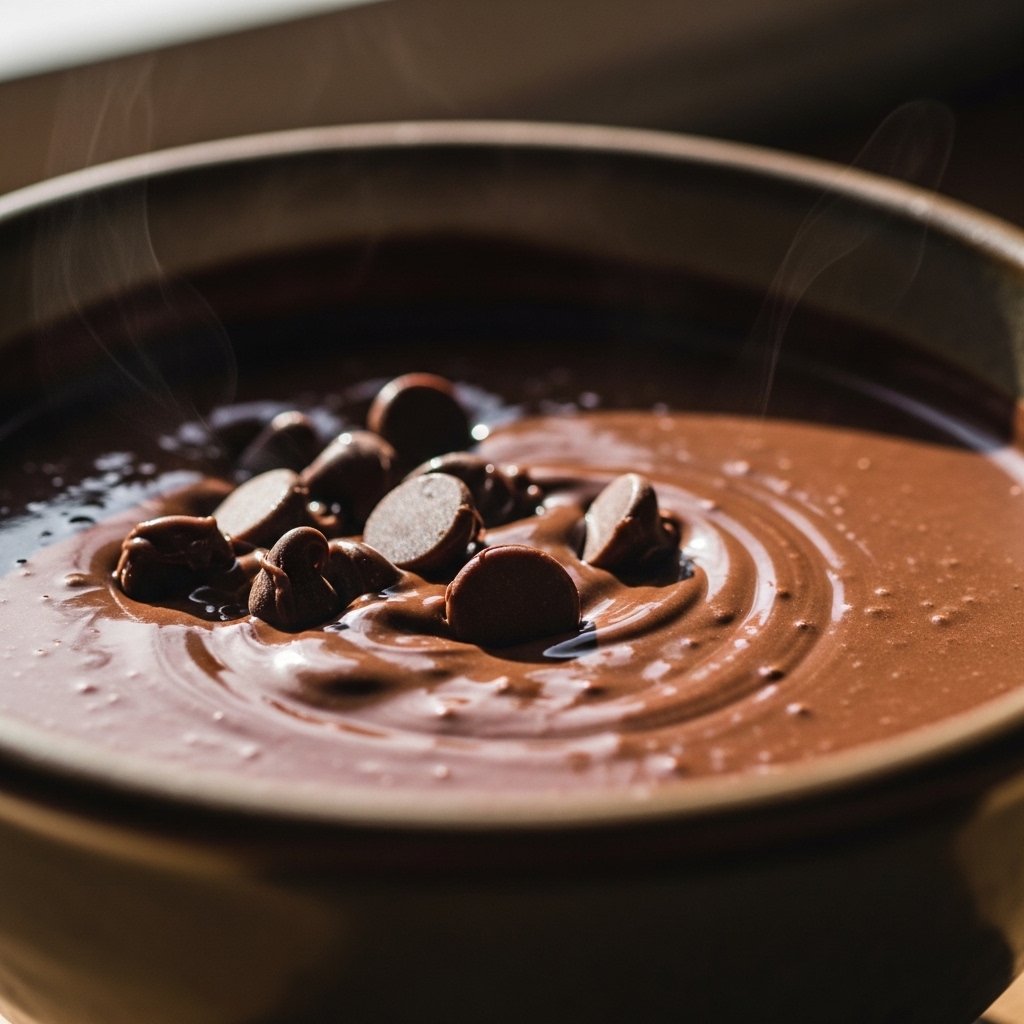
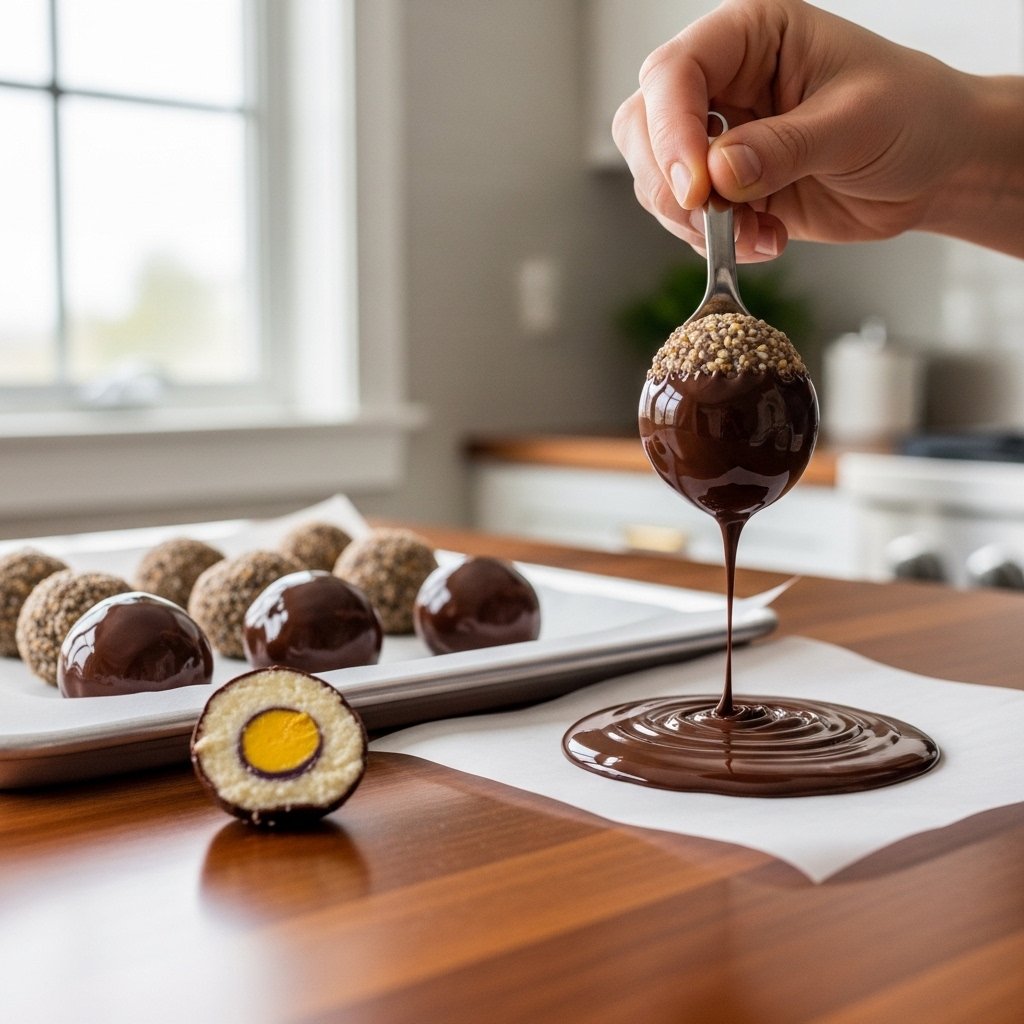
Step 4: Dip in Chocolate

Melt chocolate chips and coconut oil together until smooth. Using a fork or dipping tool, coat each chilled protein ball in chocolate.

Let excess chocolate drip off before returning to the tray.

Chill again until set.
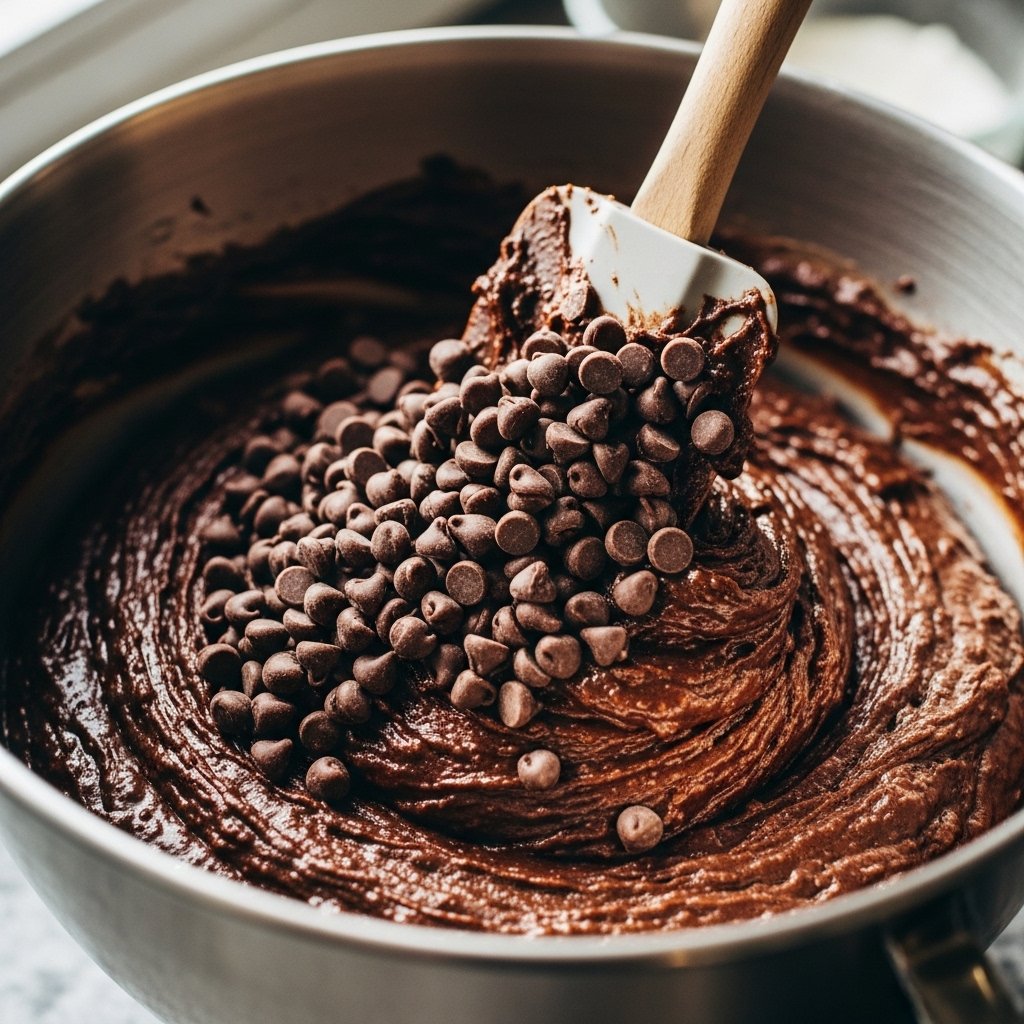
For extra fun:

  • Drizzle with white chocolate
  • Add pastel sprinkles
  • Decorate like mini Easter eggs

Tips for Perfect Protein Balls

To make the best Cadbury Egg protein balls every time, keep these tips in mind:

  • Chill dough if too soft before shaping
  • Don’t overfill centers
  • Use smooth protein powder for better texture
  • Chill before dipping in chocolate
  • Store cold for best consistency

Texture matters with no-bake recipes, so don’t rush the chilling steps.

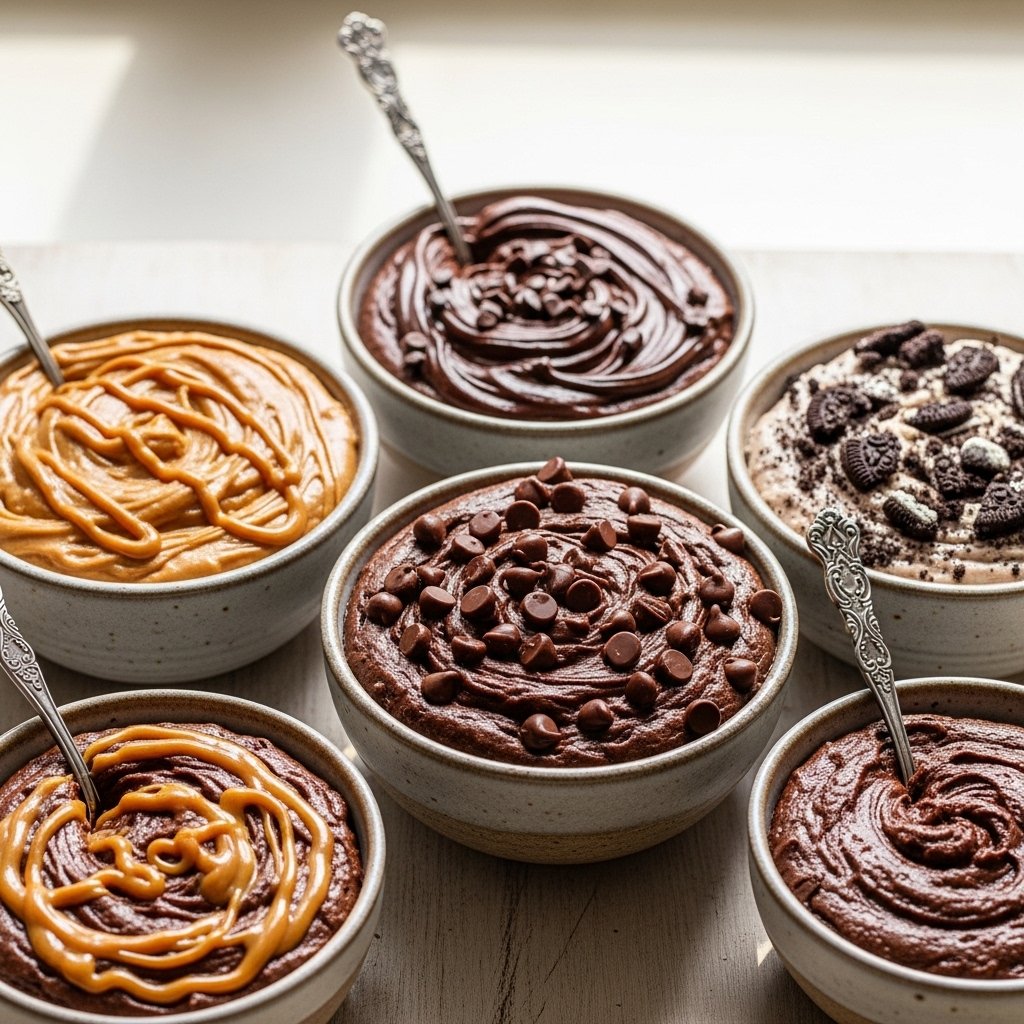
Variations and Flavor Ideas

These Cadbury Egg protein balls are easy to customize.

Fun Variations

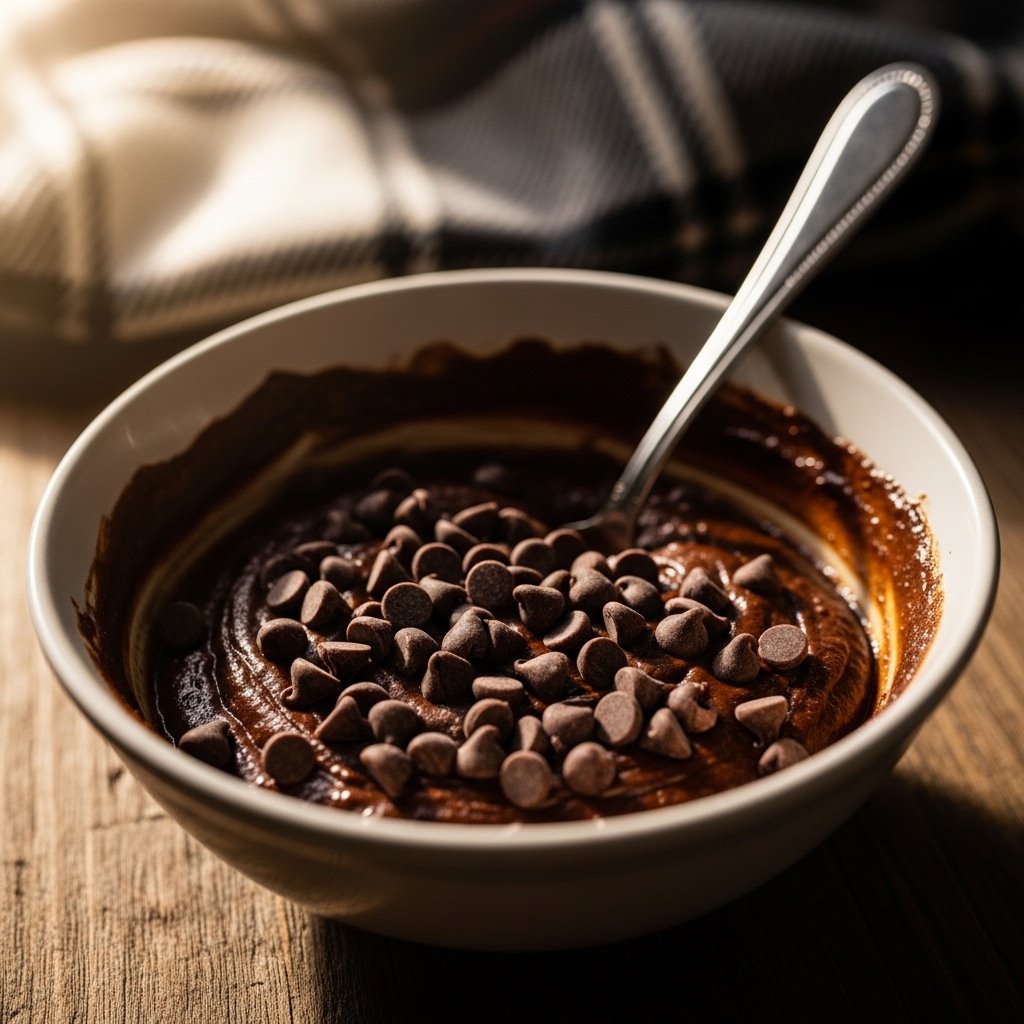
  • Use chocolate protein powder for richer flavor
  • Add crushed graham crackers for crunch
  • Mix in shredded coconut
  • Use white chocolate coating

Make Them More Festive

  • Add pastel drizzle
  • Use colored natural toppings
  • Shape into mini eggs instead of balls

These are great for Easter baskets or spring dessert boards.

What to Serve with Cadbury Egg Protein Balls

These no-bake treats pair well with:

  • Coffee or espresso
  • Protein smoothies
  • Fresh fruit
  • Greek yogurt bowls
  • Easter brunch spreads

They’re also perfect as:

  • Post-workout snacks
  • Midday sweet bites
  • Healthier dessert options

Storage Tips

These protein balls store beautifully.

Refrigerator

  • Store in an airtight container for up to 1 week

Freezer

  • Freeze for up to 2 months

Serve chilled for the best texture, especially if your filling is soft.

Common Mistakes to Avoid

To get the best Cadbury Egg protein balls, avoid these common issues:

  • Adding too much liquid to the dough
  • Skipping chill time
  • Overheating the chocolate
  • Making centers too runny
  • Using gritty protein powder

A little patience gives you a much smoother, better-tasting final result.

Frequently Asked Questions

Are Cadbury Egg protein balls healthy?

They’re a more balanced alternative to candy, with added protein and less sugar.

Can I make them dairy-free?

Yes. Use dairy-free yogurt and dairy-free chocolate.

Do I have to use protein powder?

No, but the texture and protein content will change. You can substitute oat flour or powdered peanut butter.

Can kids eat these?

Yes, they’re family-friendly and fun for spring treats.

How long do they last?

Up to 1 week in the fridge or 2 months frozen.

Final Thoughts

These Cadbury Egg protein balls are proof that healthier treats don’t have to taste boring. They’re creamy, chocolatey, satisfying, and fun enough to feel like a real dessert.

Whether you’re looking for a festive Easter snack, a protein-packed sweet treat, or a simple no-bake recipe to keep in your fridge, this recipe checks every box. Once you make a batch, don’t be surprised if they disappear faster than the real thing.

Stunning Strawberry Cookies: 5 Easy Recipes to Try Today!

If you love fruity desserts that feel fresh, colorful, and a little bit special, these stunning strawberry cookies deserve a spot in your baking rotation. Strawberry cookies bring together buttery richness, soft texture, and bright berry flavor in a way that feels both nostalgic and exciting. Whether you prefer chewy cookies, cake-like textures, sandwich styles, or quick no-fuss treats, there’s a version here for every craving.

This guide goes beyond a single recipe and gives you five easy strawberry cookie ideas that are approachable for beginners but delicious enough to impress guests. From classic soft-baked cookies to white chocolate strawberry delights, these recipes are perfect for spring gatherings, Valentine’s Day, baby showers, afternoon snacks, or simply using up fresh strawberries in a creative way.

Why Strawberry Cookies Are So Popular

Strawberry cookies are loved for more than just their flavor. They bring a bright, cheerful look to dessert tables and offer a refreshing change from heavier chocolate-based treats.

Why You’ll Love These Strawberry Cookie Recipes

  • Naturally sweet berry flavor
  • Beautiful pink and red tones
  • Great for spring and summer baking
  • Easy to customize
  • Perfect for gifting and parties
  • Kid-friendly and beginner-friendly

Strawberries pair beautifully with vanilla, lemon, white chocolate, and cream cheese, making them incredibly versatile in baking.

Essential Ingredients for the Best Strawberry Cookies

Across these five strawberry cookie recipes, you’ll use many of the same baking staples:

  • All-purpose flour
  • Unsalted butter
  • Granulated sugar
  • Brown sugar
  • Eggs
  • Vanilla extract
  • Baking powder or baking soda
  • Salt
  • Fresh strawberries or freeze-dried strawberries

Optional Add-Ins

  • White chocolate chips
  • Cream cheese
  • Lemon zest
  • Powdered sugar
  • Strawberry jam

Using quality ingredients matters, especially when working with fruit. Fresh strawberries add moisture and brightness, while freeze-dried strawberries provide concentrated flavor without making dough too wet.

Recipe 1: Classic Soft Strawberry Cookies

These soft strawberry cookies are tender, buttery, and lightly crisp at the edges.

How to Make Them

Start by creaming softened butter and sugar until light and fluffy. Add egg and vanilla, then mix in flour, baking powder, and a pinch of salt.

Fold in finely chopped fresh strawberries that have been patted dry. Scoop onto a lined baking sheet and bake at 350°F for 10 to 12 minutes.

The result is a soft cookie with juicy berry pockets and a delicate homemade feel.

Recipe 2: Strawberry White Chocolate Chip Cookies

If you love rich bakery-style cookies, this version is especially satisfying.

The creamy sweetness of white chocolate balances strawberries beautifully. Use freeze-dried strawberry powder in the dough for concentrated flavor and fold in white chocolate chips.

Bake until the edges are lightly golden and the centers stay soft.

These cookies feel luxurious and are ideal for gifting.

Recipe 3: Strawberry Shortcake Sandwich Cookies

These are playful and elegant, perfect for special occasions.

Bake two small soft vanilla-strawberry cookies and sandwich them with whipped cream cheese frosting or strawberry buttercream.

For extra flair:

  • Roll edges in crushed freeze-dried strawberries
  • Dust with powdered sugar
  • Add a small strawberry slice garnish

These look beautiful on dessert tables and make wonderful party treats.

Recipe 4: Lemon Strawberry Sugar Cookies

Lemon and strawberry are a naturally bright pairing.

Add fresh lemon zest and a little lemon juice to your sugar cookie dough, then fold in strawberry pieces or freeze-dried strawberries.

The citrus lifts the berry flavor and keeps the cookies tasting fresh rather than overly sweet.

These are perfect for spring brunches, tea parties, or baby showers.

Recipe 5: Easy Strawberry Cake Mix Cookies

For the easiest version, strawberry cake mix cookies are a lifesaver.

Simply combine:

  • 1 box strawberry cake mix
  • 2 eggs
  • 1/3 cup oil

Mix, scoop, and bake. You can add white chocolate chips, sprinkles, or cream cheese filling.

These cookies are:

  • Quick
  • Soft
  • Great for beginners
  • Perfect for last-minute desserts

They’re also a fun recipe to make with kids.

Tips for Perfect Strawberry Cookies Every Time

Working with strawberries in cookies requires a few smart adjustments.

Helpful Baking Tips

  • Pat fresh strawberries dry before adding
  • Don’t overmix the dough
  • Chill sticky dough before baking
  • Use parchment paper for even baking
  • Let cookies cool before storing

Strawberries add moisture, so balancing wet and dry ingredients is essential for great texture.

Best Ways to Serve Strawberry Cookies

These cookies are wonderful on their own, but even better with:

  • Iced coffee or tea
  • Milk
  • Vanilla ice cream
  • Fresh fruit platters
  • Dessert charcuterie boards

They’re also perfect for:

  • Baby showers
  • Spring parties
  • Valentine’s Day boxes
  • Picnic desserts

Storage and Make-Ahead Tips

To keep strawberry cookies tasting fresh:

Storage

  • Store in an airtight container for 3 to 5 days

Freezing

  • Freeze baked cookies for up to 2 months
  • Freeze dough balls and bake fresh later

Use parchment between layers to prevent sticking.

Common Mistakes to Avoid

To make the best strawberry cookies, avoid these issues:

  • Using overly wet strawberries
  • Overbaking
  • Using warm butter incorrectly
  • Skipping dough chill time when needed
  • Storing while still warm

Paying attention to moisture control is the biggest secret to success.

Frequently Asked Questions

Can I use fresh strawberries in cookies?

Yes, but pat them dry first to reduce excess moisture.

Are freeze-dried strawberries better for cookies?

For stronger flavor and better texture control, yes—they’re often ideal.

Can I freeze strawberry cookies?

Absolutely. Both baked cookies and dough freeze well.

How do I keep strawberry cookies soft?

Store them airtight and avoid overbaking.

What pairs well with strawberry cookies?

White chocolate, lemon, vanilla, and cream cheese all pair beautifully.

Final Thoughts

These stunning strawberry cookies prove that fruity desserts can be just as crave-worthy as classic chocolate chip cookies. With five easy recipes to choose from, you can bake soft everyday treats, elegant party cookies, or quick last-minute sweets depending on the occasion.

Whether you’re baking for guests, gifting homemade treats, or simply enjoying a cozy afternoon in the kitchen, strawberry cookies bring freshness, beauty, and delicious flavor to every batch. Once you start experimenting with these berry-filled ideas, you’ll want to make them all year long.

Bright and Tangy Mini Lemon Blueberry Cheesecakes: The Perfect Light and Fresh Treat

If you’re looking for a dessert that feels elegant, refreshing, and perfectly portioned, these mini lemon blueberry cheesecakes are a beautiful choice. They combine everything people love about cheesecake—creamy texture, buttery crust, and rich flavor—with the bright freshness of lemon and the natural sweetness of blueberries. The result is a dessert that feels indulgent without being too heavy.

These mini cheesecakes are ideal for spring and summer gatherings, baby showers, brunches, birthdays, or anytime you want a dessert that looks impressive but is easy to make ahead. Their individual size makes serving simple, and the lemon-blueberry combination is timeless. Every bite is smooth, tangy, sweet, and bursting with flavor.

Why You’ll Love These Mini Lemon Blueberry Cheesecakes

These cheesecakes are more than just pretty—they’re practical and incredibly delicious.

Why This Recipe Works

  • Perfect individual portions
  • Creamy and smooth texture
  • Bright lemon flavor
  • Fresh blueberries in every bite
  • Great make-ahead dessert
  • Beautiful presentation for parties

Unlike full-sized cheesecakes, mini cheesecakes bake faster, chill faster, and are easier to serve. They’re also less intimidating for beginner bakers.

Ingredients for Mini Lemon Blueberry Cheesecakes

Here’s everything you’ll need to make these mini lemon blueberry cheesecakes:

For the Crust

  • 1 cup graham cracker crumbs
  • 3 tablespoons melted butter
  • 2 tablespoons granulated sugar

For the Cheesecake Filling

  • 16 ounces cream cheese, softened
  • 1/2 cup granulated sugar
  • 2 large eggs
  • 1/3 cup sour cream
  • 2 tablespoons fresh lemon juice
  • 1 tablespoon lemon zest
  • 1 teaspoon vanilla extract
  • 1 cup fresh blueberries

Optional Toppings

  • Extra blueberries
  • Lemon zest curls
  • Whipped cream
  • Blueberry compote

Fresh lemon juice and zest are essential here because they give the cheesecakes their signature bright, tangy flavor.

Ingredient Notes and Baking Tips

Best Cream Cheese for Smooth Cheesecake

Use full-fat block cream cheese for the richest texture. Avoid whipped or spreadable cream cheese, which can affect consistency.

Why Fresh Lemon Makes a Difference

Fresh lemon adds:

  • Natural citrus brightness
  • Better aroma
  • More balanced tang

Bottled juice won’t give the same clean flavor.

Blueberry Tips

Fresh blueberries work best because they hold their shape while baking. If using frozen berries:

  • Do not thaw first
  • Toss lightly in flour to reduce sinking

How to Make Mini Lemon Blueberry Cheesecakes

Step 1: Prepare the Crust

Preheat your oven to 325°F. Line a standard muffin tin with cupcake liners.

In a small bowl, combine graham cracker crumbs, melted butter, and sugar. Mix until evenly moistened.

Spoon the crumb mixture into each liner and press firmly into the bottom to form the crust.

Bake for 5 minutes, then let cool slightly.

Step 2: Make the Cheesecake Filling

In a large bowl, beat softened cream cheese until smooth and creamy. Add sugar and mix until fully combined.

Add eggs one at a time, mixing gently after each addition. Then add sour cream, lemon juice, lemon zest, and vanilla.

Mix just until smooth—avoid overbeating, which can add too much air and cause cracking.

Fold in most of the blueberries, reserving a few for topping.

The batter should be silky and thick.

Step 3: Fill and Bake

Divide the cheesecake filling evenly over the crusts, filling each liner nearly full.

Top with a few reserved blueberries.

Bake for 18 to 22 minutes, or until the centers are just set with a slight jiggle.

Turn off the oven, crack the door slightly, and let them cool gradually for 10 minutes.

This helps prevent cracking and keeps the texture creamy.

Step 4: Chill and Decorate

Cool completely at room temperature, then refrigerate for at least 3 hours or overnight.

Before serving, top with:

  • fresh blueberries
  • lemon zest
  • whipped cream if desired

Chilling fully is essential for the best cheesecake texture and flavor.

Tips for Perfect Mini Lemon Blueberry Cheesecakes

For bakery-style mini cheesecakes, keep these tips in mind:

  • Use room temperature ingredients
  • Don’t overmix the batter
  • Bake just until set
  • Cool gradually
  • Chill thoroughly before serving
  • Use cupcake liners for easy removal

These small details help ensure a creamy, crack-free finish.

Delicious Variations to Try

This mini lemon blueberry cheesecake recipe is wonderfully versatile.

Flavor Variations

  • Swap blueberries for raspberries
  • Add a blueberry swirl
  • Use vanilla wafer crust instead of graham cracker
  • Add white chocolate chips

Seasonal Twists

  • Add fresh strawberries in spring
  • Use cranberry topping for winter holidays

This dessert adapts beautifully to different occasions.

What to Serve with Mini Lemon Blueberry Cheesecakes

These cheesecakes pair beautifully with:

  • Iced tea
  • Sparkling lemonade
  • Coffee
  • Fresh fruit platters
  • Light brunch spreads

They’re especially lovely for showers, brunches, and tea parties.

Storage and Make-Ahead Tips

Mini lemon blueberry cheesecakes are ideal for making ahead.

Storage

  • Refrigerate in an airtight container for up to 5 days

Freezing

  • Freeze (without toppings) for up to 2 months
  • Thaw overnight in the fridge before serving

Store toppings separately for the freshest presentation.

Common Mistakes to Avoid

To get the best mini lemon blueberry cheesecakes, avoid these common issues:

  • Using cold cream cheese
  • Overmixing batter
  • Overbaking
  • Skipping chill time
  • Using too much lemon juice

Careful prep and patience are the secrets to perfect texture.

Frequently Asked Questions

Can I make mini lemon blueberry cheesecakes ahead of time?

Yes. They’re even better after chilling overnight.

Can I use frozen blueberries?

Yes. Add them frozen and toss lightly in flour first.

How do I know when mini cheesecakes are done?

The edges should be set, with a slight jiggle in the center.

Can I freeze mini cheesecakes?

Absolutely. Freeze before adding fresh toppings.

Why did my cheesecakes crack?

Usually from overmixing, overbaking, or cooling too quickly.

Final Thoughts

These bright and tangy mini lemon blueberry cheesecakes are the kind of dessert that feels special without being complicated. They’re creamy, fresh, beautifully balanced, and always impressive on the table.

Whether you’re baking for a celebration, preparing a make-ahead dessert for guests, or simply treating yourself to something sweet and citrusy, this recipe is one you’ll want to keep in your collection. Once you taste that silky lemon filling with bursts of juicy blueberry, you’ll understand why this dessert is such a standout favorite.

Chocolate-Dipped Strawberries on Skewers: The Perfect Easy Party Treat

Few desserts feel as effortlessly elegant as chocolate-dipped strawberries on skewers. They’re fresh, juicy, beautifully presented, and surprisingly easy to make at home. Whether you’re planning a romantic dessert platter, a baby shower spread, a summer barbecue, or a festive holiday tray, these strawberry skewers deliver a perfect mix of freshness and indulgence.

What makes this recipe especially fun is the presentation. Sliding strawberries onto skewers turns a classic chocolate-covered fruit into a playful, handheld treat that’s easier to serve and even more eye-catching. The skewers also make decorating simpler, giving you more control while dipping and drizzling. Best of all, this no-bake dessert comes together quickly with just a few ingredients.

Why You’ll Love Chocolate-Dipped Strawberries on Skewers

This easy dessert recipe checks all the boxes for flavor, beauty, and convenience.

Why This Recipe Works

  • No baking required
  • Ready in under 30 minutes
  • Perfect for parties and entertaining
  • Easy to customize with toppings
  • Kid-friendly and fun to make
  • Great for holidays, showers, and gifts

Because the strawberries stay fresh and juicy inside while the chocolate shell hardens on the outside, every bite offers the perfect contrast of texture and flavor.

Ingredients for Chocolate-Dipped Strawberries on Skewers

To make this simple dessert, you’ll need:

  • 1 pound fresh strawberries (large, firm berries)
  • 8 to 10 wooden skewers
  • 8 ounces semi-sweet chocolate, chopped or chips
  • 4 ounces white chocolate (optional for drizzle)
  • 1 teaspoon coconut oil or vegetable oil (optional, for smoother melting)

Optional Toppings

  • Crushed pistachios
  • Sprinkles
  • Toasted coconut
  • Crushed cookies
  • Mini chocolate chips

Choosing ripe but firm strawberries is important. Soft berries can release moisture and make the chocolate slide off.

Ingredient Notes for the Best Results

How to Choose the Best Strawberries

Look for strawberries that are:

  • Bright red
  • Firm to the touch
  • Dry on the outside
  • Similar in size for even presentation

Larger strawberries work especially well because they’re easier to skewer and dip.

Best Chocolate for Dipping

Use good-quality chocolate for the smoothest finish and best flavor. Baking bars often melt better than standard chips.

Great options include:

  • Semi-sweet chocolate for balance
  • Dark chocolate for richness
  • Milk chocolate for sweeter flavor

Adding a small amount of oil helps create a silky coating and glossy finish.

How to Make Chocolate-Dipped Strawberries on Skewers

Step 1: Wash and Dry the Strawberries

Rinse the strawberries gently under cool water, then dry them thoroughly with paper towels. Let them air dry for a few extra minutes if needed.

This step is essential because water causes melted chocolate to seize or slide off.

Thread 3 to 4 strawberries onto each skewer, leaving space at the ends for easy handling.

Step 2: Melt the Chocolate

Place the semi-sweet chocolate in a microwave-safe bowl. Heat in 20-second intervals, stirring between each round until smooth and glossy.

If using, stir in coconut oil for a silkier consistency.

You can also use a double boiler if you prefer more control over the melting process.

Step 3: Dip the Strawberry Skewers

Hold each skewer by the end and dip the strawberries into the melted chocolate, turning gently to coat as much or as little as you like.

Let excess chocolate drip off before placing the skewers on a parchment-lined tray.

For best presentation, keep the coating smooth and even.

Step 4: Decorate and Set

If using white chocolate, melt it separately and drizzle over the dipped skewers using a spoon or piping bag.

Immediately add toppings before the chocolate sets.

Place the tray in the refrigerator for 15 to 20 minutes, or until the chocolate firms up.

Once set, serve chilled or slightly cool for the best texture.

Tips for Perfect Chocolate-Dipped Strawberry Skewers

A few simple tricks can help you get professional-looking results.

Helpful Tips

  • Dry strawberries completely before dipping
  • Use room temperature berries for better coating
  • Melt chocolate slowly to prevent burning
  • Use parchment paper for easy cleanup
  • Chill briefly to set the coating
  • Avoid overcrowding the tray

Patience during prep makes a huge difference in appearance and texture.

Creative Variations and Fun Toppings

This chocolate-dipped strawberries on skewers recipe is easy to customize.

Flavor Ideas

  • Use dark and white chocolate together
  • Add crushed freeze-dried strawberries
  • Sprinkle sea salt for contrast
  • Dip in caramel first, then chocolate

Party Themes

  • Red, white, and blue sprinkles for July 4th
  • Pink drizzle for baby showers
  • Gold dust for elegant events

These skewers can easily match any celebration or season.

What to Serve with Chocolate-Dipped Strawberries on Skewers

These skewers pair beautifully with:

  • Sparkling lemonade
  • Champagne or prosecco
  • Dessert charcuterie boards
  • Mini cheesecakes
  • Brownie bites

They’re also beautiful wrapped as edible gifts for Valentine’s Day, Mother’s Day, or anniversaries.

Storage Tips

Chocolate-dipped strawberries are best enjoyed fresh, but you can store them briefly.

How to Store

  • Keep in a single layer in an airtight container
  • Line with paper towels to absorb moisture
  • Refrigerate up to 24–36 hours

Avoid freezing, as strawberries release too much water once thawed.

Common Mistakes to Avoid

To make perfect chocolate-dipped strawberries on skewers, avoid these common mistakes:

  • Dipping wet strawberries
  • Overheating the chocolate
  • Using overripe berries
  • Skipping parchment paper
  • Refrigerating too long before serving

Keeping ingredients simple and prep careful ensures beautiful results.

Frequently Asked Questions

How far in advance can I make chocolate-dipped strawberries on skewers?

For best freshness, make them the same day. You can prepare them up to 24 hours in advance.

Why is my chocolate not sticking?

Usually because the strawberries weren’t fully dry or the chocolate was overheated.

Can I use frozen strawberries?

No. Frozen strawberries release too much moisture and become mushy.

What kind of skewers should I use?

Standard wooden skewers work best. You can also use decorative party picks.

Can kids help make this recipe?

Yes. This is a fun and easy recipe for supervised family cooking.

Final Thoughts

These chocolate-dipped strawberries on skewers are proof that simple desserts can still feel special. They’re fresh, beautiful, easy to customize, and always a hit at gatherings.

Whether you’re making them for a celebration, gifting them to someone special, or just treating yourself to something sweet, this recipe is an easy way to create a memorable dessert with minimal effort. Once you try them, you’ll see why they’re such a timeless favorite.

Quick & Delicious Sausage Egg Breakfast Rolls – The Perfect Brunch Bite!

If you’re looking for a crowd-pleasing breakfast that’s both easy and incredibly satisfying, these Quick & Delicious Sausage Egg Breakfast Rolls are exactly what you need. Packed with savory sausage, fluffy eggs, and melty cheese all wrapped in golden, flaky dough, they’re the perfect bite for brunch, holidays, or even busy weekday mornings.

What makes these breakfast rolls stand out is how simple they are to prepare while delivering big, comforting flavors. Whether you’re feeding a family or hosting friends, this recipe guarantees smiles all around.


Why You’ll Love This Sausage Egg Breakfast Rolls Recipe

These sausage egg breakfast rolls are a must-try for so many reasons:

  • Quick and easy to make
  • Perfect for meal prep or brunch
  • Kid-friendly and customizable
  • Packed with protein and flavor
  • Great for on-the-go breakfasts

They’re the kind of recipe you’ll find yourself making again and again.


Ingredients

To make these Quick & Delicious Sausage Egg Breakfast Rolls, you’ll need:

  • 1 can refrigerated crescent roll dough
  • 6 large eggs
  • 1 cup cooked breakfast sausage
  • 1 cup shredded cheddar cheese
  • 2 tablespoons milk
  • Salt and pepper to taste
  • Optional: chopped green onions or bell peppers


Ingredient Notes

Understanding your ingredients helps you perfect this sausage egg breakfast rolls recipe:

  • Crescent dough: creates a flaky, golden crust
  • Sausage: adds savory richness
  • Eggs: provide fluffy texture and protein
  • Cheese: brings creamy, melty goodness
  • Milk: makes eggs softer and lighter

Choose high-quality sausage and fresh eggs for the best flavor.


Step-by-Step Instructions

1. Cook the Sausage

Brown the sausage in a skillet until fully cooked, then set aside.


2. Scramble the Eggs

Whisk eggs with milk, then cook gently until just set.


3. Prepare the Dough

Unroll crescent dough and separate into triangles.


4. Add Fillings

Place sausage, eggs, and cheese onto each dough triangle.


5. Roll Them Up

Carefully roll each triangle into a crescent shape.


6. Bake

Bake at 375°F for 12–15 minutes until golden brown.


7. Serve Warm

Let cool slightly and serve fresh.


Tips for Perfect Results

To get the best sausage egg breakfast rolls, keep these tips in mind:

  • Don’t overfill the dough to avoid leaks
  • Cook eggs slightly underdone (they finish in oven)
  • Use parchment paper for easy cleanup
  • Let rolls cool slightly before serving
  • Brush tops with egg wash for extra golden color

Variations

Switch up your breakfast rolls recipe with these ideas:

Spicy Version

Add jalapeños or hot sauce.

Veggie Version

Include spinach, mushrooms, or peppers.

Cheese Lovers

Mix in mozzarella or pepper jack.

Meat Options

Use bacon or turkey sausage instead.


What to Serve With It

These sausage egg breakfast rolls pair perfectly with:

  • Fresh fruit salad
  • Yogurt parfaits
  • Smoothies
  • Coffee or fresh juice

Storage & Reheating

  • Store in fridge up to 3 days
  • Reheat in oven or microwave
  • Freeze for up to 1 month
  • Wrap individually for easy grab-and-go


Common Mistakes to Avoid

  • Overcooking eggs before baking
  • Overstuffing rolls
  • Not sealing dough properly
  • Skipping preheating oven

FAQs

1. Can I make these ahead of time?

Yes, prepare and refrigerate before baking.

2. Can I freeze breakfast rolls?

Absolutely, they freeze well.

3. What cheese works best?

Cheddar, mozzarella, or blends work great.

4. Can I use homemade dough?

Yes, but crescent dough is quicker.


Final Thoughts

These Quick & Delicious Sausage Egg Breakfast Rolls are everything you want in a breakfast recipe—easy, flavorful, and incredibly satisfying. Whether for brunch, meal prep, or a quick weekday breakfast, they deliver every time.

Once you try them, they’ll become a staple in your kitchen.

Easy Ham, Cheese & Egg Cups (Low Carb Breakfast Recipe)

If you’re searching for a quick, satisfying, and healthy way to start your day, these Easy Ham, Cheese & Egg Cups (Low Carb Breakfast Recipe) are exactly what you need. They’re simple to prepare, incredibly delicious, and packed with protein to keep you energized all morning.

Perfect for busy mornings, meal prep, or even a weekend brunch, these ham, cheese, and egg cups combine savory flavors with a soft, fluffy texture—all baked into convenient individual portions. Plus, they’re naturally low in carbs, making them ideal for keto or low-carb lifestyles.


Why You’ll Love This Easy Ham, Cheese & Egg Cups Recipe

This low carb breakfast recipe is a favorite for so many reasons:

  • Ready in under 25 minutes
  • High in protein and low in carbs
  • Perfect for meal prep
  • Kid-friendly and customizable
  • Minimal ingredients required

Whether you’re eating healthy or just want something quick and tasty, these egg cups check all the boxes.


Ingredients

To make these Easy Ham, Cheese & Egg Cups, you’ll need:

  • 6 large eggs
  • 6 slices deli ham
  • ½ cup shredded cheese (cheddar, mozzarella, or Swiss)
  • Salt and pepper to taste
  • Optional: chopped spinach, bell peppers, or onions


Ingredient Notes

Here’s how each ingredient enhances this low carb breakfast recipe:

  • Eggs: the protein-rich base
  • Ham: creates the “cup” shape and adds savory flavor
  • Cheese: adds creaminess and richness
  • Veggies (optional): boost nutrition and flavor

Choose high-quality ingredients for the best results.


Step-by-Step Instructions

1. Preheat and Prepare

Preheat oven to 375°F and grease a muffin tin.


2. Form the Ham Cups

Press one slice of ham into each muffin cup.


3. Add Cheese and Fillings

Sprinkle cheese and any veggies into each cup.


4. Crack the Eggs

Crack one egg into each cup and season.


5. Bake

Bake for 15–18 minutes until eggs are set.


6. Serve and Enjoy

Let cool slightly, then remove and serve.


Tips for Perfect Results

To make the best ham, cheese & egg cups, follow these tips:

  • Use silicone or well-greased pans to prevent sticking
  • Don’t overbake—eggs should stay soft
  • Pre-cook watery veggies like mushrooms
  • Add herbs for extra flavor
  • Let them cool slightly before removing

Variations

Make this easy breakfast recipe your own:

Keto Version

Use full-fat cheese and skip veggies high in carbs.

Veggie Lover Version

Add spinach, tomatoes, and peppers.

Spicy Version

Add jalapeños or hot sauce.

Meat Swap

Use turkey or bacon instead of ham.


What to Serve With It

These low carb egg cups pair perfectly with:

  • Fresh avocado slices
  • Mixed greens salad
  • Fresh fruit
  • Smoothies

Storage & Reheating

  • Store in fridge up to 4 days
  • Reheat in microwave for 20–30 seconds
  • Great for grab-and-go breakfasts
  • Can be frozen for up to 1 month


Common Mistakes to Avoid

  • Overfilling cups
  • Overcooking eggs
  • Not greasing pan properly
  • Using too much liquid from veggies

FAQs

1. Can I make these ahead of time?

Yes! They’re perfect for meal prep.

2. Are these keto-friendly?

Absolutely, they are low carb and high protein.

3. Can I freeze egg cups?

Yes, freeze and reheat when needed.

4. How do I keep them from sticking?

Use silicone molds or grease well.


Final Thoughts

These Easy Ham, Cheese & Egg Cups (Low Carb Breakfast Recipe) are the ultimate solution for busy mornings. They’re quick, nutritious, and incredibly satisfying.

Once you try them, you’ll find yourself making them again and again—they’re just that easy and delicious.

Healthy BBQ Chicken Chopped Salad Recipe 🥗🍗

If you’re looking for a fresh, filling, and flavor-packed meal, this Healthy BBQ Chicken Chopped Salad Recipe is going to become your new favorite. It combines smoky BBQ chicken with crisp vegetables, crunchy toppings, and a light, tangy dressing for the perfect balanced bite.

This salad is high in protein, loaded with nutrients, and easy enough for busy weekdays. Whether you’re meal prepping or making a quick lunch, it delivers big flavor without the guilt.


Why You’ll Love This Healthy BBQ Chicken Chopped Salad Recipe

This BBQ chicken salad is a total game-changer because:

  • High-protein and satisfying
  • Fresh, crunchy, and flavorful
  • Easy to prepare in under 30 minutes
  • Great for meal prep lunches
  • Customizable with your favorite toppings

It’s a healthy meal that actually tastes exciting.


Ingredients

To make this Healthy BBQ Chicken Chopped Salad, you’ll need:

  • 2 grilled chicken breasts (sliced)
  • 4 cups chopped romaine lettuce
  • 1 cup cherry tomatoes (halved)
  • 1 cup corn (grilled or canned)
  • ½ cup black beans (optional)
  • ½ cup shredded cheddar cheese
  • ÂĽ cup red onion (thinly sliced)
  • ½ cup BBQ sauce
  • 1 avocado (sliced)
  • Salt and pepper to taste


Ingredient Notes

Each ingredient plays an important role in this BBQ chicken chopped salad:

  • Chicken: Grilled chicken adds lean protein and smoky flavor
  • BBQ sauce: Choose a low-sugar version for healthier option
  • Lettuce: Romaine keeps it crisp and crunchy
  • Corn & beans: Add sweetness and texture
  • Avocado: Provides healthy fats and creaminess

Step-by-Step Instructions

1. Grill the Chicken

Cook chicken breasts with salt, pepper, and a bit of BBQ sauce.


2. Chop the Vegetables

Cut lettuce, tomatoes, onions, and avocado into bite-sized pieces.


3. Prepare Salad Base

Add lettuce, tomatoes, corn, beans, and onions into a large bowl.


4. Add Chicken

Slice grilled chicken and place on top of salad.


5. Add BBQ Sauce

Drizzle BBQ sauce over salad and toss lightly.


6. Finish and Serve

Top with cheese and avocado slices, then serve fresh.


Tips for Perfect Results

To make the best healthy BBQ chicken chopped salad, follow these tips:

  • Grill chicken for best smoky flavor
  • Chop ingredients evenly for perfect bites
  • Use fresh BBQ sauce for better taste
  • Don’t overdress the salad
  • Serve immediately for maximum crunch

Variations

Try these delicious versions:

Spicy BBQ Salad

Add jalapeños or spicy BBQ sauce.

Keto Version

Skip corn and beans, add extra avocado.

Tex-Mex Style

Add tortilla strips and salsa.

Extra Protein

Add boiled eggs or extra chicken.


What to Serve With It

This BBQ chicken salad pairs well with:

  • Garlic bread
  • Fresh fruit
  • Sweet potato fries
  • Iced tea or lemonade

Storage & Reheating

  • Store chicken and salad separately for best freshness
  • Refrigerate up to 3 days
  • Do not freeze (vegetables lose texture)
  • Add BBQ sauce just before serving


Common Mistakes to Avoid

  • Overdressing salad (makes it soggy)
  • Using cold, unseasoned chicken
  • Cutting vegetables too large
  • Mixing everything too early

FAQs

1. Is BBQ chicken salad healthy?

Yes, it’s high in protein and full of fresh vegetables.

2. Can I use store-bought grilled chicken?

Yes, it works great for quick prep.

3. What BBQ sauce is best?

Low-sugar or smoky BBQ sauce is ideal.

4. Can I meal prep this salad?

Yes, just store ingredients separately.


Final Thoughts

This Healthy BBQ Chicken Chopped Salad Recipe is the perfect balance of fresh, smoky, and satisfying. It’s quick, customizable, and ideal for healthy eating without sacrificing flavor.

Once you try it, it will easily become a regular in your weekly meal rotation.

Irresistible Chocolate Dipped Potato Chips Recipe for Sweet and Salty Snack Lovers

If you’re someone who loves the perfect balance of sweet and salty, this Irresistible Chocolate Dipped Potato Chips Recipe is about to become your new favorite snack. There’s something magical about the crunch of salty potato chips paired with smooth, rich chocolate—it’s simple, unexpected, and incredibly addictive.

This recipe has gained popularity for its effortless preparation and bold flavor contrast. Whether you’re hosting a party, craving a late-night treat, or looking for a unique dessert idea, chocolate dipped potato chips deliver every time.


Why You’ll Love This Recipe

This Chocolate Dipped Potato Chips Recipe checks all the boxes for a perfect snack.

  • Sweet and salty flavor combination
  • Ready in under 15 minutes
  • No baking required
  • Minimal ingredients
  • Perfect for gifting or entertaining

It’s proof that simple ingredients can create something truly unforgettable.


Ingredients

To make these chocolate dipped potato chips, you’ll need:

  • 2 cups ridged potato chips (for extra crunch)
  • 1 ½ cups chocolate chips (milk, dark, or semi-sweet)
  • 1 teaspoon coconut oil (optional, for smooth melting)
  • Optional toppings: sea salt, crushed nuts, sprinkles


Ingredient Notes

The beauty of this Chocolate Dipped Potato Chips Recipe lies in its simplicity, but choosing the right ingredients makes all the difference.

  • Ridged chips hold chocolate better and add texture
  • High-quality chocolate enhances flavor
  • Coconut oil creates a glossy finish
  • Toppings add visual appeal and crunch

You can also experiment with flavored chips for a fun twist.


Step-by-Step Instructions

1. Melt the Chocolate

Place chocolate chips in a microwave-safe bowl and heat in 30-second intervals, stirring until smooth.


2. Dip the Chips

Dip each potato chip halfway into the melted chocolate.


3. Arrange on Tray

Place dipped chips on parchment-lined baking sheet.


4. Add Toppings

Sprinkle sea salt, nuts, or sprinkles while chocolate is still wet.


5. Let Them Set

Allow chips to cool at room temperature or refrigerate until chocolate hardens.


Tips for Perfect Results

To get the best out of this Chocolate Dipped Potato Chips Recipe, follow these tips:

  • Use ridged chips for durability
  • Don’t overheat chocolate
  • Work quickly before chocolate sets
  • Add toppings immediately
  • Use parchment paper to prevent sticking

Variations

This recipe is incredibly versatile.

Dark Chocolate Lovers

Use bittersweet chocolate for a richer taste.

White Chocolate Version

Swap in white chocolate for a sweeter twist.

Peanut Butter Drizzle

Drizzle melted peanut butter on top.

Holiday Style

Add festive sprinkles for special occasions.


What to Serve With It

These chocolate dipped potato chips pair wonderfully with:

  • Hot coffee or espresso
  • Milkshakes
  • Ice cream
  • Fresh fruit platters

They also make a great addition to dessert boards.


Storage & Reheating

To keep your chips fresh:

  • Store in an airtight container
  • Keep at room temperature for 2–3 days
  • Refrigerate for longer storage (up to 1 week)
  • Avoid humidity to maintain crunch


Common Mistakes to Avoid

Avoid these pitfalls when making Chocolate Dipped Potato Chips:

  • Using thin or fragile chips
  • Overheating chocolate
  • Not drying chips properly
  • Adding toppings too late
  • Stacking before fully set

FAQs

1. Can I use any type of potato chips?

Yes, but ridged chips work best for structure.

2. Do I need coconut oil?

No, but it helps create smoother melted chocolate.

3. Can I make these ahead of time?

Yes, they store well for several days.

4. Can I freeze chocolate dipped chips?

Freezing is not recommended as it affects texture.


Final Thoughts

This Irresistible Chocolate Dipped Potato Chips Recipe is the perfect example of how simple ingredients can create a gourmet snack. It’s crunchy, chocolatey, and packed with that irresistible sweet and salty contrast.

Whether you’re making them for a party or just a quick treat, these chocolate dipped chips are guaranteed to impress—and disappear fast!

Blueberry Cheesecake Icebox Cake – No-Bake Summer Dessert

When the weather heats up and you want a dessert that’s cool, creamy, and effortless, this Blueberry Cheesecake Icebox Cake is exactly what you need. It combines the tangy richness of cheesecake with sweet, juicy blueberries and soft graham cracker layers—all without turning on the oven.

This no-bake dessert is perfect for summer gatherings, potlucks, or just treating yourself to something refreshing. The longer it chills, the better it gets, making it an ideal make-ahead recipe that tastes even more delicious the next day.


Why You’ll Love This Recipe

This Blueberry Cheesecake Icebox Cake is a total crowd-pleaser.

  • No baking required
  • Light, creamy, and refreshing
  • Perfect for hot summer days
  • Easy to make ahead
  • Beautiful layered presentation

It’s the kind of dessert that looks fancy but is surprisingly simple to make.


Ingredients

To make this blueberry cheesecake icebox cake, you’ll need:

  • 2 cups fresh blueberries (or blueberry pie filling)
  • 2 cups heavy whipping cream
  • 8 oz cream cheese (softened)
  • Âľ cup powdered sugar
  • 1 teaspoon vanilla extract
  • 1 package graham crackers
  • 1 tablespoon lemon juice (optional, for brightness)


Ingredient Notes

Each ingredient plays a key role in this Blueberry Cheesecake Icebox Cake.

  • Cream cheese provides tangy cheesecake flavor
  • Whipped cream adds light, airy texture
  • Blueberries bring natural sweetness and color
  • Graham crackers soften into cake-like layers
  • Lemon juice enhances freshness

Fresh blueberries give the best flavor, but canned filling works too.


Step-by-Step Instructions

1. Make Cheesecake Filling

Beat cream cheese, powdered sugar, and vanilla until smooth.


2. Whip the Cream

Whip heavy cream until stiff peaks form, then fold into cream cheese mixture.


3. Prepare Blueberries

Mix blueberries with a little sugar or lemon juice if needed.


4. Layer the Cake

Start with graham crackers, then cheesecake filling, then blueberries. Repeat layers.


5. Chill to Set

Refrigerate for at least 4–6 hours or overnight.


6. Slice and Serve

Cut into squares and serve chilled.


Tips for Perfect Results

To make the best Blueberry Cheesecake Icebox Cake, follow these tips:

  • Chill overnight for best texture
  • Use full-fat cream cheese for richness
  • Don’t overmix whipped cream
  • Layer evenly for clean slices
  • Use fresh blueberries when possible

Variations

You can easily customize this dessert.

Mixed Berry Version

Add strawberries and raspberries.

Chocolate Twist

Add chocolate chips or drizzle.

Lemon Blueberry

Add extra lemon zest for brightness.

Gluten-Free Option

Use gluten-free graham crackers.


What to Serve With It

This Blueberry Cheesecake Icebox Cake pairs perfectly with:

  • Iced coffee
  • Lemonade
  • Fresh fruit
  • Whipped cream topping
  • Mint garnish

It’s ideal for summer parties and brunch.


Storage & Reheating

For best freshness:

  • Refrigerator: Store up to 4 days
  • Keep covered tightly
  • Do not freeze (texture may change)
  • Serve chilled straight from fridge


Common Mistakes to Avoid

Avoid these issues when making Blueberry Cheesecake Icebox Cake:

  • Not chilling long enough
  • Overwhipping cream
  • Uneven layering
  • Using too much liquid in berries
  • Skipping softened cream cheese

FAQs

1. Can I make this ahead of time?

Yes, it’s best made a day in advance.

2. Can I use frozen blueberries?

Yes, but thaw and drain them first.

3. Why is my cake too soft?

It may need more chilling time.

4. Can I freeze icebox cake?

Freezing is not recommended for best texture.


Final Thoughts

This Blueberry Cheesecake Icebox Cake is the perfect no-bake dessert for warm days. It’s creamy, fruity, and incredibly easy to make while still looking impressive.

Once you try it, it’ll become your go-to summer dessert for gatherings, celebrations, and everyday indulgence.

Easy Edible Brownie Batter – Safe, Rich & Ready in Minutes

If you’ve ever licked the spoon while baking brownies, you already know how irresistible brownie batter can be. Now imagine enjoying that same rich, fudgy flavor—completely safe to eat. This Easy Edible Brownie Batter recipe is designed specifically for that purpose, with no raw eggs and heat-treated flour.

This indulgent treat is smooth, chocolatey, and ready in just minutes. Whether you’re craving a quick dessert, a dip for fruit, or a fun topping for ice cream, this edible brownie batter hits the spot every time.


Why You’ll Love This Recipe

This Easy Edible Brownie Batter is a must-try for chocolate lovers.

  • Safe to eat raw (no eggs)
  • Ready in under 10 minutes
  • Rich, fudgy, and creamy
  • Perfect for dipping or topping
  • Easily customizable

It’s like enjoying brownie batter without the wait—or the oven.


Ingredients

To make this easy edible brownie batter, you’ll need:

  • 1 cup heat-treated all-purpose flour
  • ½ cup unsweetened cocoa powder
  • ½ cup brown sugar
  • ÂĽ cup granulated sugar
  • ½ cup unsalted butter (melted)
  • ÂĽ cup milk (or plant-based milk)
  • 1 teaspoon vanilla extract
  • Pinch of salt
  • ½ cup chocolate chips (optional)


Ingredient Notes

The key to perfect Easy Edible Brownie Batter lies in safe and balanced ingredients.

  • Heat-treated flour eliminates bacteria risks
  • Cocoa powder provides deep chocolate flavor
  • Brown sugar adds moisture and richness
  • Butter gives smooth, creamy texture
  • Milk adjusts consistency

You can tweak sweetness or thickness based on your preference.


Step-by-Step Instructions

1. Heat-Treat the Flour

Microwave flour for 1–2 minutes or bake at 350°F for 5 minutes.


2. Mix Dry Ingredients

Combine flour, cocoa powder, sugars, and salt in a bowl.


3. Add Wet Ingredients

Pour in melted butter, milk, and vanilla extract.


4. Mix Until Smooth

Stir until thick, creamy batter forms.


5. Fold in Chocolate Chips

Add chocolate chips for extra texture and flavor.


6. Serve or Chill

Enjoy immediately or chill for thicker consistency.


Tips for Perfect Results

To make the best Easy Edible Brownie Batter, follow these tips:

  • Always heat-treat flour for safety
  • Use high-quality cocoa powder
  • Adjust milk for desired consistency
  • Chill for thicker texture
  • Taste and adjust sweetness

Variations

You can easily customize this brownie batter.

Peanut Butter Swirl

Add peanut butter on top and swirl.

Cookies & Cream

Mix in crushed cookies.

Protein Version

Add chocolate protein powder.

Vegan Option

Use plant-based butter and milk.


What to Serve With It

This Easy Edible Brownie Batter pairs perfectly with:

  • Fresh strawberries
  • Pretzels
  • Graham crackers
  • Vanilla ice cream
  • Waffles or pancakes

It’s also great as a dip or dessert topping.


Storage & Reheating

For best freshness:

  • Refrigerator: Store up to 5 days
  • Freezer: Up to 1 month
  • Keep in airtight container
  • No reheating required
  • Let sit at room temp before serving


Common Mistakes to Avoid

Avoid these issues when making Easy Edible Brownie Batter:

  • Skipping heat-treating flour
  • Using too much liquid
  • Overmixing batter
  • Using low-quality cocoa
  • Not adjusting sweetness

FAQs

1. Is edible brownie batter safe to eat?

Yes, because it contains no raw eggs and uses heat-treated flour.

2. Can I make it dairy-free?

Yes, use plant-based butter and milk.

3. Why is my batter too thick?

Add a little more milk gradually.

4. Can I bake this batter?

No, this recipe is designed for eating raw.


Final Thoughts

This Easy Edible Brownie Batter is the ultimate quick dessert for chocolate lovers. It’s rich, smooth, and incredibly satisfying—without needing to bake anything.

Once you try it, you’ll always want a batch ready in your fridge for those sweet cravings.