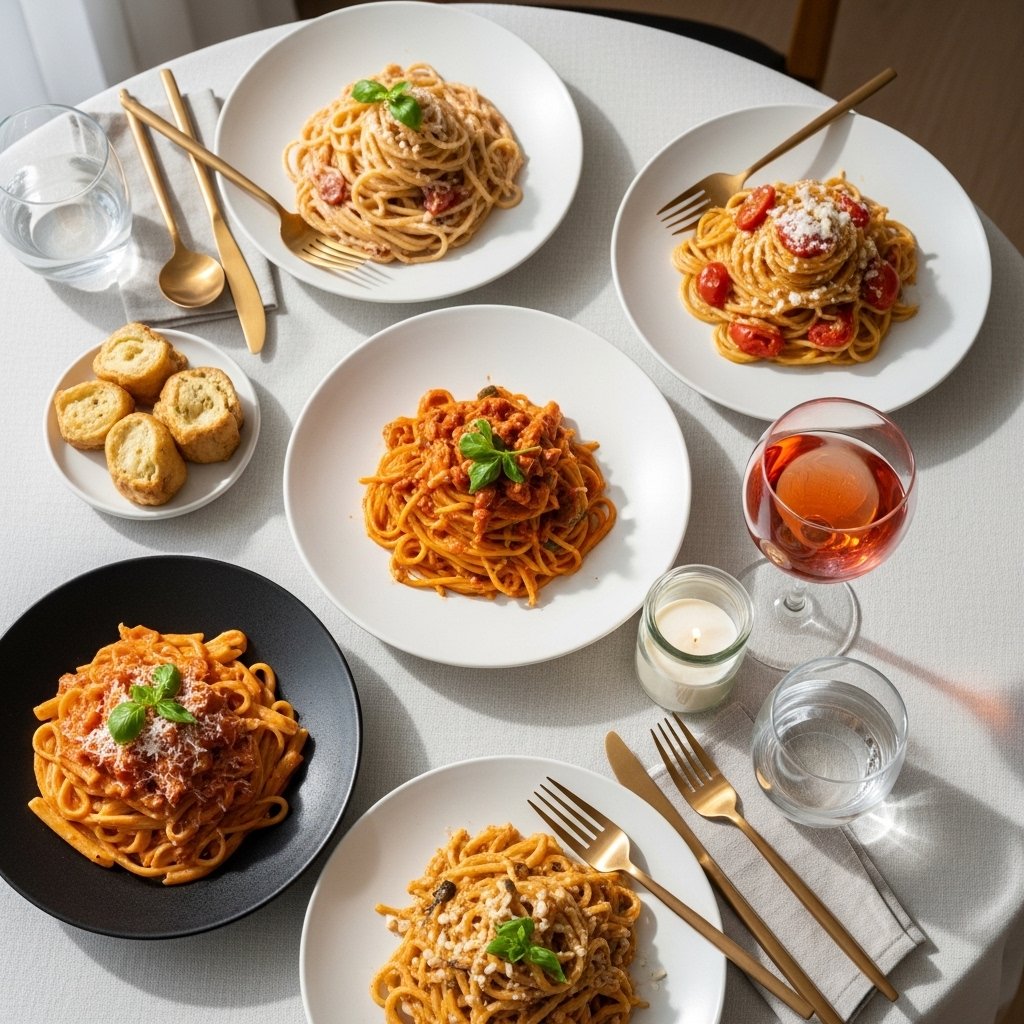
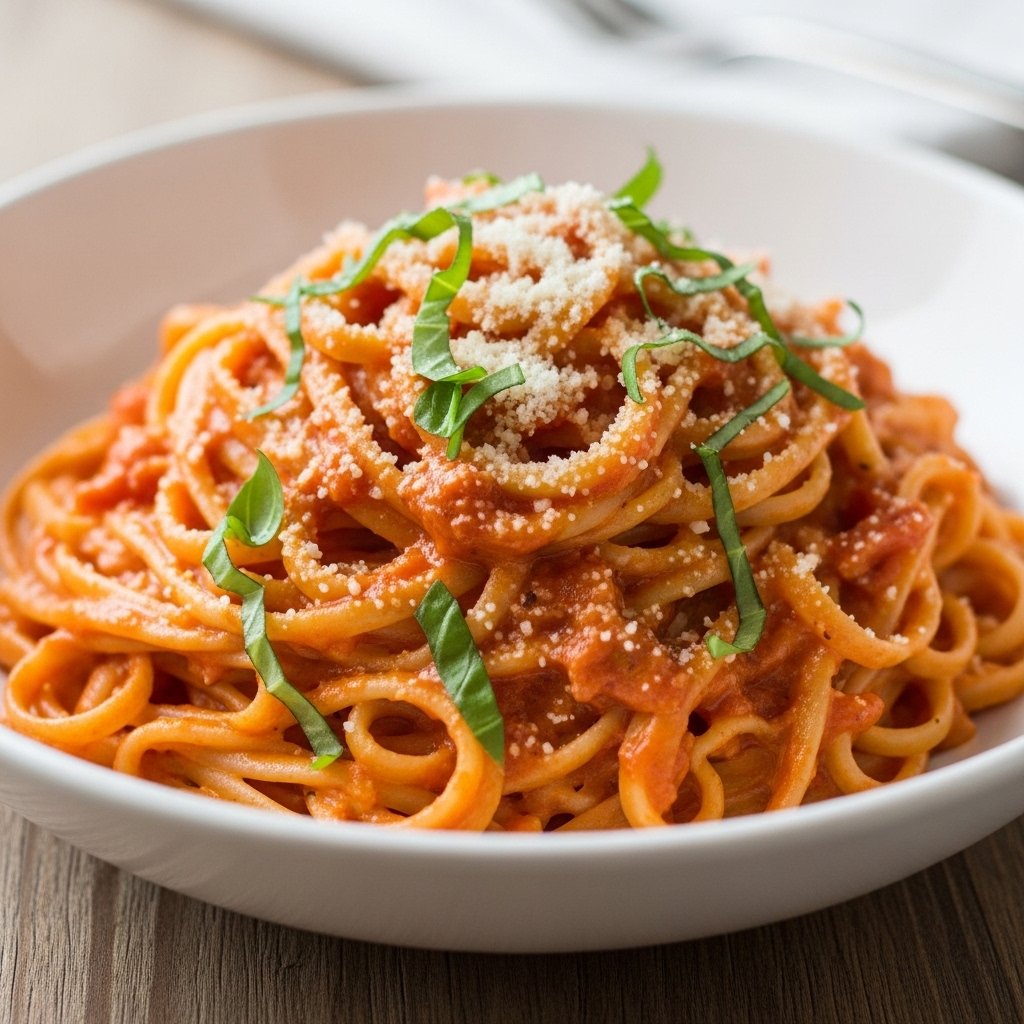
There’s something undeniably comforting about a warm bowl of creamy tomato pasta. It’s rich, silky, and packed with that perfect balance of tangy tomato flavor and smooth, velvety cream. Whether you’re cooking for a busy weeknight dinner or craving a cozy homemade meal, this dish always delivers.
What makes this creamy tomato pasta so special is its simplicity. With just a handful of pantry staples and about 30 minutes, you can create a restaurant-quality meal right in your own kitchen. It’s the kind of recipe that feels indulgent but is incredibly easy to prepare.
Why You’ll Love This Creamy Tomato Pasta
This creamy tomato pasta is a go-to recipe for so many reasons:
- Quick and easy to make
- Rich, creamy, and full of flavor
- Uses simple pantry ingredients
- Perfect for weeknight dinners
- Easily customizable
- Loved by both kids and adults
It’s comfort food at its finest—simple, satisfying, and always delicious.
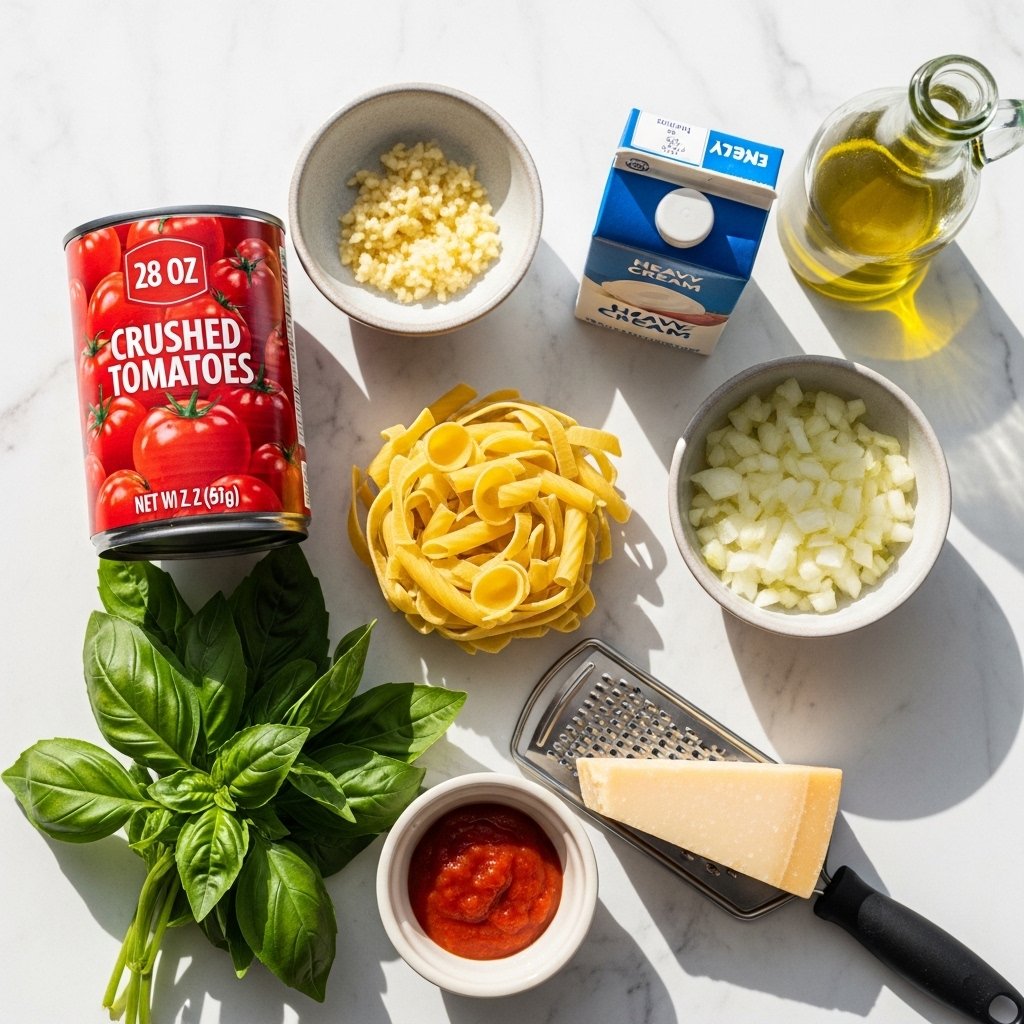
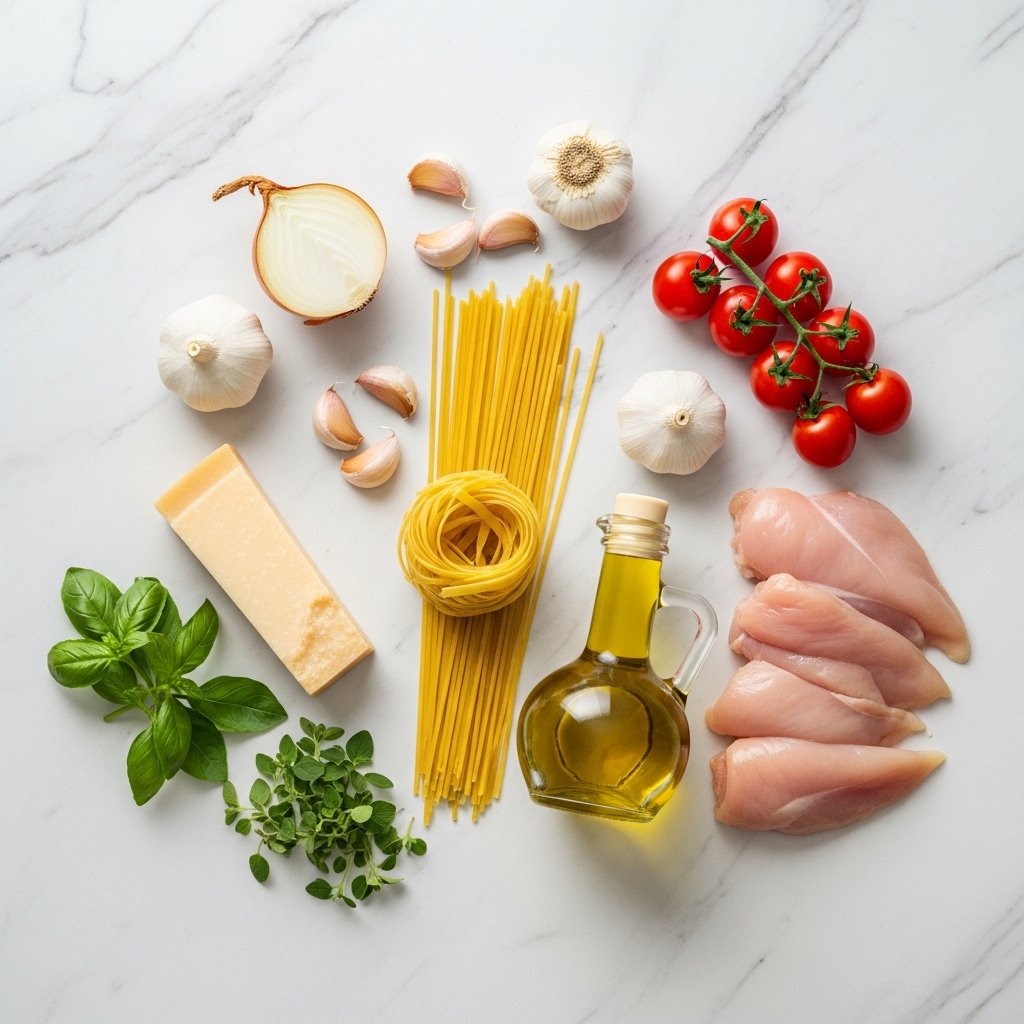
Ingredients
To make this delicious creamy tomato pasta, you’ll need:
- 12 oz pasta (penne, rigatoni, or spaghetti)
- 2 tbsp olive oil
- 3 cloves garlic, minced
- 1 small onion, finely chopped
- 1 can (14 oz) crushed tomatoes
- ¾ to 1 cup heavy cream
- ½ cup freshly grated parmesan cheese
- 1 tsp Italian seasoning
- Salt and black pepper to taste
- Fresh basil for garnish

Ingredient Notes
The key to an incredible creamy tomato pasta lies in ingredient quality. Use good canned tomatoes—they form the base of your sauce and make a noticeable difference. Freshly grated parmesan melts beautifully and adds depth.
If you want a lighter version, swap heavy cream with half-and-half. You can also experiment with whole wheat or gluten-free pasta depending on your dietary needs.
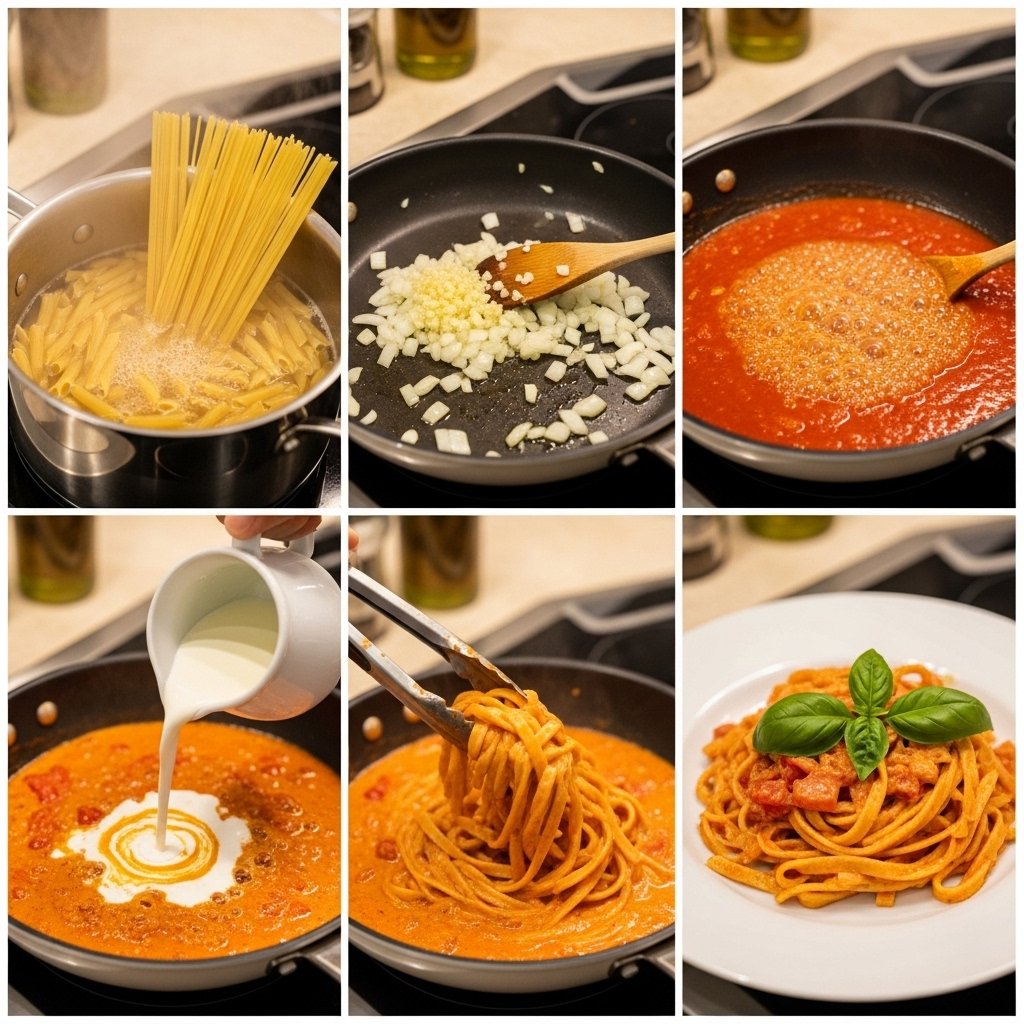
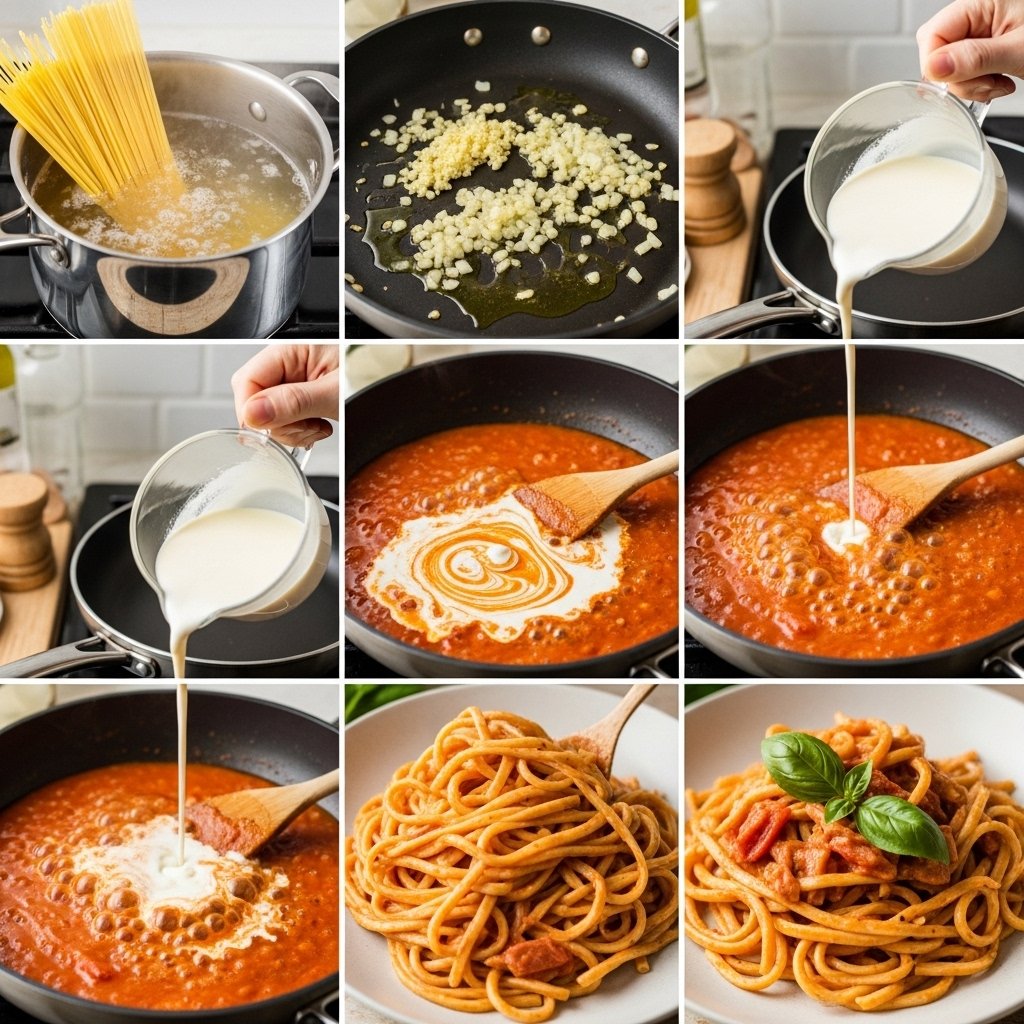
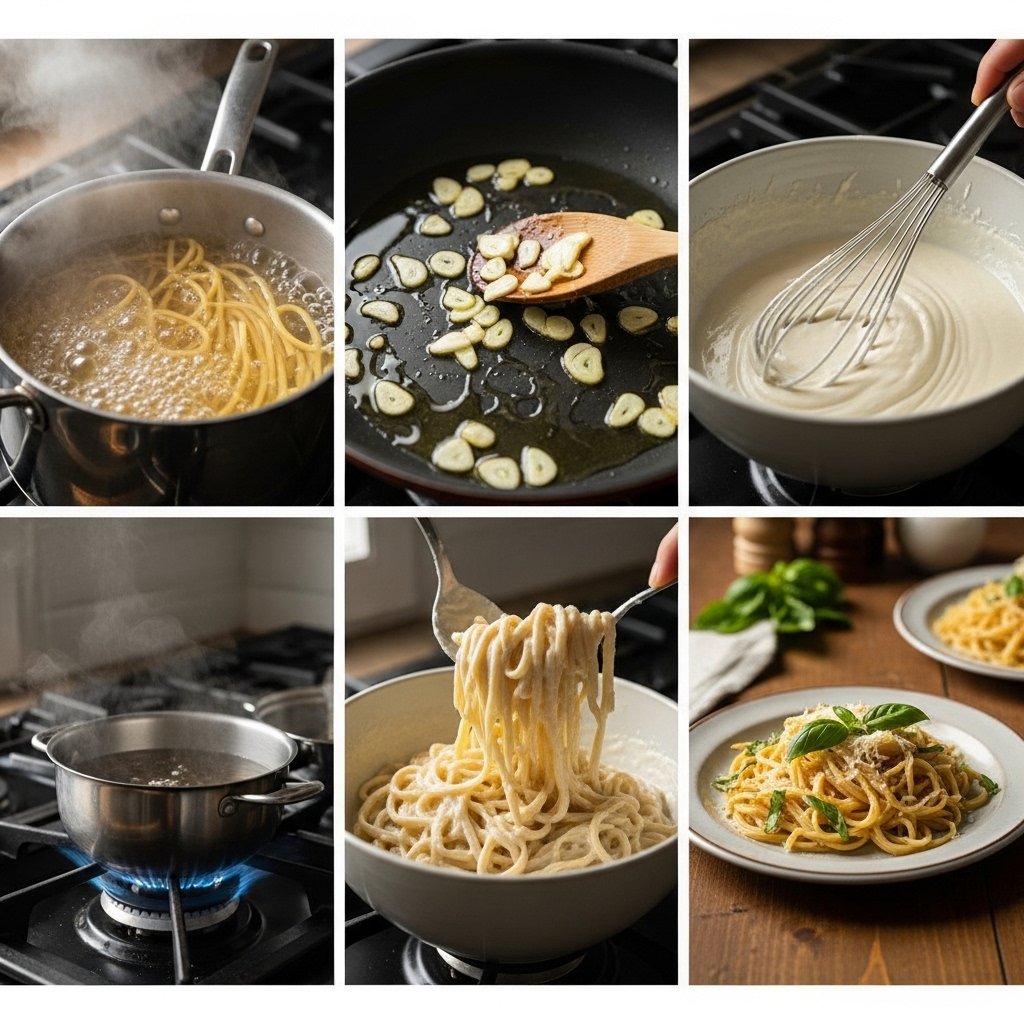
Step-by-Step Instructions
1. Cook the Pasta
Bring a large pot of salted water to a boil and cook the pasta until al dente.
2. Sauté the Aromatics
Heat olive oil in a large skillet and sauté garlic and onion until soft and fragrant.
3. Add Tomatoes
Pour in crushed tomatoes and let them simmer for 5–7 minutes.
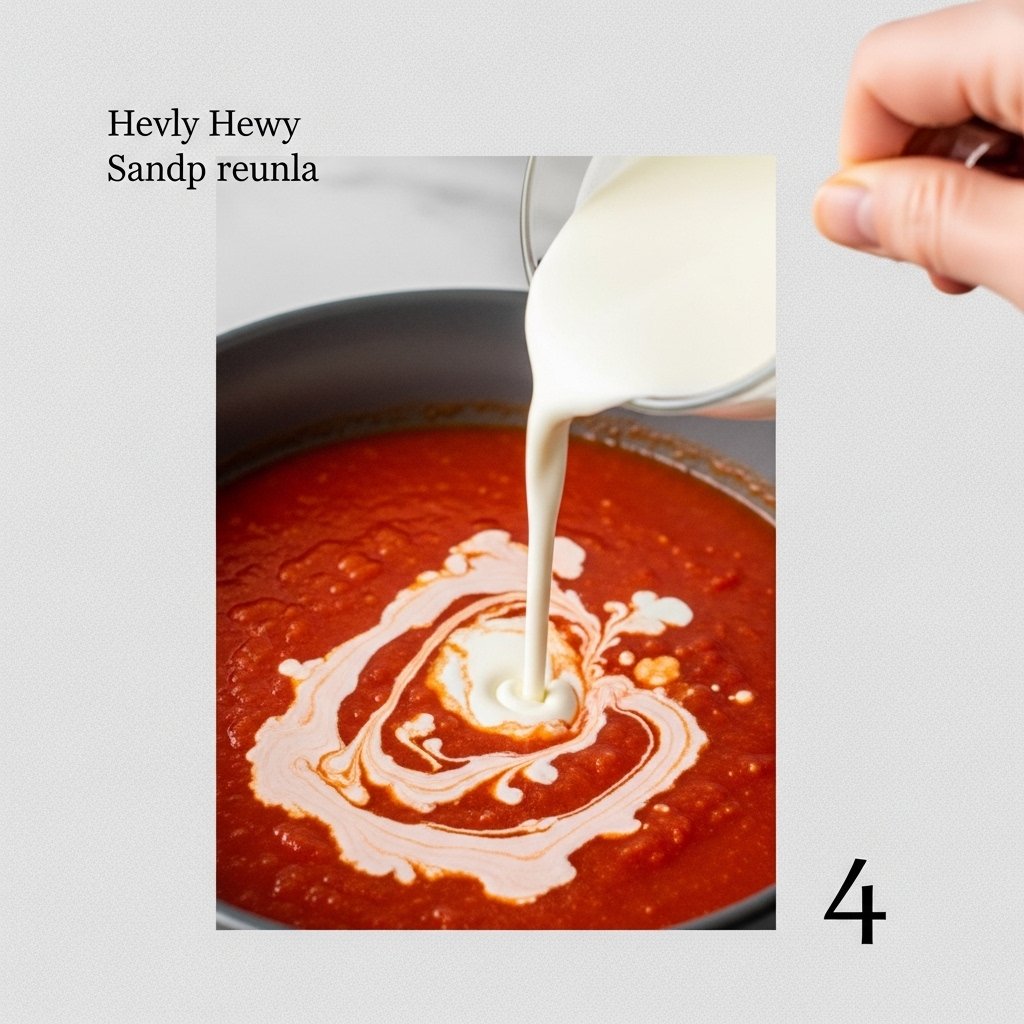
4. Add Cream
Stir in the heavy cream and mix until the sauce becomes smooth and creamy.
5. Combine Pasta
Drain the pasta and add it directly to the sauce.
6. Finish
Stir in parmesan cheese, season to taste, and garnish with fresh basil.
Tips for Perfect Results
To get the best creamy tomato pasta, follow these expert tips:
- Salt your pasta water generously
- Save some pasta water to adjust sauce consistency
- Don’t overcook the cream sauce
- Add cheese gradually for smooth melting
- Use fresh herbs for a bright finish
These simple techniques elevate your dish instantly.
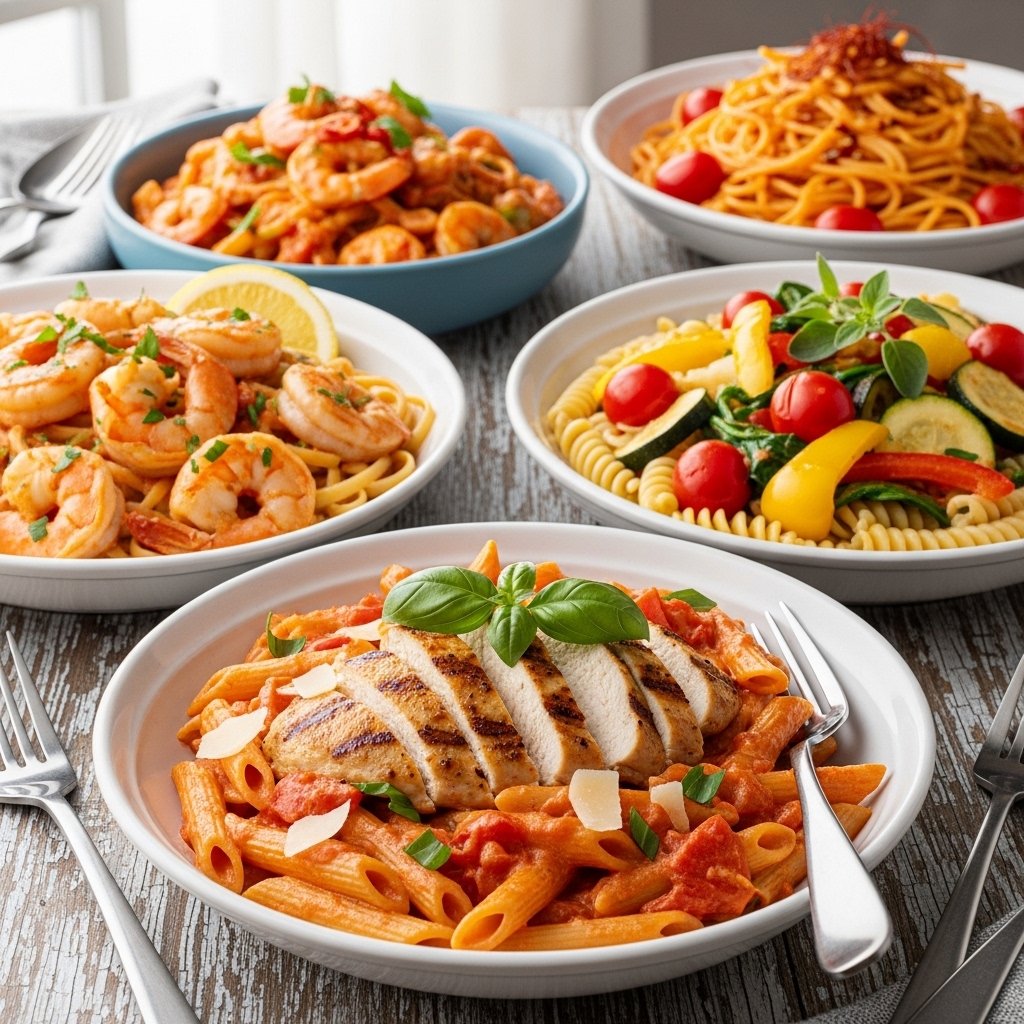
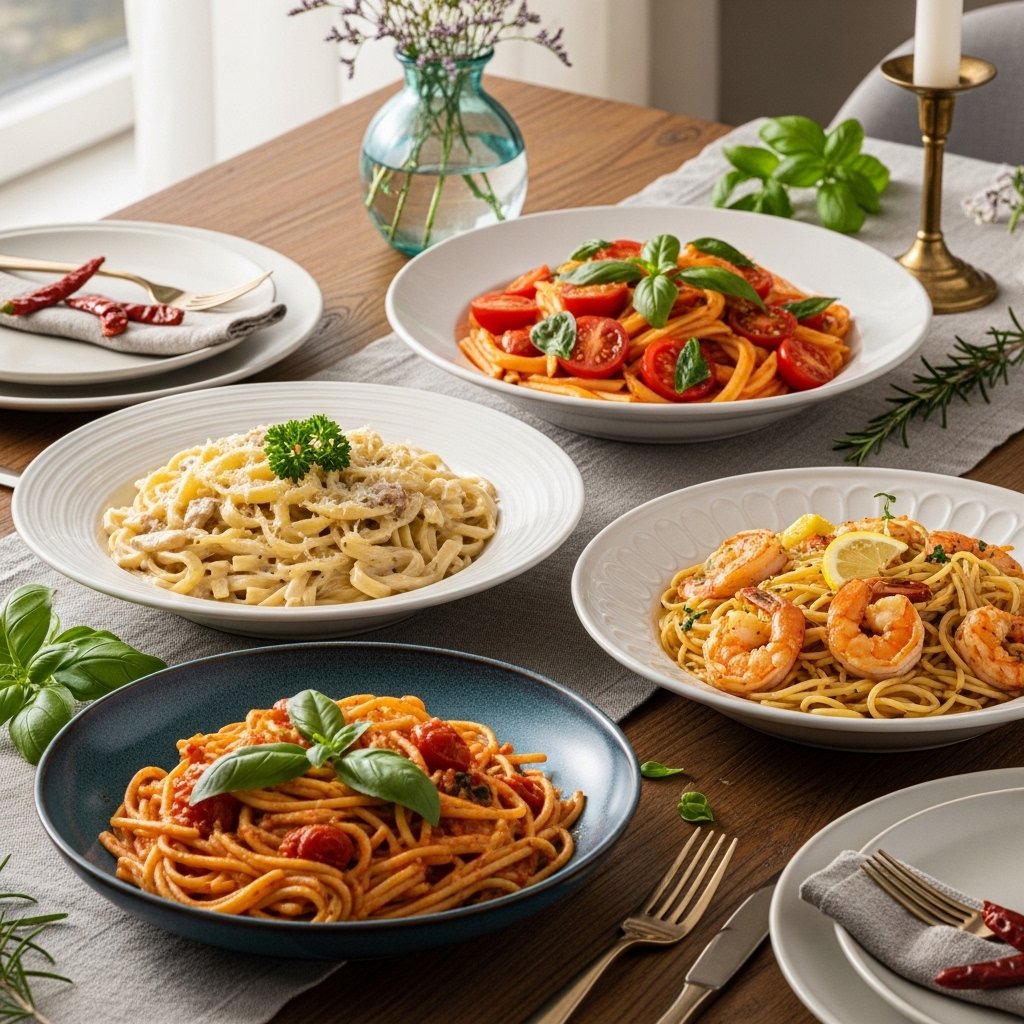
Variations
Make this creamy tomato pasta your own with these ideas:
Chicken Creamy Tomato Pasta
Add grilled or shredded chicken for extra protein.
Shrimp Tomato Pasta
Sauté shrimp and mix it into the sauce.
Vegetarian Version
Add spinach, mushrooms, or zucchini.
Spicy Version
Add red pepper flakes for a bold kick.

What to Serve With It
This creamy tomato pasta pairs perfectly with:
- Garlic bread
- Fresh green salad
- Roasted vegetables
- Mozzarella or burrata
- Sparkling water or iced tea
These sides balance the richness of the dish.
Storage & Reheating
To store your creamy tomato pasta:
- Refrigerate in an airtight container for up to 3 days
- Reheat gently on the stovetop with a splash of milk or water
- Avoid overheating to keep the sauce creamy
- Freeze the sauce separately if needed
Proper storage keeps your pasta tasting fresh.
Common Mistakes to Avoid
When making creamy tomato pasta, avoid these common mistakes:
- Overcooking the pasta
- Using too much cream
- Not seasoning properly
- Skipping simmer time for the sauce
- Adding cheese too quickly
Avoiding these ensures perfect results every time.
FAQs
Can I make creamy tomato pasta ahead of time?
Yes, but it’s best enjoyed fresh. Reheat gently with added liquid.
Can I use milk instead of cream?
Yes, but the sauce will be less rich and creamy.
What pasta works best?
Penne, rigatoni, and spaghetti are all great options.
Can I make it dairy-free?
Yes, use plant-based cream and cheese alternatives.
Final Thoughts
This creamy tomato pasta is everything you want in a comfort meal—rich, flavorful, and incredibly easy to make. It’s the perfect balance of creamy and tangy, making it a dish you’ll crave again and again.
Whether you’re cooking for yourself or sharing with loved ones, this recipe is guaranteed to become a staple in your kitchen. 🍝