3-Ingredient Flourless Nutella Mug Cake | The Ultimate 1-Minute Dessert

Introduction: Your Emergency Chocolate Fix

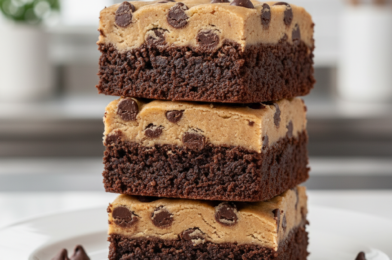
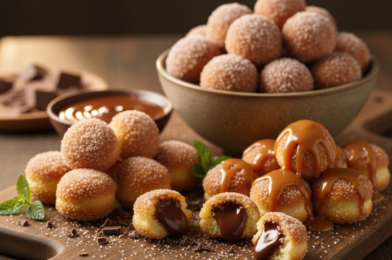
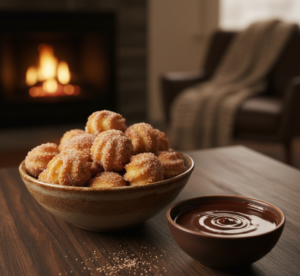
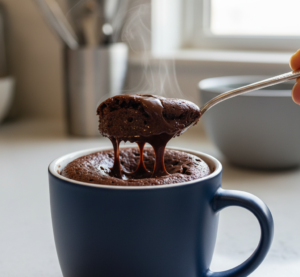
We have all been there: it’s late at night, the Netflix queue is loaded, and a sudden, uncontrollable craving for something warm, chocolatey, and decadent hits. You don’t want to preheat the oven, and you certainly don’t want to deal with a sink full of flour-covered dishes. Enter the Flourless Nutella Mug Cake. This recipe is a total game-changer for dessert lovers who value both quality and speed. By removing the flour, we strip away the “spongy” or “rubbery” texture that plagues so many microwave desserts, leaving behind something that tastes more like a rich chocolate souffle or a molten lava cake.

The beauty of this mug cake lies in its simplicity. It relies on the natural fats and sugars in the hazelnut spread to provide the structure, while a single egg works its magic to create a light, airy lift. Because it is naturally gluten-free, it’s an inclusive dessert that doesn’t feel like a compromise. In less time than it takes to find your favorite show, you can be tucking into a steaming, gooey masterpiece that smells like a professional pâtisserie.


Why You’ll Love This Flourless Nutella Mug Cake

The primary reason this Flourless Nutella Mug Cake stands out from the crowd is the incredible texture. Most mug cakes rely on all-purpose flour, which can easily turn tough and bread-like in the microwave. By going flourless, you achieve a moist, fudgy consistency that highlights the hazelnut and cocoa notes of the Nutella. It’s a concentrated burst of flavor that feels far more sophisticated than a one-minute microwave recipe has any right to be.

Furthermore, this recipe is incredibly pantry-friendly. There is no need to hunt for baking powder, cocoa powder, or specialized extracts. If you have a jar of hazelnut spread and an egg, you are 90% of the way there. It’s the perfect “emergency” dessert for college students, busy parents, or anyone who needs a solo treat without the temptation of a full tray of brownies sitting on the counter.


The Minimalist Ingredient List

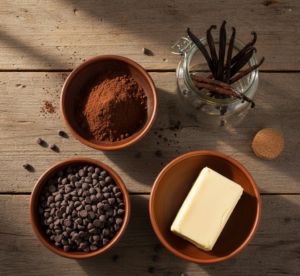
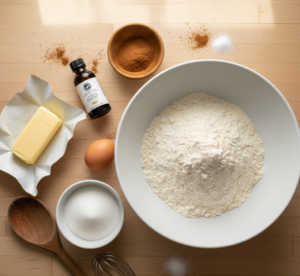
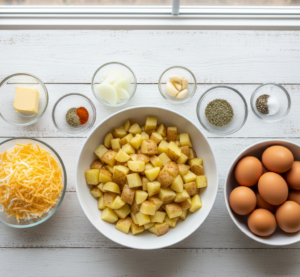
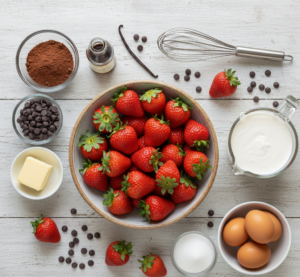
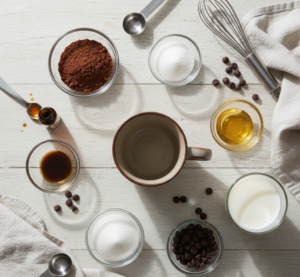
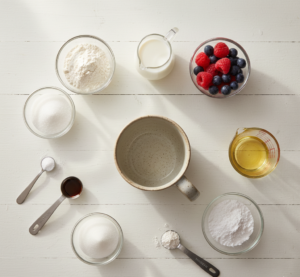
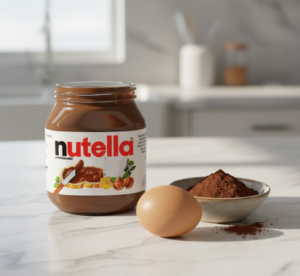
To make this decadent treat, you only need three basic items. Each one plays a critical role in the chemistry of the “bake.”

  • Nutella (or any Chocolate Hazelnut Spread): This provides the fat, sugar, and cocoa flavor.

  • Large Egg: This is the binder and the leavening agent that helps the cake rise.

  • Cocoa Powder (Optional but Recommended): A tiny bit of unsweetened cocoa powder deepens the chocolate profile and helps stabilize the “crumb.”


Ingredient Notes for Best Results

When making a Flourless Nutella Mug Cake, the temperature of your ingredients matters more than you might think. For the most seamless batter, try to use a room-temperature egg. A cold egg can cause the fats in the Nutella to seize up slightly, making it harder to whisk into a smooth consistency. If you’re in a rush, just pop the egg in a bowl of warm water for two minutes before cracking it.

As for the hazelnut spread, make sure you are using a fresh jar that hasn’t dried out. The oils in the Nutella are what keep the cake moist. If you use the crusty bits from the bottom of an old jar, your cake might end up a bit crumbly. If you want to cut down on the sweetness slightly, opting for a “dark chocolate” hazelnut spread variety can provide a more bittersweet, grown-up flavor profile.

Step-by-Step Instructions

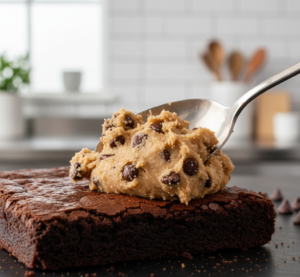
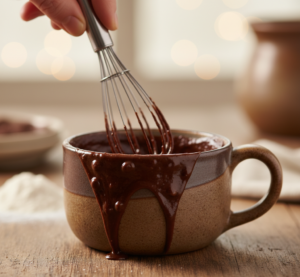
  1. The Mix: In a microwave-safe mug (standard 10–12 ounce size works best), add 1/4 cup of Nutella and one large egg. If you are using cocoa powder, add 1 tablespoon now.

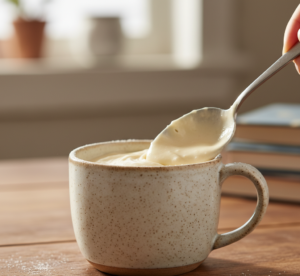
  2. Whisk Until Smooth: Use a small whisk or a fork to beat the mixture vigorously. You want to ensure the egg is fully incorporated and there are no streaks of yellow. The batter should look glossy and smooth, similar to a thick chocolate syrup.

  3. The Microwave: Place the mug in the center of your microwave. Cook on high for 50 to 60 seconds. Note: Every microwave is different. You are looking for the top to be set but slightly tacky to the touch.

  4. The Rest: This is the hardest part. Let the cake sit for at least 1 to 2 minutes. The residual heat finishes the cooking process and allows the structure to set so it doesn’t collapse immediately.


Tips for Perfect Microwave Baking

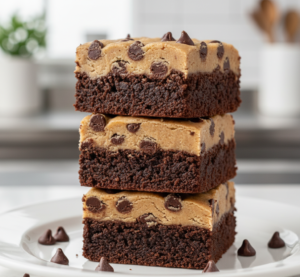
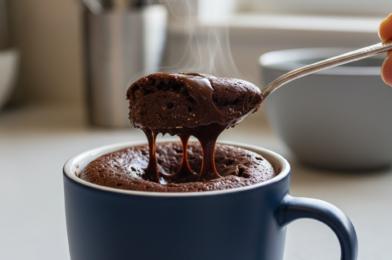
The most common mistake with any mug cake is overcooking. Because microwaves heat from the inside out, the cake continues to cook for a minute after the timer beeps. If it looks dry and dull on top when you take it out, it’s likely overdone. Aim for a slightly “wet” look in the very center; this ensures a molten, fudgy interior that mimics a lava cake.

Also, consider the shape of your mug. A wide, shallow mug will cook faster than a tall, narrow one. If you use a tall “latte” style mug, you may need an extra 10 seconds. Always start with 45 seconds and add time in 5-second increments to avoid a rubbery texture.

Delicious Variations & Add-ins

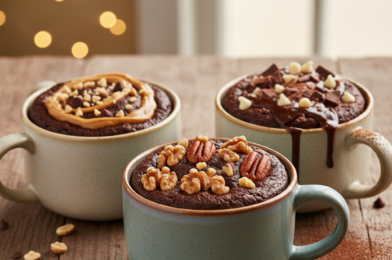
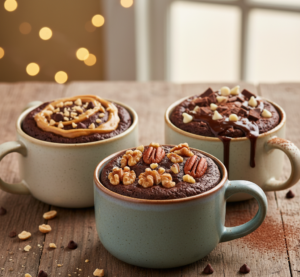
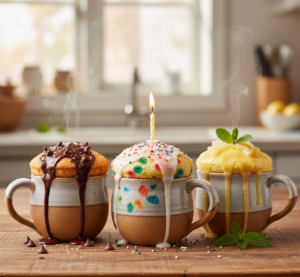
While the base recipe is perfect on its own, you can easily customize your Flourless Nutella Mug Cake to suit your mood:

  • The Peanut Butter Core: Drop a teaspoon of creamy peanut butter into the center of the batter before microwaving for a hidden surprise.

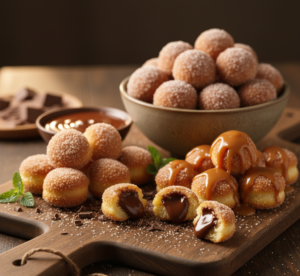
  • Sea Salt & Caramel: Top with a pinch of flaky sea salt and a drizzle of caramel sauce after baking.

  • Chocolate Chip Delight: Stir in a tablespoon of semi-sweet chocolate chips for extra melty pockets of chocolate.

  • Hazelnut Crunch: Add some crushed toasted hazelnuts on top for a texture contrast that emphasizes the Nutella flavor.


What to Serve With Your Mug Cake

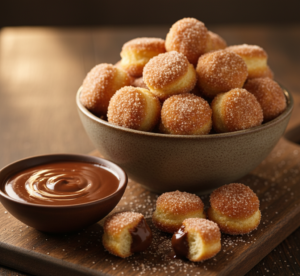
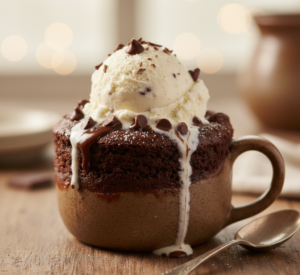
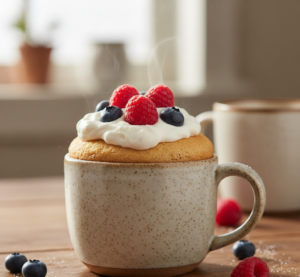
To elevate this from a quick snack to a plated dessert, serve it with a cold element. A scoop of classic vanilla bean ice cream is the gold standard, as it melts into the warm cake to create a creamy sauce. If you want something lighter, a dollop of fresh whipped cream or a splash of cold heavy cream works beautifully.

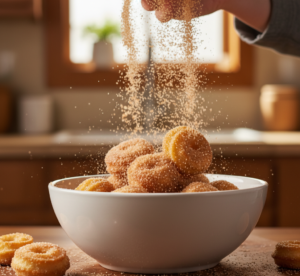
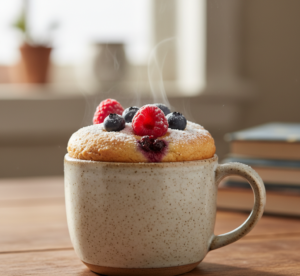
For a fruitier contrast, fresh raspberries or sliced strawberries provide a necessary acidity that cuts through the richness of the hazelnut and chocolate. If you’re feeling particularly indulgent, a dusting of powdered sugar adds that final “bakery-perfect” visual touch.


Common Mistakes to Avoid

  • Using a Small Mug: The cake will rise significantly during the cooking process. If your mug is too small, it will overflow and create a sticky mess on your microwave glass.

  • Skipping the Rest Time: If you eat it immediately, the texture might feel slightly eggy. Letting it sit for two minutes allows the starches and fats to settle into a cake-like crumb.

  • Not Mixing Well: If the egg isn’t fully whisked, you might find small bits of cooked egg white in your dessert. Take the extra 30 seconds to get that batter perfectly smooth!


FAQs about Flourless Nutella Mug Cake

Q: Is this recipe truly gluten-free? A: Yes! Since we are using no flour or grain-based thickeners, it is naturally gluten-free. Just ensure your specific brand of hazelnut spread is certified GF if you have a severe allergy.

Q: Can I make this vegan? A: This specific flourless version relies heavily on the egg for structure. For a vegan version, you would typically need flour and a leavening agent like baking powder, so this 3-ingredient method won’t work as well with egg substitutes.

Q: Why did my mug cake turn out rubbery? A: This is almost always caused by overcooking. Microwave for a shorter duration next time, or check your microwave’s wattage—high-wattage machines (1200W+) usually only need 45 seconds.

Q: Can I bake this in a real oven? A: You can! Place the batter in an oven-safe ramekin and bake at 350°F for about 12–15 minutes. It will have an even more souffle-like texture.


Final Thoughts

The Flourless Nutella Mug Cake is a testament to the fact that you don’t need a pantry full of ingredients to create something spectacular. It’s fast, foolproof, and satisfies that deep chocolate craving with minimal effort. Whether you’re a novice in the kitchen or a seasoned baker looking for a quick fix, this recipe is one you’ll find yourself coming back to again and again. Grab your favorite mug, a jar of Nutella, and get ready to enjoy the easiest dessert you’ve ever made!

Incredible Homemade Lunches: Easy, Delicious & Budget-Friendly Ideas

When it comes to saving money, eating healthier, and actually enjoying your midday meal, nothing beats incredible homemade lunches. Whether you’re working from home, packing meals for the office, or prepping lunches for the week, having go-to recipes can completely transform your daily routine.

Gone are the days of boring sandwiches or expensive takeout. With the right approach, incredible homemade lunches can be exciting, flavorful, and incredibly satisfying. In this guide, you’ll discover creative ideas, helpful tips, and practical strategies to make lunch something you genuinely look forward to every day.

Why You’ll Love Incredible Homemade Lunches

There are so many reasons why embracing incredible homemade lunches is a game changer for your lifestyle.

Here’s why they’re worth it:

  • Save money compared to eating out
  • Healthier and customizable ingredients
  • Perfect for meal prep and busy schedules
  • Endless variety to avoid boredom
  • Easy to tailor for dietary needs

Once you start planning your lunches, you’ll wonder why you didn’t do it sooner.


Essential Ingredients for Homemade Lunches

Creating incredible homemade lunches starts with having the right ingredients on hand. Stocking your kitchen with versatile staples makes meal prep faster and easier.

Here are some must-have basics:

  • Proteins: chicken, turkey, eggs, beans, tofu
  • Grains: rice, quinoa, pasta, bread, wraps
  • Vegetables: leafy greens, bell peppers, cucumbers, carrots
  • Healthy fats: avocado, olive oil, nuts
  • Flavor boosters: sauces, herbs, spices, dressings

Ingredient Notes

The secret to incredible homemade lunches is balance—combining protein, carbs, and healthy fats for meals that keep you full and energized.

Fresh ingredients make a big difference in both taste and nutrition. Prepping items like grilled chicken, roasted vegetables, or cooked grains ahead of time helps you build meals quickly throughout the week.


Easy Homemade Lunch Ideas

1. Protein-Packed Lunch Bowls

Build bowls with rice or quinoa, grilled chicken, veggies, and a flavorful sauce.

2. Wraps & Sandwiches

Try chicken Caesar wraps, turkey avocado sandwiches, or veggie wraps.

3. Pasta Salads

Cold pasta with veggies, cheese, and dressing is perfect for meal prep.

4. Bento-Style Boxes

Mix small portions of fruits, proteins, crackers, and dips.

Step-by-Step Meal Prep Strategy

To consistently enjoy incredible homemade lunches, follow this simple process:

1. Plan Your Meals

Choose 2–3 lunch options for the week.

2. Prep Ingredients

Cook proteins, chop veggies, and prepare grains.

3. Assemble or Store Separately

Keep components fresh by assembling daily or storing in sections.

4. Pack Smart

Use airtight containers to maintain freshness.

This system saves time and keeps your lunches exciting.


Tips for Perfect Results

To make the most of your incredible homemade lunches, keep these tips in mind:

  • Prep ingredients in batches
  • Use a variety of textures and flavors
  • Keep dressings separate until serving
  • Invest in good storage containers
  • Rotate recipes weekly to avoid boredom

These small habits make a big difference in consistency and enjoyment.


Variations

One of the best things about incredible homemade lunches is how flexible they are.

Low-Carb Options

Focus on salads, lettuce wraps, and protein bowls.

Vegetarian Choices

Use beans, tofu, or lentils for protein.

High-Protein Meals

Add extra chicken, eggs, or Greek yogurt.

Kid-Friendly Ideas

Include simple, fun options like mini sandwiches or fruit cups.

What to Serve With It

Enhance your incredible homemade lunches with simple sides:

  • Fresh fruit
  • Yogurt or smoothies
  • Chips or crackers
  • Homemade dips

These additions make your lunch more satisfying and complete.


Storage & Reheating

Proper storage is key to maintaining incredible homemade lunches throughout the week.

  • Store in airtight containers in the fridge for up to 4 days
  • Keep wet and dry ingredients separate
  • Reheat meals gently to avoid drying out
  • Label containers for easy organization

Good storage keeps your meals fresh and safe to eat.


Common Mistakes to Avoid

Avoid these common pitfalls when preparing incredible homemade lunches:

  • Making meals too repetitive
  • Not seasoning properly
  • Overpacking containers
  • Skipping prep time

Avoiding these mistakes helps keep your lunches enjoyable and stress-free.


FAQs

How long do homemade lunches last?

Most meals last 3–4 days in the refrigerator when stored properly.

What’s the best way to meal prep lunches?

Prepare ingredients in advance and assemble as needed.

Are homemade lunches healthier?

Yes, you control the ingredients and portions.

Can I freeze lunch meals?

Some meals freeze well, especially cooked proteins and grains.


Final Thoughts

Creating incredible homemade lunches doesn’t have to be complicated or time-consuming. With a little planning and creativity, you can enjoy meals that are not only healthier and more affordable but also genuinely delicious.

From hearty bowls to fresh wraps and vibrant salads, the possibilities are endless. Start small, experiment with flavors, and soon you’ll have a lineup of incredible homemade lunches that make every day better.

Chocolate Chip Cookie Dough Brownie Bites 🍫🍪✨ | Fudgy, Creamy & Bakery-Perfect

If you have ever found yourself standing in front of the pantry, torn between the chewy richness of a fudge brownie and the nostalgic comfort of raw cookie dough, this recipe is your sign that you don’t have to choose. Chocolate Chip Cookie Dough Brownie Bites are the definitive answer to every dessert lover’s internal conflict. These bite-sized treasures feature a dense, cocoa-rich brownie base topped with a thick, creamy layer of edible, eggless chocolate chip cookie dough. They aren’t just a snack; they are a decadent experience designed to mimic the high-end treats you’d find at a boutique American bakery.

Creating the perfect brownie bite is an art form that balances textures. You want a brownie that is sturdy enough to hold a topping but fudgy enough to melt in your mouth. By combining a dark chocolate profile with the buttery, brown-sugar-heavy notes of cookie dough, we create a flavor harmony that is hard to beat. Whether you are prepping for a backyard barbecue, a holiday party, or just a Tuesday night craving, these bites are guaranteed to be the star of the show.


Why You’ll Love These Chocolate Chip Cookie Dough Brownie Bites

There is a reason this specific dessert has taken the internet by storm: it hits every single sensory note. First, there is the texture. You get the slight resistance of the brownie crust, the fudgy interior, and then the smooth, melt-away consistency of the cookie dough. Second, the convenience factor is huge. Since these are made in a mini-muffin tin or cut into small squares, they are perfectly portioned for crowds. No messy slicing or crumbly cake layers to worry about—just grab and go.

Beyond the taste, this recipe is incredibly versatile. You can dress them up with a drizzle of melted ganache or keep them simple and rustic. Most importantly, this version uses heat-treated flour and an eggless cookie dough base, making it 100% safe to eat “raw.” We’ve all been told not to eat the dough since we were kids, but this recipe finally gives you the green light to indulge without a second thought.


Ingredients You’ll Need

To achieve that bakery-level quality, you’ll need standard pantry staples, but the quality of your chocolate will make all the difference.

For the Brownie Base:

  • Unsalted Butter: Melted to create that signature chewy texture.

  • Granulated Sugar & Light Brown Sugar: A mix provides sweetness and moisture.

  • Cocoa Powder: Unsweetened, high-quality Dutch-processed cocoa is best.

  • Eggs: Room temperature for better emulsion.

  • Vanilla Extract: Pure Madagascar vanilla is the gold standard.

  • All-Purpose Flour: Just enough to provide structure.

  • Salt: To balance the intense sweetness.

For the Cookie Dough Topping:

  • Heat-Treated All-Purpose Flour: Essential for food safety.

  • Unsalted Butter: Softened to room temperature.

  • Brown Sugar: For that deep molasses flavor.

  • Heavy Cream or Milk: To achieve the right “doughy” consistency.

  • Mini Semi-Sweet Chocolate Chips: Mini chips ensure you get chocolate in every single bite.


Ingredient Notes for Professional Results

When making Chocolate Chip Cookie Dough Brownie Bites, the “heat-treated flour” is a step you cannot skip. To do this, simply spread your flour on a baking sheet and bake at 350°F for about 5–7 minutes until it reaches 160°F. This kills any lingering bacteria, making your edible cookie dough safe. Additionally, I highly recommend using Dutch-processed cocoa powder for the brownie base. It has a lower acidity and a darker, richer color than natural cocoa, which results in a more “gourmet” appearance and a smoother chocolate flavor.

Another tip is to use mini chocolate chips rather than standard-sized ones. Because these bites are small, regular chips can feel bulky and disrupt the creamy texture of the dough. Mini chips distribute more evenly, ensuring that the ratio of dough to chocolate remains perfect in every mouthful. If you want to get really fancy, sprinkle a tiny bit of flaky sea salt over the finished bites to cut through the sugar and enhance the cocoa notes.

Step-by-Step Instructions

1. Prepare the Brownies

Preheat your oven to 350°F (175°C) and grease a mini-muffin tin or an 8×8 baking pan lined with parchment paper. In a large bowl, whisk together the melted butter and sugars. Add the eggs and vanilla, beating until the mixture is light and glossy. Sift in the cocoa powder, flour, and salt. Fold gently until just combined—do not overmix, or your brownies will become cakey rather than fudgy. Bake for 15-18 minutes (for bites) or 25 minutes (for a pan). Let them cool completely.

2. Make the Edible Cookie Dough

While the brownies cool, cream together the softened butter and brown sugar until fluffy. Add the vanilla and heavy cream. Gradually mix in your heat-treated flour and salt until a thick dough forms. Finally, fold in the mini chocolate chips. If the dough feels too stiff, add an extra teaspoon of cream.

3. Assembly

If using a mini-muffin tin, use a small spoon to press a tablespoon of cookie dough onto the top of each brownie bite. If you used a square pan, spread the dough in an even layer over the cooled brownie slab, then chill in the fridge for 30 minutes before cutting into small, sharp squares.

Tips for Perfect Results

The secret to the best Chocolate Chip Cookie Dough Brownie Bites lies in the cooling process. If you try to add the cookie dough while the brownies are even slightly warm, the butter in the dough will melt, creating a greasy mess. Patience is a virtue here! For the cleanest cuts, I recommend chilling the entire tray in the freezer for about 20 minutes before slicing. This firms up the fats and allows your knife to glide through both layers without dragging the dough into the brownie.

Another pro tip: use a warm knife to slice your brownie bites. Run your knife under hot water, wipe it dry, and then make your cut. Repeat this for every single slice. This technique is what professional bakeries use to get those perfectly square, “clean” edges that look so satisfying on a serving platter.


Variations to Try

  • Peanut Butter Twist: Replace half of the butter in the cookie dough with creamy peanut butter for a “Buckeye” inspired flavor profile.

  • Double Chocolate: Use cocoa powder in the cookie dough as well for an “Extreme Chocolate” version.

  • Holiday Style: Swap the chocolate chips for crushed peppermint or colorful M&Ms to match the season.

  • Salted Caramel: Drizzle a bit of homemade salted caramel between the brownie and the dough layer for an extra layer of indulgence.


Storage & Reheating

Because the cookie dough contains dairy (butter and cream), these bites should be stored in an airtight container in the refrigerator. They will stay fresh and delicious for up to 5 days. If you prefer a softer texture, let them sit at room temperature for about 15 minutes before serving.

Can you freeze them? Absolutely! These are fantastic freezer treats. Wrap them individually in plastic wrap and place them in a freezer bag. They can be frozen for up to 3 months. To eat, just thaw one in the fridge overnight or enjoy it semi-frozen—it tastes almost like a fudge bar!

FAQs

Q: Why do I have to heat-treat the flour? A: Raw flour can contain E. coli or Salmonella. Baking it at 350°F until it reaches 160°F kills these pathogens, making it safe to consume without further cooking.

Q: Can I use a boxed brownie mix? A: Yes! If you’re short on time, a high-quality boxed “Ghirardelli” style mix works great. Just ensure you bake them in a way that results in a fudgy texture.

Q: My cookie dough is too crumbly. How do I fix it? A: This usually happens if there is too much flour. Add heavy cream or milk one teaspoon at a time until the dough is pliable and creamy.

Q: Do I need to refrigerate these? A: Yes, because of the butter and cream in the unbaked cookie dough topping, refrigeration is recommended for both safety and texture.


Final Thoughts

These Chocolate Chip Cookie Dough Brownie Bites are the ultimate crowd-pleaser. They combine the best of both worlds into a single, decadent mouthful that looks just as good as it tastes. By following the tips for heat-treating your flour and allowing for proper cooling time, you’ll end up with a dessert that rivals any high-end bakery in the USA. Give this recipe a try for your next get-together, and watch how quickly they disappear!

Fluffy Air Fryer Churro Bites Recipe (Crispy, Sweet & Easy Dessert!)

If you’re craving something sweet, warm, and irresistibly cinnamon-sugar coated, these fluffy air fryer churro bites are about to become your new favorite dessert. They deliver everything you love about classic churros—crispy edges, soft fluffy centers, and that iconic cinnamon sugar coating—but with way less oil and effort thanks to the air fryer.

This fluffy air fryer churro bites recipe is perfect for parties, movie nights, or anytime you want a quick treat without deep frying. The dough comes together easily, and the air fryer gives you golden, bakery-style results in minutes.

Why You’ll Love This Recipe

There are so many reasons these fluffy air fryer churro bites will win you over instantly:

  • Crispy outside, soft and fluffy inside
  • No deep frying required
  • Quick and easy dessert in under 20 minutes
  • Budget-friendly pantry ingredients
  • Perfect for sharing and dipping

Once you try this fluffy air fryer churro bites recipe, you’ll want to make it again and again.


Ingredients

To make these delicious fluffy air fryer churro bites, you’ll need:

  • 1 cup all-purpose flour
  • 1 cup water
  • 2 tablespoons butter
  • 1 tablespoon sugar
  • 1/2 teaspoon salt
  • 1/2 teaspoon vanilla extract
  • 1 large egg
  • Cooking spray

Cinnamon Sugar Coating:

  • 1/2 cup sugar
  • 1 tablespoon ground cinnamon
  • 2 tablespoons melted butter

Ingredient Notes

The secret to perfect fluffy air fryer churro bites is the dough texture. It should be thick enough to hold shape but soft enough to pipe or scoop easily.

Butter adds richness, while vanilla enhances the flavor. The cinnamon sugar coating is essential—it gives churros their signature sweet crunch. Don’t skip the melted butter step; it helps the sugar stick perfectly.


Step-by-Step Instructions

1. Make the Dough

In a saucepan, combine water, butter, sugar, and salt. Bring to a boil, then add flour and stir until a dough forms. Remove from heat and let cool slightly.

2. Add Egg and Vanilla

Mix in egg and vanilla until smooth and glossy.

3. Shape the Churro Bites

Transfer dough into a piping bag or use a spoon to form small bite-sized pieces.

4. Air Fry

Preheat air fryer to 375°F (190°C). Spray basket lightly and cook churro bites for 8–10 minutes until golden and fluffy.

5. Coat in Cinnamon Sugar

Brush warm churro bites with melted butter and roll in cinnamon sugar mixture.

Tips for Perfect Results

To make the best fluffy air fryer churro bites, keep these tips in mind:

  • Let dough cool slightly before adding egg
  • Don’t overcrowd the air fryer basket
  • Spray lightly for even browning
  • Coat immediately while warm
  • Use fresh cinnamon for best flavor

These small steps guarantee bakery-style churros every time.


Variations

This fluffy air fryer churro bites recipe is easy to customize.

Chocolate Stuffed

Pipe a little chocolate inside each bite before cooking.

Caramel Drizzle

Top with warm caramel sauce after coating.

Pumpkin Spice

Add pumpkin spice to the cinnamon sugar mix.

Filled Churro Bites

Fill with Nutella or cream cheese frosting.

What to Serve With It

These fluffy air fryer churro bites pair perfectly with:

  • Chocolate sauce
  • Caramel dip
  • Whipped cream
  • Coffee or hot chocolate
  • Ice cream

These pairings make the dessert even more indulgent.


Storage & Reheating

To keep your fluffy air fryer churro bites fresh:

  • Store in an airtight container for up to 2 days
  • Reheat in air fryer for 2–3 minutes to restore crispiness
  • Avoid microwaving (can make them soggy)
  • Coat in fresh cinnamon sugar after reheating if needed

They’re best enjoyed fresh and warm.


Common Mistakes to Avoid

Avoid these mistakes when making fluffy air fryer churro bites:

  • Overcooking dough before adding egg
  • Using too large pieces (won’t cook evenly)
  • Skipping butter coating before sugar
  • Overcrowding air fryer basket
  • Not preheating air fryer

These simple fixes ensure perfect churro texture.


FAQs

Can I bake these instead of using an air fryer?

Yes, bake at 375°F until golden, though texture may be slightly different.

Why are my churro bites dense?

The dough may have been overmixed or too dry.

Can I make them ahead of time?

Yes, but they are best fresh for maximum fluffiness.

Can I freeze churro bites?

Yes, freeze before coating and reheat in air fryer.


Final Thoughts

These fluffy air fryer churro bites are the perfect combination of crispy, fluffy, and sweet—all made easier with the air fryer. They’re quick, fun, and incredibly satisfying, making them ideal for both beginners and experienced home cooks.

Once you try this fluffy air fryer churro bites recipe, it will become your go-to dessert for cravings, parties, and cozy nights in. Simple ingredients, amazing flavor, and unbeatable texture—what more could you want?

Cheesy Potato Egg Scramble

If you’re looking for a hearty, satisfying breakfast that comes together quickly and keeps you full for hours, this cheesy potato egg scramble is exactly what you need. It’s made with simple ingredients—crispy potatoes, fluffy scrambled eggs, and gooey melted cheese—but the result is pure comfort food magic.

This cheesy potato egg scramble is perfect for busy mornings, lazy weekend brunches, or even breakfast-for-dinner nights. It’s budget-friendly, customizable, and loved by both kids and adults. Once you try it, it may just become your go-to breakfast recipe.

Why You’ll Love This Recipe

There are plenty of reasons this cheesy potato egg scramble deserves a spot in your regular breakfast rotation:

  • Quick and easy to prepare
  • Uses simple pantry ingredients
  • High in protein and very filling
  • Perfect for breakfast, brunch, or dinner
  • Easily customizable with add-ins

It’s the kind of meal that feels comforting and indulgent while still being practical for everyday cooking.


Ingredients

To make this delicious cheesy potato egg scramble, you’ll need:

  • 2 medium potatoes, diced small
  • 4 large eggs
  • 1/2 cup shredded cheddar cheese
  • 2 tablespoons butter or oil
  • 1/4 cup milk (optional, for fluffier eggs)
  • 1/2 small onion, diced
  • Salt and pepper to taste
  • Optional toppings: green onions, hot sauce, bacon bits

Ingredient Notes

The secret to a great cheesy potato egg scramble is texture balance. The potatoes should be crispy on the outside and tender inside, while the eggs should stay soft and creamy.

Cheddar cheese works best because it melts smoothly and adds a rich, sharp flavor. However, you can also mix in mozzarella or pepper jack for a twist. Milk is optional but helps create fluffier scrambled eggs.


Step-by-Step Instructions

1. Cook the Potatoes

Heat butter or oil in a skillet over medium heat. Add diced potatoes and cook until golden and crispy, about 10–12 minutes. Stir occasionally.

2. Add Onions

Add diced onions and cook until softened and slightly caramelized.

3. Prepare the Eggs

In a bowl, whisk eggs with milk, salt, and pepper.

4. Scramble Everything Together

Pour eggs into the skillet with potatoes. Stir gently until eggs are just set.

5. Add Cheese

Sprinkle shredded cheese over the top and let it melt into the scramble.

6. Serve Warm

Remove from heat and serve immediately with your favorite toppings.

Tips for Perfect Results

To make the best cheesy potato egg scramble, keep these tips in mind:

  • Cut potatoes into small, even pieces for faster cooking
  • Don’t overcrowd the pan—crispy potatoes need space
  • Cook eggs on low heat for soft texture
  • Add cheese at the end to avoid overcooking
  • Season at every stage for best flavor

These simple techniques make a big difference in taste and texture.


Variations

One of the best things about cheesy potato egg scramble is how easy it is to customize.

Meat Lover’s Version

Add cooked bacon, sausage, or ham.

Veggie Packed Scramble

Add bell peppers, spinach, or mushrooms.

Spicy Kick

Mix in jalapeños or hot sauce.

Mexican Style

Add salsa, cumin, and pepper jack cheese.

What to Serve With It

This cheesy potato egg scramble pairs well with:

  • Toast or biscuits
  • Fresh fruit
  • Avocado slices
  • Hot coffee or juice
  • Salsa or sour cream

These sides make it a complete and satisfying meal.


Storage & Reheating

To store leftover cheesy potato egg scramble:

  • Refrigerate in an airtight container for up to 3 days
  • Reheat in a skillet for best texture
  • Microwave in short intervals if needed
  • Add a splash of water or milk when reheating

It’s best enjoyed fresh but still reheats well.


Common Mistakes to Avoid

Avoid these mistakes when making cheesy potato egg scramble:

  • Overcooking the eggs (they’ll become rubbery)
  • Cutting potatoes too large (they won’t cook evenly)
  • Not seasoning properly
  • Cooking on too high heat

Avoiding these ensures a perfectly balanced scramble every time.


FAQs

Can I use frozen potatoes?

Yes, but fresh potatoes give better texture and flavor.

Can I make this dairy-free?

Yes, simply skip cheese or use a dairy-free alternative.

What cheese works best?

Cheddar is classic, but mozzarella or pepper jack also work well.

Can I meal prep this?

Yes, it stores well for a few days in the fridge.


Final Thoughts

This cheesy potato egg scramble is the perfect combination of simple ingredients and comforting flavor. It’s quick, filling, and endlessly customizable, making it ideal for any meal of the day.

Whether you’re cooking for family or just yourself, this cheesy potato egg scramble is a reliable, delicious recipe you’ll come back to again and again.

Crockpot French Dip Sandwiches: Easy, Quick, and Delicious Slow Cooker Recipe!

If you’re searching for a comforting, hands-off dinner that delivers big flavor with minimal effort, these Crockpot French dip sandwiches: easy, quick, and delicious slow cooker recipe are exactly what you need. Tender, slow-cooked beef piled onto toasted rolls, topped with melty cheese, and served with a rich, savory au jus for dipping—this is comfort food at its finest.

What makes this recipe so special is the slow cooker. It does all the heavy lifting while you go about your day, and by dinnertime, you’ve got restaurant-quality sandwiches ready to serve. These Crockpot French dip sandwiches: easy, quick, and delicious slow cooker recipe are perfect for busy weeknights, game days, or casual family gatherings.

Why You’ll Love This Recipe

There are so many reasons these Crockpot French dip sandwiches: easy, quick, and delicious slow cooker recipe will become a family favorite.

  • Minimal prep time with maximum flavor
  • Tender, juicy shredded beef
  • Rich homemade au jus for dipping
  • Perfect for meal prep or feeding a crowd
  • Easy, budget-friendly ingredients

It’s one of those meals that tastes like it took hours of effort—but your slow cooker does all the work.


Ingredients

To make these Crockpot French dip sandwiches: easy, quick, and delicious slow cooker recipe, you’ll need:

  • 3–4 lbs beef chuck roast
  • 1 onion, sliced
  • 3–4 cloves garlic, minced
  • 4 cups beef broth
  • 2 tablespoons Worcestershire sauce
  • 1 tablespoon soy sauce
  • 1 teaspoon dried thyme
  • 1 teaspoon black pepper
  • Salt to taste
  • 6–8 hoagie rolls or sandwich buns
  • 6–8 slices provolone or Swiss cheese

Ingredient Notes

The key to amazing Crockpot French dip sandwiches: easy, quick, and delicious slow cooker recipe is using a well-marbled beef chuck roast. As it slow cooks, the fat melts into the broth, creating incredibly tender meat and a flavorful dipping sauce.

Worcestershire sauce and soy sauce add depth and umami, while garlic and onions bring aromatic richness. The result is a deeply savory au jus that makes every bite irresistible.


Step-by-Step Instructions

1. Prepare the Crockpot

Place sliced onions and garlic at the bottom of the slow cooker.

2. Add the Beef

Season the chuck roast with salt and pepper, then place it on top of the onions.

3. Add Liquid and Seasonings

Pour in beef broth, Worcestershire sauce, soy sauce, thyme, and remaining seasoning.

4. Slow Cook

Cook on low for 8–9 hours or high for 4–5 hours until beef is tender and easy to shred.

5. Shred the Beef

Remove beef, shred with forks, and return it to the crockpot to soak in juices.

6. Assemble Sandwiches

Pile beef onto toasted rolls, top with cheese, and serve with warm au jus for dipping.

Tips for Perfect Results

To make the best Crockpot French dip sandwiches: easy, quick, and delicious slow cooker recipe, follow these tips:

  • Use chuck roast for best tenderness
  • Don’t skip searing if you want extra depth (optional)
  • Let beef rest in juices after shredding
  • Toast rolls for structure and flavor
  • Serve au jus hot for best experience

These small steps elevate your sandwiches from good to unforgettable.


Variations

One of the best things about Crockpot French dip sandwiches: easy, quick, and delicious slow cooker recipe is how flexible they are.

Cheesy French Dip

Add extra cheese and melt under the broiler.

Spicy Version

Add sliced jalapeños or hot sauce.

Mushroom French Dip

Add sautéed mushrooms for earthy flavor.

Garlic Butter Rolls

Brush rolls with garlic butter before toasting.

What to Serve With It

These Crockpot French dip sandwiches: easy, quick, and delicious slow cooker recipe pair well with:

  • French fries or sweet potato fries
  • Coleslaw
  • Pickles
  • Side salad
  • Potato chips

These sides balance the richness of the sandwich.


Storage & Reheating

To keep your Crockpot French dip sandwiches: easy, quick, and delicious slow cooker recipe fresh:

  • Store beef and au jus separately in airtight containers
  • Refrigerate for up to 4 days
  • Freeze shredded beef for up to 2 months
  • Reheat gently on stovetop or microwave with broth

This makes it a great meal prep option too.


Common Mistakes to Avoid

Avoid these mistakes when making Crockpot French dip sandwiches: easy, quick, and delicious slow cooker recipe:

  • Using lean cuts of beef (can become dry)
  • Skipping seasoning layers
  • Overcooking on high heat too long
  • Not reserving enough broth for dipping

Avoiding these ensures juicy, flavorful results every time.


FAQs

Can I use a different cut of beef?

Yes, but chuck roast is best for tenderness.

Can I make this ahead of time?

Absolutely—it tastes even better the next day.

Can I cook it on high instead of low?

Yes, but low heat gives the best texture.

What cheese works best?

Provolone and Swiss are classic choices.


Final Thoughts

These Crockpot French dip sandwiches: easy, quick, and delicious slow cooker recipe are the ultimate comfort food—rich, savory, and incredibly satisfying. With minimal effort and maximum flavor, they’re perfect for busy families or anyone craving a hearty, restaurant-style meal at home.

Once you try them, you’ll see why these Crockpot French dip sandwiches: easy, quick, and delicious slow cooker recipe quickly become a regular on your dinner menu.

Layered Chocolate Mousse Brownies for Valentine’s Dessert Ideas (Rich, Romantic & Decadent)

If you’re looking for the ultimate show-stopping dessert for Valentine’s Day, these layered chocolate mousse brownies for Valentine’s dessert ideas are exactly what you need. Imagine a rich, fudgy brownie base topped with a cloud-like layer of silky chocolate mousse—all finished with a glossy chocolate topping or fresh berries.

This dessert is everything romance should taste like: indulgent, smooth, and deeply chocolatey. Whether you’re planning a romantic dinner at home or surprising someone special, these layered chocolate mousse brownies for Valentine’s dessert ideas are guaranteed to impress.

Why You’ll Love This Recipe

There are plenty of reasons these layered chocolate mousse brownies for Valentine’s dessert ideas deserve a spot on your dessert table.

  • Combines two desserts in one: brownies + mousse
  • Perfect for romantic occasions like Valentine’s Day
  • Rich, fudgy, and creamy textures
  • Make-ahead friendly for stress-free entertaining
  • Bakery-style presentation at home

This dessert looks fancy, but it’s surprisingly approachable for home bakers.


Ingredients

To make these layered chocolate mousse brownies for Valentine’s dessert ideas, you’ll need three main components:

For the Brownie Base:

  • 1/2 cup butter
  • 1 cup sugar
  • 2 eggs
  • 1/3 cup cocoa powder
  • 1/2 cup all-purpose flour
  • 1/4 teaspoon salt
  • 1/2 teaspoon vanilla extract

For the Chocolate Mousse:

  • 1 cup heavy whipping cream
  • 1/2 cup semi-sweet chocolate chips
  • 2 tablespoons powdered sugar
  • 1/2 teaspoon vanilla extract

Optional Topping:

  • Melted chocolate drizzle
  • Fresh strawberries
  • Chocolate shavings

Ingredient Notes

The magic of layered chocolate mousse brownies for Valentine’s dessert ideas comes from texture contrast. The brownie layer should be dense and fudgy, while the mousse is light and airy.

Using good-quality chocolate makes a huge difference in flavor. Semi-sweet chocolate balances the sweetness of the mousse, while cocoa powder intensifies the brownie base.


Step-by-Step Instructions

1. Make the Brownie Base

Preheat oven to 350°F (175°C). Melt butter and mix with sugar. Add eggs and vanilla, then whisk in cocoa powder, flour, and salt. Pour into a lined baking pan and bake for 20–25 minutes. Let cool completely.

2. Prepare the Chocolate Mousse

Melt chocolate chips and let cool slightly. Whip heavy cream with powdered sugar and vanilla until soft peaks form. Gently fold melted chocolate into whipped cream.

3. Assemble the Layers

Spread mousse evenly over cooled brownies. Smooth the top and refrigerate for at least 2–3 hours until set.

4. Add Toppings and Serve

Top with chocolate drizzle, berries, or shavings before slicing and serving.

Tips for Perfect Results

To make the best layered chocolate mousse brownies for Valentine’s dessert ideas, keep these tips in mind:

  • Always cool brownies completely before adding mousse
  • Use chilled cream for better whipping
  • Don’t overmix mousse—fold gently
  • Chill long enough for clean layers
  • Use a sharp knife for clean slices

These small details make a big difference in presentation and texture.


Variations

One of the best things about layered chocolate mousse brownies for Valentine’s dessert ideas is how easy they are to customize.

White Chocolate Version

Replace dark chocolate with white chocolate for a sweeter twist.

Raspberry Layer

Add fresh raspberries between brownie and mousse layers.

Mocha Flavor

Add espresso powder to enhance chocolate depth.

Nutty Crunch

Sprinkle chopped hazelnuts or almonds on top.

What to Serve With It

These layered chocolate mousse brownies for Valentine’s dessert ideas pair beautifully with:

  • Fresh strawberries
  • Espresso or coffee
  • Vanilla ice cream
  • Champagne or sparkling juice

These pairings enhance the romantic dessert experience.


Storage & Reheating

Proper storage keeps your layered chocolate mousse brownies for Valentine’s dessert ideas fresh and delicious.

  • Store in the refrigerator for up to 4 days
  • Keep covered to prevent drying
  • Do not freeze (mousse texture may change)
  • Serve chilled for best flavor

They taste even better after resting overnight.


Common Mistakes to Avoid

Avoid these mistakes when making layered chocolate mousse brownies for Valentine’s dessert ideas:

  • Adding mousse to warm brownies
  • Overwhipping or underwhipping cream
  • Skipping chill time
  • Using low-quality chocolate
  • Cutting before fully set

Avoiding these ensures perfect layers every time.


FAQs

Can I make these brownies ahead of time?

Yes! They’re perfect for making a day in advance.

Can I use boxed brownie mix?

Absolutely—it works well if you’re short on time.

Why is my mousse runny?

It likely wasn’t whipped enough or the cream was too warm.

Can I freeze them?

Not recommended due to mousse texture changes.


Final Thoughts

These layered chocolate mousse brownies for Valentine’s dessert ideas are the ultimate romantic treat—rich, creamy, and absolutely unforgettable. They combine the best of two worlds: fudgy brownies and airy chocolate mousse.

Whether you’re celebrating Valentine’s Day or simply want a luxurious dessert to share, this recipe delivers elegance without stress. Once you try these layered chocolate mousse brownies for Valentine’s dessert ideas, they’ll become your go-to special occasion dessert.

EASY MICROWAVE MUG BROWNIE (Fudgy, Fast & Chocolatey Dessert in Minutes)

When a chocolate craving hits, waiting for an oven to preheat is simply not an option. That’s where this easy microwave mug brownie comes in to save the day. Rich, fudgy, and ready in just a couple of minutes, it’s the ultimate single-serve dessert for busy days, late-night cravings, or anytime you need a quick chocolate fix.

The beauty of this easy microwave mug brownie is that it uses simple pantry ingredients you likely already have at home. No fancy equipment, no complicated steps—just mix, microwave, and enjoy a warm, gooey brownie straight from the mug.

Why You’ll Love This Recipe

There are plenty of reasons this easy microwave mug brownie will become your go-to dessert.

  • Ready in under 5 minutes
  • Made with simple pantry staples
  • Perfect single-serving treat
  • Fudgy, rich, and chocolate-loaded
  • No oven required

It’s the fastest way to satisfy your chocolate cravings without making a full batch of brownies.


Ingredients

To make this easy microwave mug brownie, you’ll need:

  • 4 tablespoons all-purpose flour
  • 2 tablespoons cocoa powder
  • 2–3 tablespoons sugar (adjust to taste)
  • Pinch of salt
  • 3 tablespoons milk
  • 2 tablespoons vegetable oil or melted butter
  • 1/4 teaspoon vanilla extract
  • Optional: chocolate chips or nuts

Ingredient Notes

The secret to a perfect easy microwave mug brownie lies in balancing moisture and chocolate flavor. Cocoa powder gives it that deep, rich taste, while oil or butter ensures a soft, fudgy texture.

Milk helps bind everything together, and vanilla extract enhances the chocolate flavor. If you want extra indulgence, chocolate chips melt beautifully inside the batter, creating gooey pockets of chocolate.


Step-by-Step Instructions

1. Mix Dry Ingredients

In a microwave-safe mug, combine flour, cocoa powder, sugar, and salt.

2. Add Wet Ingredients

Stir in milk, oil, and vanilla extract until smooth and lump-free.

3. Add Mix-Ins

Fold in chocolate chips or nuts if using.

4. Microwave

Cook on high for 60–90 seconds, depending on your microwave’s power.

5. Cool Slightly and Enjoy

Let it sit for a minute before eating—it will be very hot!

Tips for Perfect Results

To make the best easy microwave mug brownie, follow these simple tips:

  • Don’t overmix the batter
  • Use a large mug to prevent overflow
  • Start with less cooking time and adjust if needed
  • Let it rest before eating for best texture
  • Add chocolate chips for extra richness

These tips ensure a perfectly fudgy brownie every time.


Variations

One of the best things about this easy microwave mug brownie is how easy it is to customize.

Peanut Butter Swirl

Add a spoonful of peanut butter before microwaving.

Nutty Version

Mix in chopped walnuts or almonds.

Mint Chocolate

Add a drop of peppermint extract.

Double Chocolate

Use chocolate milk instead of regular milk.

What to Serve With It

This easy microwave mug brownie is delicious on its own, but even better with toppings.

  • Vanilla ice cream
  • Whipped cream
  • Chocolate syrup
  • Fresh berries

These additions turn it into a restaurant-style dessert.


Storage & Reheating

Since this is a single-serve dessert, the easy microwave mug brownie is best enjoyed immediately.

  • Best eaten fresh
  • Can be stored covered for up to 1 day
  • Reheat for 10–15 seconds in the microwave if needed

Freshly made is always the most fudgy and delicious.


Common Mistakes to Avoid

Avoid these mistakes when making your easy microwave mug brownie:

  • Overcooking (makes it dry and rubbery)
  • Using too small a mug
  • Not mixing thoroughly
  • Adding too much flour

Avoiding these ensures the perfect gooey texture.


FAQs

Can I make this mug brownie without eggs?

Yes! This recipe is completely egg-free.

Why is my mug brownie dry?

It was likely overcooked—reduce microwave time slightly next time.

Can I double the recipe?

It’s best made as a single serving, but you can cook two mugs separately.

Can I make it gluten-free?

Yes, use a gluten-free flour blend.


Final Thoughts

This easy microwave mug brownie is the ultimate quick dessert—rich, fudgy, and ready in minutes. It’s perfect for satisfying sudden chocolate cravings without the hassle of baking an entire pan of brownies.

Once you try it, you’ll see why this easy microwave mug brownie becomes a favorite go-to treat. Simple, fast, and absolutely delicious, it’s proof that great desserts don’t have to take time.

Loaded Bacon Cheeseburger Pasta You’ll Crave Again and Again

If you’re a fan of bold, comforting flavors, this loaded bacon cheeseburger pasta you’ll crave again and again is about to become your new favorite dinner. Imagine everything you love about a juicy bacon cheeseburger—savory ground beef, crispy bacon, melty cheese—combined with tender pasta and a rich, creamy sauce.

This dish is the definition of comfort food meets convenience. Whether you’re feeding a hungry family or just want leftovers that taste even better the next day, this loaded bacon cheeseburger pasta you’ll crave again and again delivers big flavor with minimal effort..

Why You’ll Love This Recipe

There’s a lot to love about this hearty, satisfying dish. This loaded bacon cheeseburger pasta you’ll crave again and again checks all the boxes for a perfect weeknight meal.

  • Rich, creamy, and packed with flavor
  • Combines two comfort food favorites
  • Easy one-pan or simple stovetop recipe
  • Family-friendly and filling
  • Great for leftovers and meal prep

It’s the kind of meal that brings everyone back to the table for seconds.


Ingredients

To make this irresistible loaded bacon cheeseburger pasta you’ll crave again and again, you’ll need:

  • 12 oz pasta (elbow, penne, or shells)
  • 1 lb ground beef
  • 6 slices bacon, cooked and crumbled
  • 1 small onion, diced
  • 2 cloves garlic, minced
  • 1 cup shredded cheddar cheese
  • 1/2 cup cream cheese
  • 1/2 cup milk
  • 2 tablespoons ketchup
  • 1 tablespoon mustard
  • Salt and pepper to taste

Ingredient Notes

The key to making loaded bacon cheeseburger pasta you’ll crave again and again is layering flavors. Ground beef provides a rich, savory base, while bacon adds smoky crunch that takes the dish to the next level.

Cheddar cheese delivers that classic cheeseburger flavor, and cream cheese helps create a smooth, creamy sauce. The addition of ketchup and mustard gives the dish its signature burger-inspired taste, making every bite feel nostalgic and satisfying.


Step-by-Step Instructions

1. Cook the Pasta

Boil pasta in salted water until al dente. Drain and set aside.

2. Cook the Bacon

In a large skillet, cook bacon until crispy. Remove and crumble, leaving some grease in the pan.

3. Brown the Beef

Add ground beef and diced onion to the skillet. Cook until browned and fully cooked. Stir in garlic.

4. Make the Sauce

Lower heat and add cream cheese, milk, ketchup, and mustard. Stir until smooth and creamy.

5. Combine Everything

Add cooked pasta and half the bacon to the skillet. Mix well, then top with shredded cheese and remaining bacon.

6. Melt and Serve

Let cheese melt, then serve warm.

Tips for Perfect Results

To make the best loaded bacon cheeseburger pasta you’ll crave again and again, follow these tips:

  • Use freshly shredded cheese for better melting
  • Don’t overcook the pasta
  • Drain excess grease if needed
  • Adjust sauce consistency with milk
  • Taste and adjust seasoning before serving

These tips ensure a perfectly creamy and flavorful dish.


Variations

This loaded bacon cheeseburger pasta you’ll crave again and again is easy to customize.

Add Veggies

Include tomatoes, pickles, or spinach.

Spicy Version

Add jalapeños or hot sauce.

Lighter Option

Use ground turkey instead of beef.

Extra Cheesy

Mix in multiple cheeses like mozzarella or pepper jack.

What to Serve With It

Pair this loaded bacon cheeseburger pasta you’ll crave again and again with simple sides to balance the richness.

  • Side salad
  • Garlic bread
  • Roasted vegetables
  • Pickles for a tangy contrast

It’s a complete meal that satisfies every craving.


Storage & Reheating

This loaded bacon cheeseburger pasta you’ll crave again and again stores beautifully for leftovers.

  • Refrigerate in an airtight container for up to 4 days
  • Reheat on the stovetop with a splash of milk
  • Microwave in short intervals, stirring between
  • Not ideal for freezing due to the creamy sauce

Leftovers are just as delicious the next day!


Common Mistakes to Avoid

Avoid these mistakes when making loaded bacon cheeseburger pasta you’ll crave again and again:

  • Overcooking the pasta
  • Using pre-shredded cheese (doesn’t melt as well)
  • Skipping seasoning adjustments
  • Adding too much liquid

These small details make a big difference in the final result.


FAQs

Can I make this ahead of time?

Yes! It reheats well and is great for meal prep.

What pasta works best?

Short pasta like shells or elbow macaroni holds the sauce well.

Can I make it without bacon?

Absolutely—though bacon adds extra flavor.

Is it kid-friendly?

Yes! Kids love the cheeseburger-inspired flavors.


Final Thoughts

This loaded bacon cheeseburger pasta you’ll crave again and again is the ultimate comfort food mashup—rich, cheesy, and packed with bold flavor. It’s easy to make, incredibly satisfying, and perfect for any night of the week.

Once you try it, don’t be surprised if it becomes a regular in your dinner rotation. This dish truly lives up to its name—you’ll be craving it again and again!

Vanilla Mug Cake Recipe (Soft, Fluffy & Ready in Minutes!)

Craving something sweet but don’t want to bake an entire cake? This vanilla mug cake recipe is the perfect solution. Made in just minutes using simple pantry ingredients, this single-serve dessert is soft, fluffy, and incredibly satisfying.

Whether you need a late-night treat, a quick dessert after dinner, or a fun recipe to make with kids, this vanilla mug cake recipe delivers instant gratification without the hassle. Best of all, it’s made right in your microwave—no oven required!

Why You’ll Love This Recipe

There’s a lot to love about this vanilla mug cake recipe, especially when time and simplicity matter.

Here’s why it’s a favorite:

  • Ready in under 5 minutes
  • Uses basic pantry ingredients
  • Perfect single-serving dessert
  • Soft, moist, and fluffy texture
  • Easy to customize with toppings or flavors

It’s the ultimate quick dessert for busy days or spontaneous cravings.


Ingredients

To make this easy vanilla mug cake recipe, you’ll need:

  • 4 tablespoons all-purpose flour
  • 2 tablespoons sugar
  • 1/4 teaspoon baking powder
  • Pinch of salt
  • 3 tablespoons milk
  • 2 tablespoons vegetable oil or melted butter
  • 1/2 teaspoon vanilla extract

Ingredient Notes

The beauty of this vanilla mug cake recipe lies in its simplicity. Each ingredient plays an important role in creating that soft, cake-like texture.

Flour provides structure, while baking powder gives the cake its lift. Milk adds moisture, and oil or butter ensures a tender crumb. Vanilla extract is the star flavor—so use a good-quality one for the best results.


Step-by-Step Instructions

1. Mix Dry Ingredients

In a microwave-safe mug, whisk together flour, sugar, baking powder, and salt.

2. Add Wet Ingredients

Pour in milk, oil, and vanilla extract. Mix until smooth with no lumps.

3. Microwave

Cook on high for 60–90 seconds, depending on your microwave’s power.

4. Cool Slightly and Enjoy

Let the cake cool for a minute before digging in.

Tips for Perfect Results

To get the best results from your vanilla mug cake recipe, keep these tips in mind:

  • Don’t overmix the batter
  • Use a large mug to prevent overflow
  • Start with shorter cook time and add more if needed
  • Let it rest briefly after microwaving
  • Avoid overcooking to keep it moist

These tips help you achieve a perfectly fluffy mug cake every time.


Variations

One of the best things about this vanilla mug cake recipe is how easy it is to customize.

Chocolate Chip Version

Add a tablespoon of chocolate chips.

Funfetti Cake

Mix in colorful sprinkles for a festive touch.

Lemon Twist

Add a little lemon zest for brightness.

Cinnamon Sugar

Sprinkle cinnamon sugar on top before cooking.

What to Serve With It

This vanilla mug cake recipe is delicious on its own, but even better with toppings.

  • Whipped cream
  • Fresh berries
  • Ice cream
  • Chocolate or caramel drizzle

These additions turn a simple mug cake into a decadent dessert.


Storage & Reheating

Since this vanilla mug cake recipe is a single serving, it’s best enjoyed fresh.

  • Eat immediately for best texture
  • If needed, cover and store for up to 1 day
  • Reheat briefly in the microwave (10–15 seconds)

Fresh is always best, but it can be saved in a pinch.


Common Mistakes to Avoid

Avoid these common mistakes when making this vanilla mug cake recipe:

  • Overcooking (leads to dryness)
  • Using a mug that’s too small
  • Not mixing thoroughly
  • Adding too much flour

Keeping these in mind ensures perfect results every time.


FAQs

Can I make this without eggs?

Yes! This recipe is naturally egg-free.

Why is my mug cake rubbery?

It’s likely overcooked—reduce cooking time slightly.

Can I use almond milk?

Absolutely—any milk alternative works well.

Can I double the recipe?

It’s best made as a single serving, but you can make two mugs separately.


Final Thoughts

This vanilla mug cake recipe is proof that you don’t need a lot of time or ingredients to create something delicious. It’s quick, easy, and incredibly satisfying—perfect for when you want dessert without the fuss.

Once you try it, this vanilla mug cake recipe will become your go-to for instant sweet cravings. Simple, comforting, and endlessly customizable, it’s a little treat that always delivers big flavor.