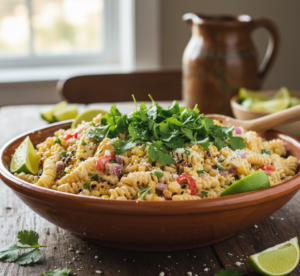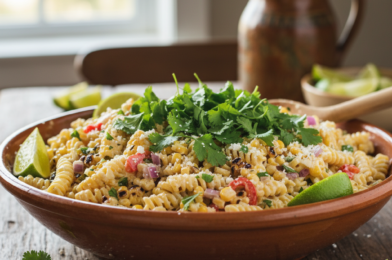
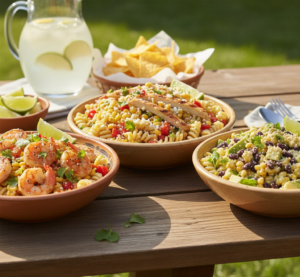
If you’re looking for a bold, flavor-packed side dish that steals the show at every gathering, this Mexican street corn pasta salad is a must-try dish you absolutely need in your recipe collection. Inspired by the classic street food flavors of elote, this pasta salad combines sweet corn, creamy dressing, tangy lime, and a hint of spice into one irresistible bowl.
Perfect for summer cookouts, potlucks, or even a quick weekday side, this Mexican street corn pasta salad is a must-try dish because it delivers both comfort and freshness in every bite. It’s creamy without being heavy, zesty without being overpowering, and incredibly easy to make.
Why You’ll Love This Recipe
There are so many reasons why this Mexican street corn pasta salad is a must-try dish, especially if you love bold, fresh flavors.
Here’s what makes it special:
- Creamy and tangy with a hint of spice
- Perfect for BBQs, picnics, and gatherings
- Easy to prepare ahead of time
- Combines classic street corn flavors with pasta
- Customizable with proteins or veggies
It’s the kind of dish that disappears quickly—so you might want to make extra!
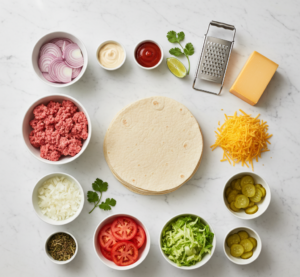
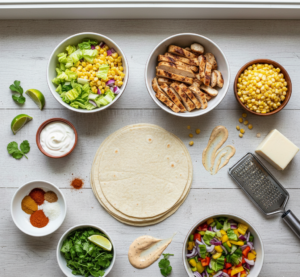
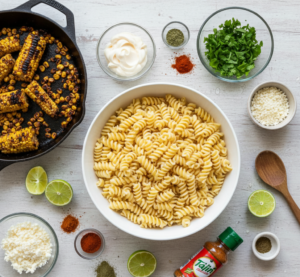
Ingredients
To make this delicious Mexican street corn pasta salad is a must-try dish, gather the following:
- 12 oz pasta (rotini or bowtie)
- 2 cups corn (fresh, canned, or frozen)
- 1/2 cup mayonnaise
- 1/4 cup sour cream
- 1/2 cup crumbled cotija cheese (or feta)
- 1 tablespoon lime juice
- 1 teaspoon chili powder
- 1/2 teaspoon smoked paprika
- 1/4 cup chopped cilantro
- Salt and pepper to taste
Ingredient Notes
The beauty of this Mexican street corn pasta salad is a must-try dish lies in its balance of flavors. Sweet corn is the star, especially when lightly charred for that authentic street corn taste.
Cotija cheese adds a salty, crumbly texture, while the creamy base of mayo and sour cream ties everything together. Fresh lime juice brightens the dish, and chili powder adds just the right amount of warmth.
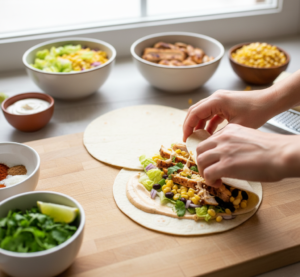
Step-by-Step Instructions
1. Cook the Pasta
Boil pasta in salted water until al dente. Drain and let cool completely.
2. Prepare the Corn
If using fresh or frozen corn, sauté in a skillet until slightly charred for extra flavor.
3. Make the Dressing
In a large bowl, mix mayonnaise, sour cream, lime juice, chili powder, smoked paprika, salt, and pepper.
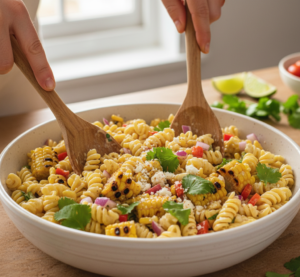
4. Combine Ingredients
Add cooled pasta, corn, cilantro, and cheese to the dressing. Toss until well coated.
5. Chill and Serve
Refrigerate for at least 30 minutes before serving for best flavor.
Tips for Perfect Results
To ensure your Mexican street corn pasta salad is a must-try dish turns out perfect every time, keep these tips in mind:
- Let the pasta cool before mixing to prevent sogginess
- Char the corn for added depth of flavor
- Adjust lime juice to taste for extra brightness
- Use fresh cilantro for the best aroma
- Chill before serving to enhance flavor
These simple tips elevate the dish from good to unforgettable.
Variations
One of the reasons this Mexican street corn pasta salad is a must-try dish is its versatility.
Add Protein
Include grilled chicken, shrimp, or black beans.
Make It Spicy
Add diced jalapeños or hot sauce.
Lighten It Up
Use Greek yogurt instead of sour cream.
Vegan Option
Use plant-based mayo and skip the cheese or use vegan cheese.
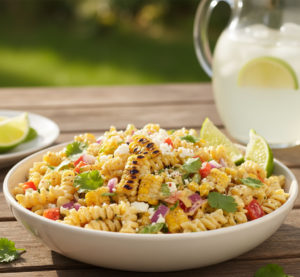
What to Serve With It
This Mexican street corn pasta salad is a must-try dish pairs beautifully with many main courses.
- Grilled chicken or steak
- Burgers and hot dogs
- BBQ ribs
- Tacos or fajitas
It’s a versatile side that complements both casual and festive meals.
Storage & Reheating
This Mexican street corn pasta salad is a must-try dish stores well and is great for leftovers.
- Refrigerate in an airtight container for up to 3 days
- Stir before serving to refresh the texture
- Add a splash of lime juice if needed
- Not suitable for freezing
It’s even more flavorful the next day!
Common Mistakes to Avoid
Avoid these common mistakes when making this Mexican street corn pasta salad is a must-try dish:
- Mixing pasta while still hot
- Skipping the chilling step
- Using too much dressing
- Not seasoning properly
Avoiding these ensures the perfect balance of flavor and texture.
FAQs
Can I make this ahead of time?
Yes! It actually tastes better after chilling for a few hours.
What pasta works best?
Short pasta like rotini or bowtie holds the dressing well.
Can I use canned corn?
Absolutely—just drain and sauté for better flavor.
Is it spicy?
It has mild heat, but you can adjust spice levels easily.
Final Thoughts
This Mexican street corn pasta salad is a must-try dish for anyone who loves bold, fresh, and creamy flavors. It’s easy to make, incredibly versatile, and perfect for any occasion—from backyard BBQs to quick family dinners.
Once you try it, you’ll understand why it’s such a crowd favorite. Add this Mexican street corn pasta salad is a must-try dish to your menu, and watch it become a staple everyone requests again and again.