Easy No Bake Chocolate Chip Cookie Dough Bars for Every Occasion

If you’re looking for a dessert that’s effortless, crowd-pleasing, and dangerously addictive, these Easy No Bake Chocolate Chip Cookie Dough Bars for Every Occasion are exactly what you need. They deliver everything you love about classic cookie dough—soft texture, buttery sweetness, and plenty of chocolate chips—but in a safe, sliceable, no-bake form.

These bars are perfect for birthdays, holidays, potlucks, or even just a late-night sweet craving. Since there’s no oven required, they come together quickly and chill into perfect squares that taste like edible cookie dough heaven.


Why You’ll Love This Recipe

These easy no bake chocolate chip cookie dough bars are made for real-life dessert lovers.

  • No oven needed—quick and simple
  • Safe to eat with heat-treated flour
  • Soft, chewy, and rich in flavor
  • Perfect for parties and gifting
  • Customizable for any occasion

They’re the kind of dessert everyone asks you to bring again and again.


Ingredients

To make these cookie dough bars, you’ll need simple pantry staples:

  • 1 cup all-purpose flour (heat-treated)
  • ½ cup unsalted butter (softened)
  • ½ cup brown sugar
  • ¼ cup white sugar
  • 2 teaspoons vanilla extract
  • 2–3 tablespoons milk
  • ¾ cup chocolate chips
  • Pinch of salt
  • Optional: melted chocolate for topping


Ingredient Notes

The magic behind Easy No Bake Chocolate Chip Cookie Dough Bars for Every Occasion is in the texture and balance.

  • Heat-treated flour ensures safety
  • Brown sugar gives deep caramel flavor
  • Butter creates creamy richness
  • Vanilla enhances sweetness naturally
  • Chocolate chips add texture and classic cookie flavor

Always use softened butter for smooth mixing.


Step-by-Step Instructions

1. Heat-Treat the Flour

Bake or microwave flour until safe to eat, then cool completely.


2. Cream Butter and Sugars

Mix butter, brown sugar, and white sugar until light and fluffy.


3. Add Flavor

Stir in vanilla extract and a pinch of salt for balance.


4. Mix in Flour

Gradually add cooled flour and mix until dough forms.


5. Add Milk and Chocolate Chips

Stir in milk, then fold in chocolate chips evenly.


6. Press Into Pan

Spread dough into a lined baking dish and press firmly and evenly.


7. Chill and Slice

Refrigerate for 2–3 hours, then cut into bars.


Tips for Perfect Results

To make the best Easy No Bake Chocolate Chip Cookie Dough Bars for Every Occasion, follow these tips:

  • Always heat-treat flour properly
  • Use room-temperature butter for smooth texture
  • Chill long enough for clean slicing
  • Don’t skip salt—it enhances sweetness
  • Add extra chocolate chips for indulgence

Variations

These bars are easy to customize for any event.

Birthday Cake Version

Add sprinkles and white chocolate chips.

Peanut Butter Swirl

Mix in peanut butter for extra richness.

Double Chocolate

Add cocoa powder to the dough.

Vegan Option

Use plant-based butter and milk alternatives.


What to Serve With It

These cookie dough bars pair perfectly with:

  • Cold milk or hot coffee
  • Ice cream scoops
  • Fresh berries
  • Dessert platters
  • Party snack boards

They’re great for any celebration.


Storage & Reheating

For best freshness:

  • Refrigerator: Store up to 7 days
  • Freezer: Store up to 2 months
  • Keep in airtight container
  • Serve chilled or slightly softened


Common Mistakes to Avoid

Avoid these mistakes when making Easy No Bake Chocolate Chip Cookie Dough Bars:

  • Not heat-treating flour
  • Using melted butter instead of softened
  • Skipping chilling time
  • Adding too much milk
  • Cutting before fully set

FAQs

1. Are these cookie dough bars safe to eat?

Yes, as long as you heat-treat the flour properly.

2. Can I freeze them?

Yes, they freeze very well for up to 2 months.

3. Can I make them gluten-free?

Yes, use a gluten-free flour blend.

4. Why are my bars too soft?

They likely need more chilling time or less milk.


Final Thoughts

These Easy No Bake Chocolate Chip Cookie Dough Bars for Every Occasion are the ultimate easy dessert. They’re rich, sweet, and perfect for any event—from casual snacks to big celebrations.

Once you make them, they’ll quickly become a go-to recipe you’ll want to repeat again and again.

Chocolate Strawberry Yogurt Clusters Recipe – Easy Healthy Frozen Treat

If you’re craving something sweet, refreshing, and secretly healthy, this Chocolate Strawberry Yogurt Clusters Recipe is about to become your new favorite treat. These frozen yogurt clusters combine juicy strawberries, creamy yogurt, and a rich chocolate shell for the perfect bite-sized dessert.

They’re simple to make, require no baking, and taste like a frozen chocolate-covered cheesecake bite. Whether you need a quick snack, a healthier dessert, or a fun treat for kids, this recipe checks every box.


Why You’ll Love This Recipe

This Chocolate Strawberry Yogurt Clusters Recipe is loved for its simplicity and flavor.

  • No baking required
  • Only a few simple ingredients
  • Naturally sweet and refreshing
  • Perfect for meal prep snacks
  • Kid-friendly and freezer-friendly

It’s a guilt-free dessert that feels indulgent without the extra calories.


Ingredients

To make this Chocolate Strawberry Yogurt Clusters Recipe, you’ll need:

  • 1 ½ cups fresh strawberries (chopped)
  • 1 cup Greek yogurt (vanilla or plain)
  • 1–2 tablespoons honey or maple syrup
  • 1 teaspoon vanilla extract (optional)
  • 1 cup melted dark chocolate or milk chocolate
  • 1 teaspoon coconut oil (optional for smooth coating)
  • Pinch of sea salt (optional)


Ingredient Notes

The success of this Chocolate Strawberry Yogurt Clusters Recipe depends on balance and texture.

  • Greek yogurt adds creaminess and protein
  • Strawberries give natural sweetness and freshness
  • Honey enhances flavor without overpowering
  • Dark chocolate adds richness and crunch
  • Coconut oil helps create a smooth chocolate shell

You can easily adjust sweetness based on your preference.


Step-by-Step Instructions

1. Prepare the Yogurt Mixture

In a bowl, mix Greek yogurt, honey, and vanilla until smooth.


2. Add Strawberries

Fold in chopped strawberries gently so they are evenly coated.


3. Form Clusters

Scoop spoonfuls of the mixture onto a parchment-lined baking tray.


4. Freeze Until Firm

Freeze clusters for at least 2–3 hours until solid.


5. Dip in Chocolate

Melt chocolate with coconut oil and drizzle or dip frozen clusters.


6. Set and Serve

Let chocolate harden, then enjoy immediately or store frozen.


Tips for Perfect Results

To make the best Chocolate Strawberry Yogurt Clusters Recipe, follow these tips:

  • Freeze clusters fully before dipping in chocolate
  • Use thick Greek yogurt for best structure
  • Don’t overmix strawberries or they’ll release too much juice
  • Work quickly when coating in chocolate
  • Store in freezer immediately after finishing

Variations

This recipe is very flexible and fun to customize.

Mixed Berry Version

Add blueberries and raspberries.

Peanut Butter Twist

Swirl peanut butter into the yogurt mixture.

Dark Chocolate Only

Use 70%+ dark chocolate for a healthier version.

Crunchy Version

Add granola or crushed nuts.


What to Serve With It

These Chocolate Strawberry Yogurt Clusters pair well with:

  • Smoothies
  • Coffee or iced lattes
  • Fresh fruit bowls
  • Protein shakes
  • Light breakfast spreads

They’re perfect as a snack or light dessert.


Storage & Reheating

For best freshness:

  • Freezer: Store up to 2 months
  • Keep in airtight container
  • No reheating needed
  • Eat directly from freezer for best texture


Common Mistakes to Avoid

Avoid these mistakes when making Chocolate Strawberry Yogurt Clusters Recipe:

  • Not freezing long enough before dipping
  • Using thin yogurt (it won’t hold shape)
  • Overloading with strawberries
  • Skipping parchment paper
  • Letting chocolate cool too much before coating

FAQs

1. Are these yogurt clusters healthy?

Yes, they’re made with yogurt, fruit, and dark chocolate for a balanced treat.

2. Can I use frozen strawberries?

Fresh is best, but thawed frozen strawberries can work if drained well.

3. Can I make them dairy-free?

Yes, use coconut or almond yogurt and dairy-free chocolate.

4. How long do they last in the freezer?

They stay fresh for up to 2 months in an airtight container.


Final Thoughts

This Chocolate Strawberry Yogurt Clusters Recipe is the perfect blend of healthy, sweet, and refreshing. It’s easy to prepare, freezer-friendly, and satisfying without being heavy.

Whether you need a quick snack, a light dessert, or a fun treat for the family, these yogurt clusters are guaranteed to become a repeat favorite.

Mini Cadbury Egg Protein Balls – Healthy Easter Snack Recipe

If you’re looking for a fun, festive, and slightly healthier Easter treat, these Mini Cadbury Egg Protein Balls are about to become your new favorite snack. They combine the nostalgic crunch of mini Cadbury eggs with a soft, protein-packed base that tastes like dessert but fuels your day like a snack.

Perfect for Easter baskets, post-workout bites, or sweet cravings without going overboard, these protein balls are no-bake, quick, and incredibly addictive. They’re also kid-friendly and great for meal prep.


Why You’ll Love This Recipe

These Mini Cadbury Egg Protein Balls are a must-try for spring and Easter season.

  • No-bake and super quick to make
  • High in protein and satisfying
  • Perfect balance of sweet and healthy
  • Great for Easter parties and snacks
  • Kid-friendly and fun to prepare

They taste like dessert but work as a nutritious snack anytime.


Ingredients

To make these Mini Cadbury Egg Protein Balls, you’ll need:

  • 1 cup rolled oats
  • ½ cup vanilla or chocolate protein powder
  • ½ cup peanut butter or almond butter
  • ¼ cup honey or maple syrup
  • 1 teaspoon vanilla extract
  • ½ cup crushed mini Cadbury eggs
  • 2–3 tablespoons milk (as needed)
  • Optional: dark chocolate drizzle


Ingredient Notes

The magic of Mini Cadbury Egg Protein Balls comes from the balance of texture and flavor.

  • Oats create a hearty, chewy base
  • Protein powder boosts nutrition and keeps you full
  • Peanut butter adds creaminess and richness
  • Honey or maple syrup binds everything naturally
  • Mini Cadbury eggs bring crunch and chocolate sweetness

You can easily adjust sweetness or protein levels to your preference.


Step-by-Step Instructions

1. Mix Dry Ingredients

In a large bowl, combine oats and protein powder.


2. Add Wet Ingredients

Add peanut butter, honey, and vanilla extract. Mix until combined.


3. Adjust Texture

Add milk gradually until a thick dough forms.


4. Fold in Cadbury Eggs

Gently crush mini Cadbury eggs and fold them into the mixture.


5. Shape Into Balls

Roll mixture into small bite-sized balls using your hands.


6. Chill and Set

Place in fridge for at least 30 minutes before serving.


Tips for Perfect Results

To make the best Mini Cadbury Egg Protein Balls, follow these tips:

  • Don’t over-crush the Cadbury eggs for texture
  • Add milk slowly to avoid a runny dough
  • Chill before rolling for easier shaping
  • Use natural peanut butter for best flavor
  • Store chilled for freshness

Variations

You can customize these protein balls easily.

Chocolate Lover Version

Add cocoa powder and chocolate chips.

Nut-Free Version

Use sunflower seed butter instead of peanut butter.

Extra Protein Boost

Add an extra scoop of protein powder.

Holiday Twist

Swap Cadbury eggs for M&Ms or sprinkles.


What to Serve With It

These Mini Cadbury Egg Protein Balls pair well with:

  • Greek yogurt
  • Smoothies
  • Coffee or tea
  • Fresh fruit
  • Post-workout shakes

They’re perfect as a quick snack or dessert alternative.


Storage & Reheating

For best freshness:

  • Refrigerator: Store up to 7 days
  • Freezer: Freeze up to 2 months
  • Serving: Eat chilled or room temperature
  • No reheating needed


Common Mistakes to Avoid

Avoid these mistakes when making Mini Cadbury Egg Protein Balls:

  • Adding too much liquid too quickly
  • Over-mixing and crushing candy too fine
  • Skipping chilling time
  • Using dry peanut butter without adjusting moisture
  • Making balls too large

FAQs

1. Are these protein balls healthy?

Yes, they’re high in protein and made with wholesome ingredients.

2. Can I make them without protein powder?

Yes, substitute with extra oats or almond flour.

3. Can I freeze them?

Yes, they freeze very well for up to 2 months.

4. Do they taste like dessert?

Absolutely—they taste like a healthy cookie dough treat.


Final Thoughts

These Mini Cadbury Egg Protein Balls are the perfect mix of fun, flavor, and nutrition. They’re quick to make, easy to store, and ideal for Easter celebrations or everyday snacking.

Once you try them, you’ll want to keep a batch in your fridge at all times—they’re that good.

Indulge in Millionaire Brownies: A Decadent Delight!

If you’re craving a dessert that truly lives up to its name, these millionaire brownies are the ultimate indulgence. Combining three irresistible layers—buttery shortbread, luscious caramel, and rich chocolate brownie—this dessert is pure luxury in every bite. It’s the kind of treat that feels special enough for celebrations but is simple enough to make at home.

What makes millionaire brownies so unforgettable is their perfect balance of textures and flavors. You get a crisp, crumbly base, a silky caramel center, and a fudgy chocolate top that melts in your mouth. Whether you’re baking for a party, a holiday gathering, or just treating yourself, this recipe guarantees impressive results.


Why You’ll Love This Recipe

These millionaire brownies are not your average brownies—they’re a next-level dessert experience.

  • Three decadent layers in one dessert
  • Perfect balance of sweet, buttery, and rich flavors
  • Great for special occasions or gifting
  • Easy to slice and serve for gatherings
  • A guaranteed crowd-pleaser

Once you taste them, you’ll understand why they’re called “millionaire” brownies—they taste like a million bucks.


Ingredients

To make these indulgent millionaire brownies, you’ll need:

For the Shortbread Layer:

  • 1 cup unsalted butter (softened)
  • ½ cup granulated sugar
  • 2 cups all-purpose flour

For the Caramel Layer:

  • 1 cup unsalted butter
  • 1 cup brown sugar
  • 1 can (14 oz) sweetened condensed milk
  • 2 tablespoons corn syrup

For the Brownie Layer:

  • 1 cup unsalted butter (melted)
  • 1 ½ cups granulated sugar
  • ¾ cup cocoa powder
  • 3 large eggs
  • 1 teaspoon vanilla extract
  • 1 cup all-purpose flour
  • ½ teaspoon salt


Ingredient Notes

When making millionaire brownies, quality ingredients truly make a difference. Use real butter for richness and high-quality cocoa powder for a deep chocolate flavor. Sweetened condensed milk is essential for achieving that smooth, creamy caramel layer.

If you want to elevate your brownies even more, consider:

  • Using dark chocolate cocoa for a richer taste
  • Adding a pinch of sea salt to enhance sweetness
  • Substituting part of the flour with almond flour for a nutty twist

Step-by-Step Instructions

1. Make the Shortbread Base

Preheat your oven to 350°F. In a bowl, cream together butter and sugar until light and fluffy. Gradually add flour and mix until a dough forms. Press evenly into a lined baking pan and bake for 15–18 minutes until lightly golden.


2. Prepare the Caramel Layer

In a saucepan over medium heat, melt butter, brown sugar, condensed milk, and corn syrup. Stir continuously until thick and golden, about 8–10 minutes. Pour over the baked shortbread layer and spread evenly.


3. Make the Brownie Batter

In a mixing bowl, whisk melted butter, sugar, cocoa powder, eggs, and vanilla extract until smooth. Fold in flour and salt until just combined.


4. Assemble and Bake

Pour the brownie batter over the caramel layer and spread gently. Bake for 20–25 minutes until the top is set but still fudgy.


5. Cool and Slice

Allow the brownies to cool completely before slicing. This helps the layers set properly and ensures clean cuts.


Tips for Perfect Millionaire Brownies

To achieve bakery-quality millionaire brownies, keep these tips in mind:

  • Let each layer cool slightly before adding the next
  • Stir caramel constantly to prevent burning
  • Don’t overbake the brownie layer—it should stay fudgy
  • Chill before slicing for cleaner cuts
  • Use a sharp knife and wipe between cuts

Variations

These millionaire brownies are incredibly versatile and easy to customize.

Salted Caramel Version

Sprinkle flaky sea salt over the caramel layer for a sweet-salty contrast.

Nutty Delight

Add chopped pecans or walnuts between layers for extra crunch.

Chocolate Lover’s Twist

Mix chocolate chips into the brownie batter for an even richer dessert.

Gluten-Free Option

Use a gluten-free flour blend for a celiac-friendly version.


What to Serve With It

These millionaire brownies are rich on their own, but pairing them with complementary flavors can elevate the experience:

  • Vanilla ice cream
  • Fresh berries like strawberries or raspberries
  • Hot coffee or espresso
  • A drizzle of chocolate or caramel sauce

Serving them slightly warm with ice cream creates an unforgettable dessert moment.


Storage & Reheating

Millionaire brownies store beautifully, making them perfect for make-ahead desserts.

  • Room Temperature: Store in an airtight container for up to 3 days
  • Refrigerator: Keeps fresh for up to 1 week
  • Freezer: Freeze for up to 2 months
  • Reheating: Warm slightly in the microwave for a gooey texture


Common Mistakes to Avoid

Even experienced bakers can run into issues when making millionaire brownies:

  • Overcooking the caramel (can become too hard)
  • Not lining the pan properly
  • Cutting before fully cooled
  • Overmixing the brownie batter
  • Using low-quality cocoa powder

Avoiding these mistakes ensures a perfect result every time.


FAQs

1. Why are they called millionaire brownies?

Because they’re rich, indulgent, and layered—like a luxurious dessert fit for a millionaire.

2. Can I make millionaire brownies ahead of time?

Yes! They actually taste better the next day as the flavors develop.

3. How do I get clean slices?

Chill the brownies and use a sharp knife, wiping it between cuts.

4. Can I use store-bought caramel?

You can, but homemade caramel provides the best flavor and texture.


Final Thoughts

These millionaire brownies are the definition of indulgence. With their buttery shortbread base, silky caramel center, and rich chocolate topping, they deliver a dessert experience that’s both comforting and luxurious.

Whether you’re baking for a celebration or simply treating yourself, this recipe is guaranteed to impress. Once you try these decadent layered brownies, they’ll quickly become one of your go-to desserts for any special occasion.

No-Bake Oreo Cheesecake – Creamy, Dreamy & Ultra Easy Dessert Recipe

If you’re a fan of creamy desserts that require zero oven time, this No-Bake Oreo Cheesecake is going to be your new favorite treat. It’s rich, silky, and packed with chunks of chocolate Oreo cookies in every bite.

Unlike traditional baked cheesecakes, this version is incredibly simple and beginner-friendly. There’s no water bath, no cracking, and no stress—just a smooth, luscious dessert that sets perfectly in the fridge.

This No-Bake Oreo Cheesecake is perfect for birthdays, holidays, potlucks, or whenever you need a quick yet impressive dessert that everyone will love.


Why You’ll Love This No-Bake Oreo Cheesecake

There are so many reasons to adore this No-Bake Oreo Cheesecake:

  • No oven required
  • Ultra creamy and rich texture
  • Packed with Oreo cookie chunks
  • Easy beginner-friendly recipe
  • Perfect make-ahead dessert

It’s the ultimate dessert for Oreo lovers everywhere.


Ingredients

To make this No-Bake Oreo Cheesecake, you’ll need:

For the Crust:

  • 24 Oreo cookies (crushed)
  • 5 tablespoons melted butter

For the Cheesecake Filling:

  • 16 oz cream cheese (softened)
  • 1 cup heavy whipping cream
  • 3/4 cup powdered sugar
  • 10–12 Oreo cookies (chopped)
  • 1 teaspoon vanilla extract

For Topping (optional):

  • Whipped cream
  • Crushed Oreos
  • Chocolate drizzle


Ingredient Notes

The success of this No-Bake Oreo Cheesecake depends on using quality ingredients and proper texture balance.

Cream cheese should be fully softened for a smooth filling. Heavy cream adds fluffiness and lightness, making the cheesecake airy instead of dense.

Oreo cookies provide both the crust and mix-ins, giving the dessert its signature cookies-and-cream flavor.


Step-by-Step Instructions

Step 1: Make the Crust

Mix crushed Oreos with melted butter and press firmly into a springform pan.


Step 2: Whip Cream

Beat heavy cream until stiff peaks form.


Step 3: Prepare Cheesecake Filling

Mix cream cheese, powdered sugar, and vanilla until smooth, then fold in whipped cream.


Step 4: Add Oreos

Fold in chopped Oreo cookies evenly.


Step 5: Assemble

Pour filling over crust and smooth the top.


Step 6: Chill

Refrigerate for at least 4–6 hours or overnight.


Step 7: Serve

Top with whipped cream and crushed Oreos before serving.


Tips for Perfect Results

To make the best No-Bake Oreo Cheesecake, follow these tips:

  • Use softened cream cheese for smooth texture
  • Whip cream to stiff peaks for structure
  • Chill overnight for best firmness
  • Crush Oreos finely for crust stability
  • Fold gently to keep filling airy

These tips guarantee a perfect cheesecake every time.


Variations

This No-Bake Oreo Cheesecake is easy to customize:

  • Use Golden Oreos for vanilla version
  • Add peanut butter swirl
  • Mix in chocolate chips
  • Top with caramel drizzle
  • Make mini cheesecake cups

Each variation brings a new flavor experience.


What to Serve With It

Pair your No-Bake Oreo Cheesecake with:

  • Hot coffee
  • Cold milk
  • Chocolate sauce
  • Fresh strawberries
  • Vanilla ice cream

These pairings enhance the creamy richness.


Storage & Reheating

To store your No-Bake Oreo Cheesecake:

  • Keep refrigerated for up to 5 days
  • Cover tightly to prevent drying
  • Freeze for up to 2 months
  • Thaw in fridge before serving

No reheating is needed—just serve chilled.


Common Mistakes

Avoid these mistakes when making No-Bake Oreo Cheesecake:

  • Not chilling long enough
  • Overmixing filling
  • Using cold cream cheese
  • Skipping whipped cream step
  • Crust too loose or crumbly

Avoiding these ensures perfect cheesecake texture.


FAQs

1. Can I make this without heavy cream?

Yes, but texture will be less fluffy.

2. Can I use store-bought whipped topping?

Yes, it’s a quick substitute.

3. How long does it need to set?

At least 4–6 hours, overnight is best.

4. Can I freeze Oreo cheesecake?

Yes, it freezes very well.


Final Thoughts

This No-Bake Oreo Cheesecake is the perfect combination of simplicity and indulgence. Creamy, rich, and packed with Oreo cookies, it’s a dessert that always impresses without requiring any baking skills.

Whether you’re making it for a celebration or a simple sweet craving, this recipe delivers every time. Once you try it, it will become a go-to dessert in your kitchen!

Ravenclaw Midnight Blueberry Cheesecake 🔮🌌 | Silky, Mystical & Wizard-Approved

Step into a world of magic and indulgence with this Ravenclaw Midnight Blueberry Cheesecake 🔮🌌 | Silky, Mystical & Wizard-Approved. Inspired by deep midnight hues and rich, velvety textures, this cheesecake is as enchanting as it is delicious.

This dessert isn’t just about looks—though its stunning blue-purple tones are unforgettable—it’s also packed with flavor. Creamy cheesecake meets the natural sweetness of blueberries, creating a luxurious dessert that feels straight out of a wizarding feast.

Whether you’re hosting a themed party, celebrating a special occasion, or simply craving something unique, this Ravenclaw Midnight Blueberry Cheesecake will absolutely steal the spotlight.

Why You’ll Love This Ravenclaw Midnight Blueberry Cheesecake

This Ravenclaw Midnight Blueberry Cheesecake 🔮🌌 | Silky, Mystical & Wizard-Approved offers more than just a magical appearance:

  • Silky, creamy texture that melts in your mouth
  • Naturally flavored with blueberries
  • Stunning visual presentation
  • Perfect for themed parties or celebrations
  • Make-ahead friendly dessert

It’s a show-stopping centerpiece that tastes just as incredible as it looks.

Ingredients

To make this enchanting Ravenclaw Midnight Blueberry Cheesecake, you’ll need:

For the Crust:

  • 1 1/2 cups chocolate cookie crumbs
  • 1/3 cup melted butter

For the Filling:

  • 24 oz cream cheese (softened)
  • 1 cup granulated sugar
  • 3 large eggs
  • 1 cup blueberry puree
  • 1 teaspoon vanilla extract
  • 1/2 cup sour cream

For the Topping:

  • Fresh blueberries
  • Blueberry glaze or sauce
  • Edible shimmer or glitter (optional)

Ingredient Notes

The magic behind this Ravenclaw Midnight Blueberry Cheesecake lies in its ingredients.

Fresh blueberries are key for achieving that naturally rich color and flavor. If you want an even deeper “midnight” tone, you can enhance the color with a small amount of natural food coloring. The chocolate cookie crust adds a subtle richness that pairs beautifully with the fruity filling.

Make sure your cream cheese is fully softened to ensure a smooth, lump-free texture.

Step-by-Step Instructions

Step 1: Prepare the Crust

Mix chocolate cookie crumbs with melted butter and press firmly into a springform pan. Chill while preparing the filling.

Step 2: Make the Filling

Beat cream cheese and sugar until smooth. Add eggs one at a time, then mix in blueberry puree, vanilla, and sour cream.


Step 3: Assemble

Pour the filling over the crust and smooth the top evenly.

Step 2: Make the Filling

Beat cream cheese and sugar until smooth. Add eggs one at a time, then mix in blueberry puree, vanilla, and sour cream.


Step 3: Assemble

Pour the filling over the crust and smooth the top evenly.

Step 4: Bake

Bake at 325°F (160°C) for 50–60 minutes until the center is slightly set.


Step 5: Cool and Decorate

Let the cheesecake cool completely, then top with blueberry glaze, fresh berries, and edible shimmer.

Tips for Perfect Results

To create the perfect Ravenclaw Midnight Blueberry Cheesecake, follow these tips:

  • Use room temperature ingredients for smooth batter
  • Avoid overmixing to prevent cracks
  • Bake in a water bath for even cooking
  • Let cheesecake cool gradually
  • Chill overnight for best texture

These tips ensure a creamy, crack-free cheesecake.

Variations

Customize your Ravenclaw Midnight Blueberry Cheesecake 🔮🌌 | Silky, Mystical & Wizard-Approved:

  • Add a swirl of cream cheese for a marbled effect
  • Use graham cracker crust instead of chocolate
  • Add lemon zest for brightness
  • Top with whipped cream
  • Create mini cheesecakes for individual servings

These variations let you personalize your magical dessert.

What to Serve With It

Pair your Ravenclaw Midnight Blueberry Cheesecake with:

  • Fresh whipped cream
  • Coffee or espresso
  • Herbal tea
  • Vanilla ice cream
  • Fresh fruit

These pairings enhance the overall dessert experience.

Storage & Reheating

To store your Ravenclaw Midnight Blueberry Cheesecake:

  • Refrigerate in airtight container for up to 5 days
  • Freeze slices for up to 2 months
  • Thaw overnight in fridge before serving
  • Do not microwave

Proper storage keeps the texture creamy and fresh.

Common Mistakes

Avoid these mistakes when making Ravenclaw Midnight Blueberry Cheesecake:

  • Overmixing batter
  • Skipping water bath
  • Using cold ingredients
  • Overbaking
  • Not chilling long enough

Avoiding these ensures a flawless result.

FAQs

1. Can I use frozen blueberries?

Yes, just thaw and drain them before making the puree.

2. How do I get a smooth texture?

Use room temperature ingredients and mix gently.

3. Can I make this ahead of time?

Absolutely! It’s even better after chilling overnight.

4. What gives it the deep blue color?

Blueberries provide natural color, enhanced with optional food coloring.


Final Thoughts

This Ravenclaw Midnight Blueberry Cheesecake 🔮🌌 | Silky, Mystical & Wizard-Approved is more than just a dessert—it’s an experience. From its rich, creamy texture to its mesmerizing color, every bite feels magical.

Perfect for themed parties or simply treating yourself to something special, this cheesecake is guaranteed to impress both visually and in flavor. Once you make it, it will become one of your most memorable and beloved recipes!

Chocolate Covered Strawberry Brownies – Rich, Fudgy & Irresistibly Decadent

If you’re looking for a show-stopping dessert that combines elegance with pure indulgence, these Chocolate Covered Strawberry Brownies are exactly what you need. Imagine a rich, fudgy brownie base layered with juicy fresh strawberries and topped with a smooth, glossy chocolate coating—it’s the ultimate chocolate lover’s dream.

This recipe takes inspiration from classic chocolate-covered strawberries and transforms them into a decadent, sliceable dessert that’s perfect for holidays, date nights, or special occasions. Not only do these brownies look stunning, but they also deliver an incredible balance of flavors—deep chocolate richness, bright berry freshness, and silky sweetness.

Once you try these Chocolate Covered Strawberry Brownies, you’ll find yourself making them again and again for any event that calls for something truly special.

Why You’ll Love These Chocolate Covered Strawberry Brownies

There are so many reasons to fall in love with these Chocolate Covered Strawberry Brownies:

  • Rich, fudgy brownie base
  • Fresh strawberries add natural sweetness and brightness
  • Smooth chocolate ganache topping
  • Perfect for celebrations or romantic desserts
  • Beautiful presentation with minimal effort

These brownies are as impressive as they are delicious.

Ingredients

To make these irresistible Chocolate Covered Strawberry Brownies, you’ll need:

For the Brownie Base:

  • 1 cup unsalted butter
  • 1 1/2 cups granulated sugar
  • 3/4 cup cocoa powder
  • 3 large eggs
  • 1 teaspoon vanilla extract
  • 1 cup all-purpose flour
  • 1/2 teaspoon salt

For the Topping:

  • 2 cups fresh strawberries (hulled and sliced)
  • 1 1/2 cups semi-sweet chocolate chips
  • 1/2 cup heavy cream

Ingredient Notes

To get the best results from your Chocolate Covered Strawberry Brownies, quality ingredients make all the difference.

Use fresh, ripe strawberries for the best flavor and texture. Semi-sweet chocolate chips create a balanced ganache that isn’t overly sweet. If you prefer a deeper chocolate flavor, you can use dark chocolate instead.

The brownie base should be rich and fudgy, so avoid overmixing the batter to maintain that perfect dense texture.

Step-by-Step Instructions

Step 1: Make the Brownie Batter

Melt butter and mix with sugar and cocoa powder. Add eggs and vanilla, then stir in flour and salt until combined.

Step 2: Bake the Brownies

Pour batter into a lined baking pan and bake at 350°F (175°C) for 20–25 minutes. Let cool completely.


Step 3: Add the Strawberry Layer

Arrange sliced strawberries evenly over the cooled brownie base.

Step 4: Make the Ganache

Heat heavy cream and pour over chocolate chips. Stir until smooth and glossy.


Step 5: Add Chocolate Topping

Pour ganache over strawberries, spreading evenly. Chill until set.

Tips for Perfect Results

To master Chocolate Covered Strawberry Brownies, follow these tips:

  • Let brownies cool completely before adding toppings
  • Pat strawberries dry to avoid excess moisture
  • Use high-quality chocolate for smooth ganache
  • Chill thoroughly before slicing
  • Use a sharp knife for clean cuts

These tips ensure a professional-looking and delicious dessert.

Variations

These Chocolate Covered Strawberry Brownies are easy to customize:

  • Add white chocolate drizzle for contrast
  • Use raspberries instead of strawberries
  • Add a cheesecake layer for extra richness
  • Sprinkle chopped nuts for crunch
  • Use gluten-free flour for dietary needs

Each variation adds a unique twist while keeping the core flavors intact.

What to Serve With It

Pair your Chocolate Covered Strawberry Brownies with:

  • Vanilla ice cream
  • Fresh whipped cream
  • Coffee or espresso
  • Champagne or dessert wine
  • Fresh berries

These pairings elevate the dessert even more.

Storage & Reheating

To keep your Chocolate Covered Strawberry Brownies fresh:

  • Store in airtight container in refrigerator for up to 4 days
  • Keep chilled due to fresh fruit
  • Let sit at room temperature before serving
  • Not ideal for freezing due to strawberries

Proper storage maintains flavor and texture.

Common Mistakes

Avoid these mistakes when making Chocolate Covered Strawberry Brownies:

  • Adding strawberries to warm brownies
  • Not drying strawberries properly
  • Overbaking the brownie base
  • Using low-quality chocolate
  • Skipping chilling time

Avoiding these ensures perfect layers and flavor.

FAQs

1. Can I use frozen strawberries?

Fresh strawberries are best, as frozen ones release too much moisture.

2. How do I get clean slices?

Chill thoroughly and use a sharp knife wiped clean between cuts.

3. Can I make this recipe ahead of time?

Yes, it’s perfect for making a day in advance.

4. Can I use boxed brownie mix?

Absolutely! It’s a great shortcut for busy days.


Conclusion

These Chocolate Covered Strawberry Brownies are the perfect blend of rich chocolate and fresh fruit, making them a standout dessert for any occasion. They’re beautiful, indulgent, and surprisingly easy to make at home.

Whether you’re celebrating something special or just treating yourself, this recipe delivers a bakery-quality dessert that’s guaranteed to impress. Once you try it, you’ll understand why it’s such a crowd favorite!

Chocolate Chip Cookie Dough Brownie Bites 🍫🍪✨ | Fudgy, Creamy & Bakery-Perfect

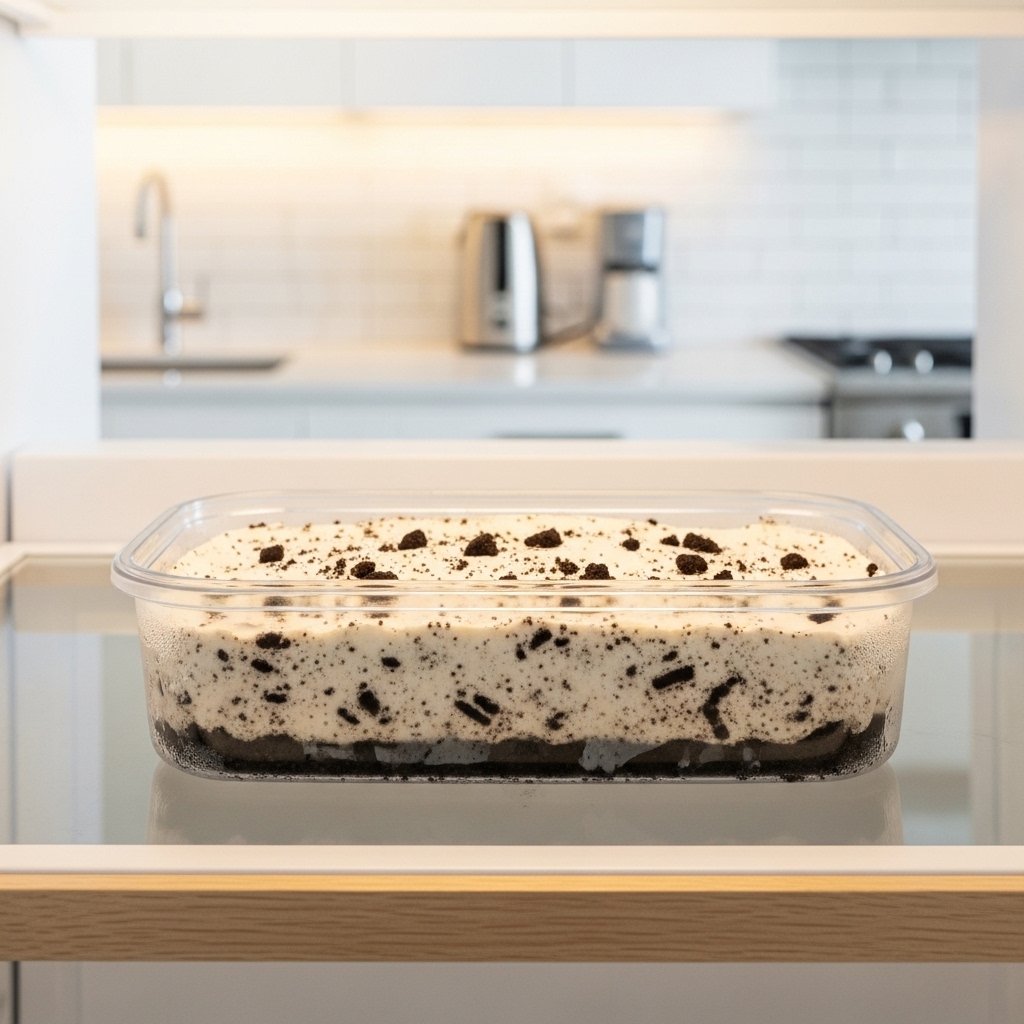
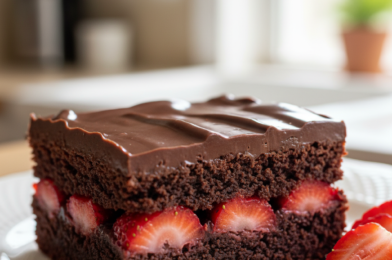
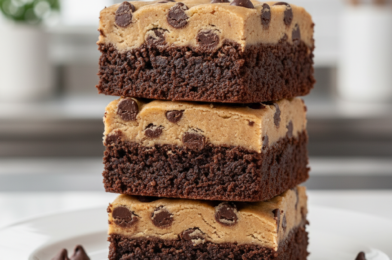
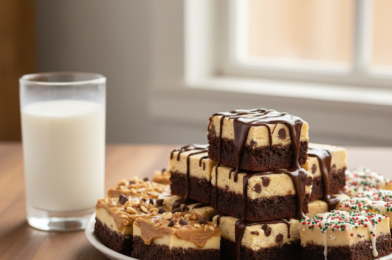
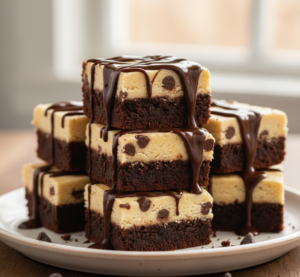
If you have ever found yourself standing in front of the pantry, torn between the chewy richness of a fudge brownie and the nostalgic comfort of raw cookie dough, this recipe is your sign that you don’t have to choose. Chocolate Chip Cookie Dough Brownie Bites are the definitive answer to every dessert lover’s internal conflict. These bite-sized treasures feature a dense, cocoa-rich brownie base topped with a thick, creamy layer of edible, eggless chocolate chip cookie dough. They aren’t just a snack; they are a decadent experience designed to mimic the high-end treats you’d find at a boutique American bakery.

Creating the perfect brownie bite is an art form that balances textures. You want a brownie that is sturdy enough to hold a topping but fudgy enough to melt in your mouth. By combining a dark chocolate profile with the buttery, brown-sugar-heavy notes of cookie dough, we create a flavor harmony that is hard to beat. Whether you are prepping for a backyard barbecue, a holiday party, or just a Tuesday night craving, these bites are guaranteed to be the star of the show.


Why You’ll Love These Chocolate Chip Cookie Dough Brownie Bites

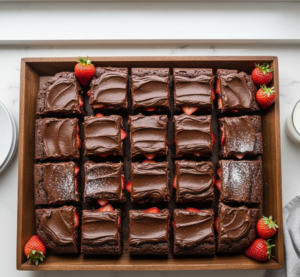
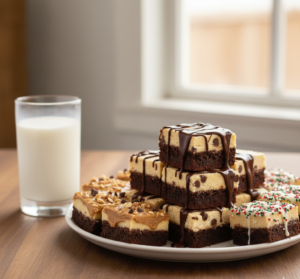
There is a reason this specific dessert has taken the internet by storm: it hits every single sensory note. First, there is the texture. You get the slight resistance of the brownie crust, the fudgy interior, and then the smooth, melt-away consistency of the cookie dough. Second, the convenience factor is huge. Since these are made in a mini-muffin tin or cut into small squares, they are perfectly portioned for crowds. No messy slicing or crumbly cake layers to worry about—just grab and go.

Beyond the taste, this recipe is incredibly versatile. You can dress them up with a drizzle of melted ganache or keep them simple and rustic. Most importantly, this version uses heat-treated flour and an eggless cookie dough base, making it 100% safe to eat “raw.” We’ve all been told not to eat the dough since we were kids, but this recipe finally gives you the green light to indulge without a second thought.


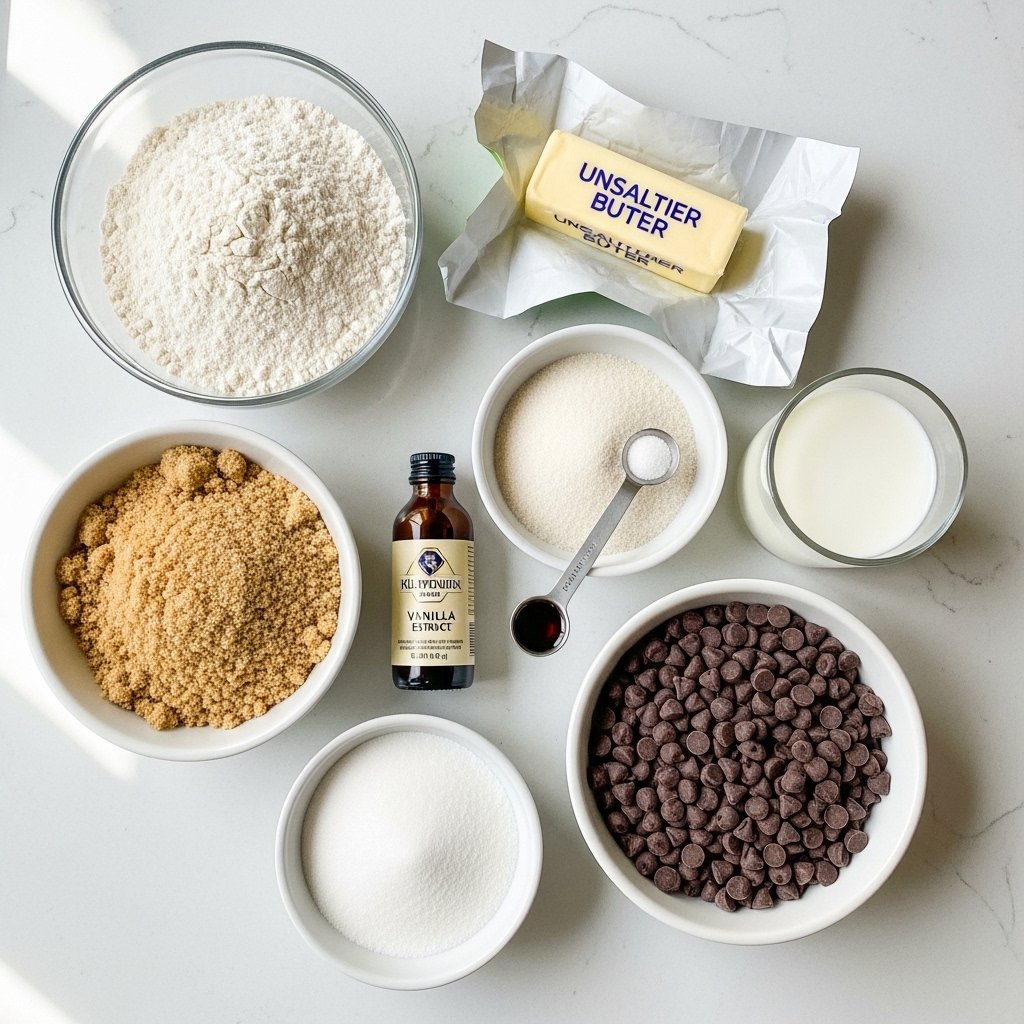
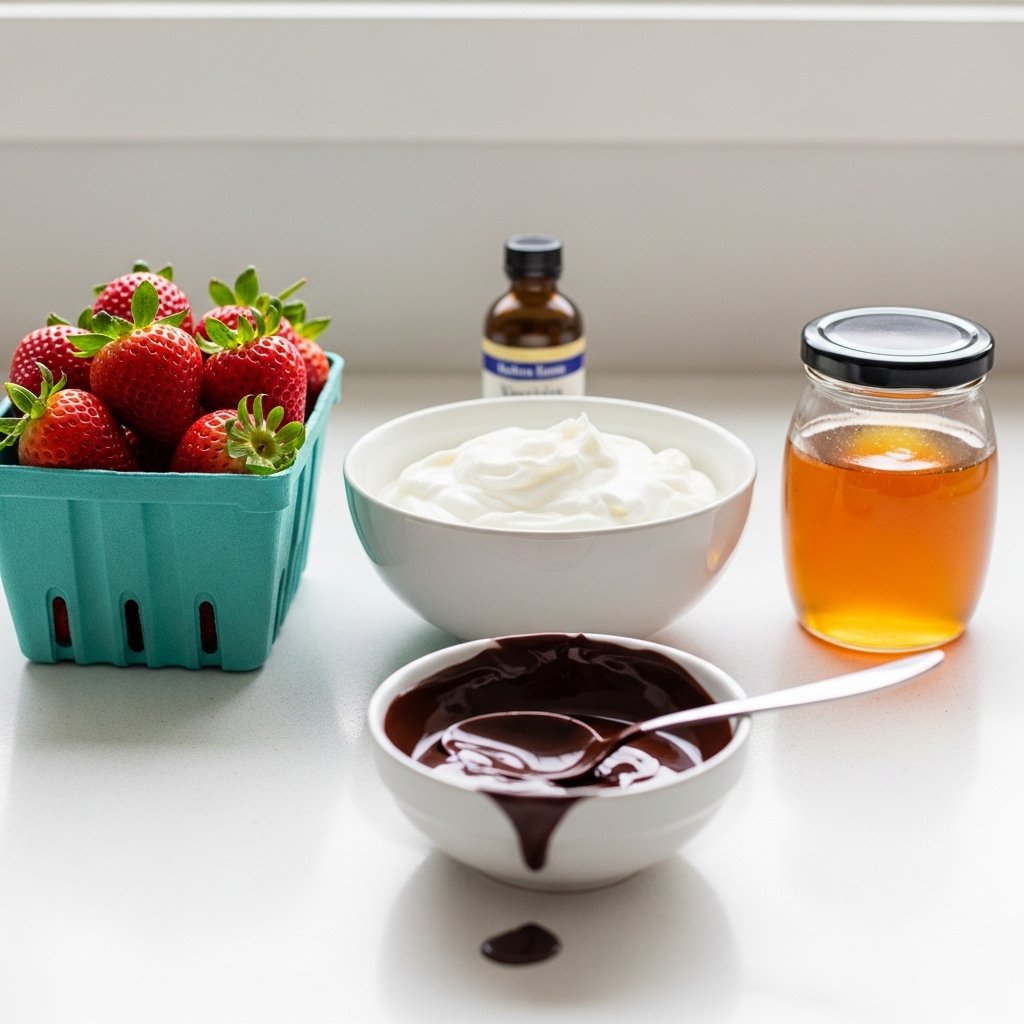
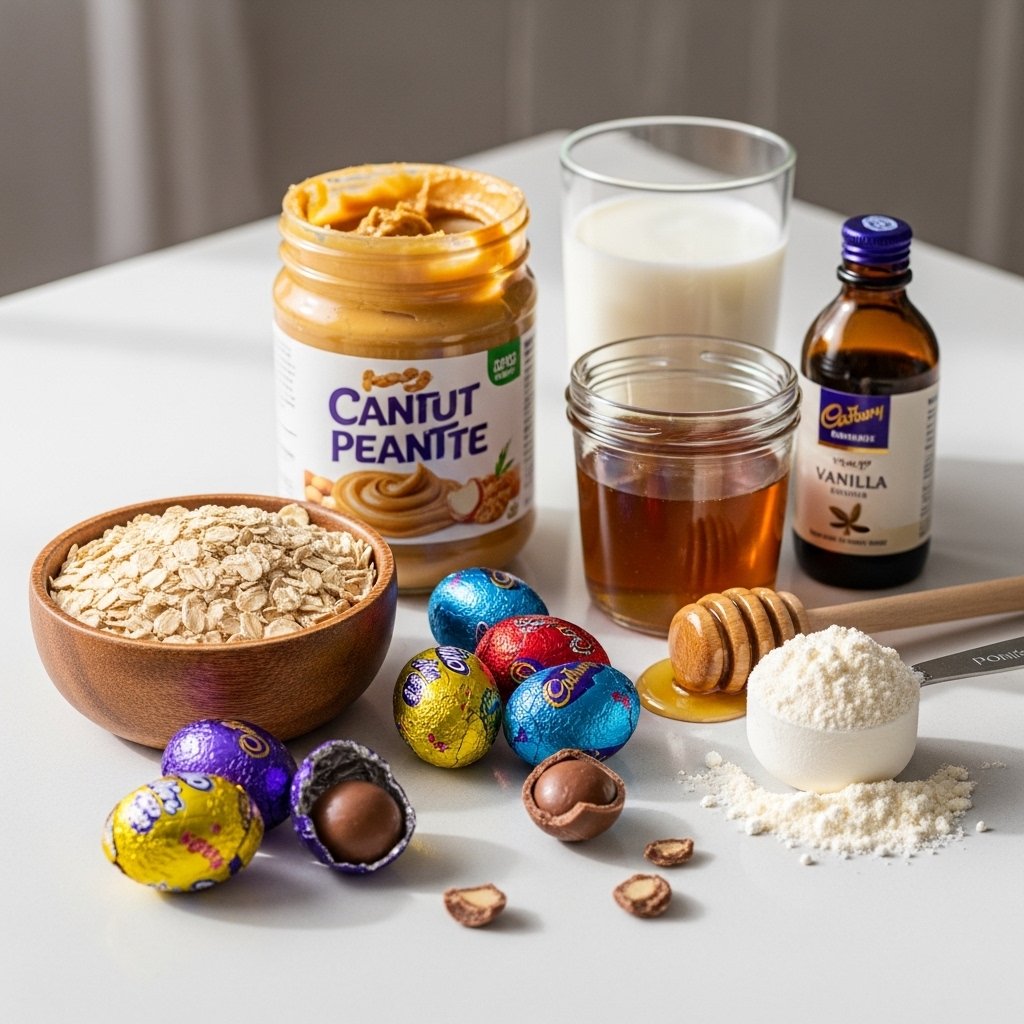
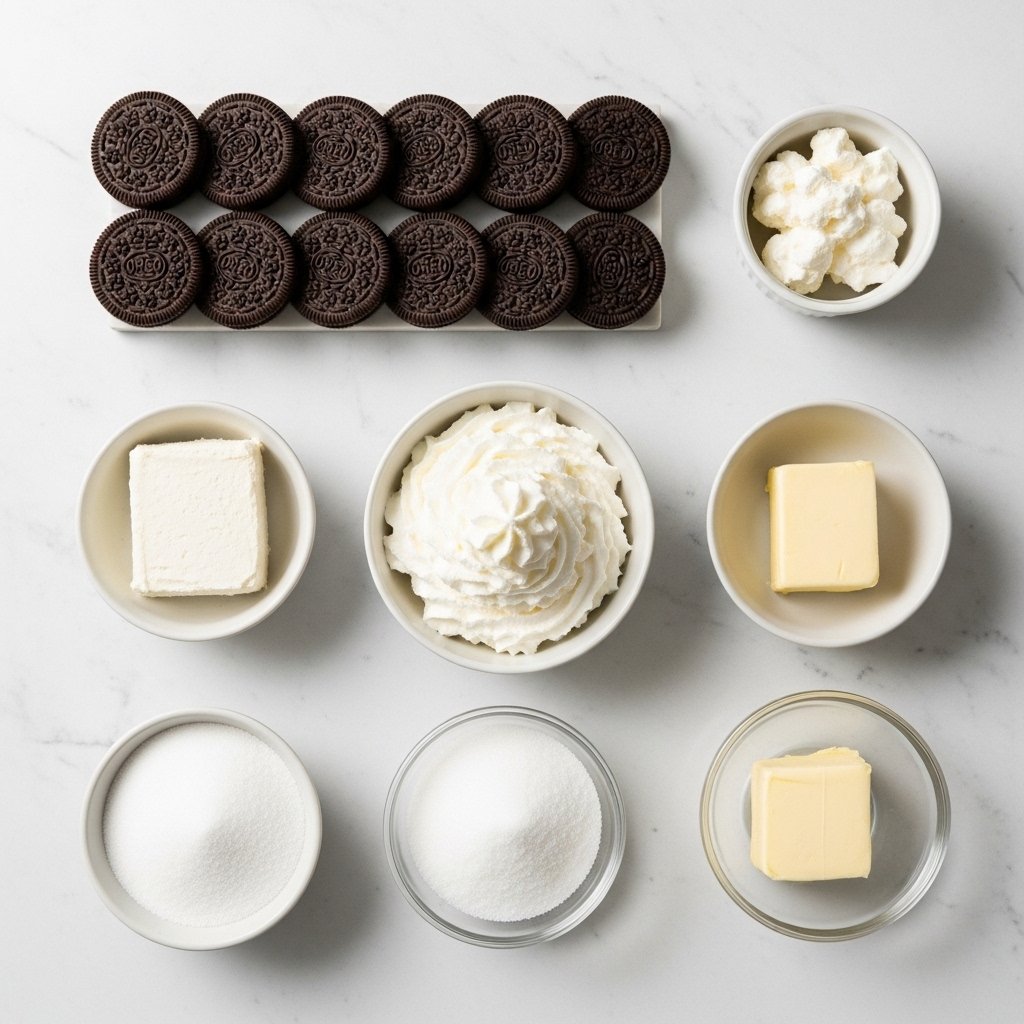
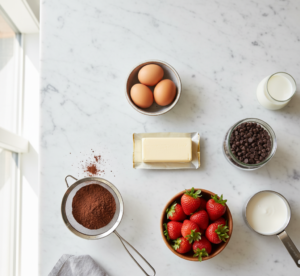
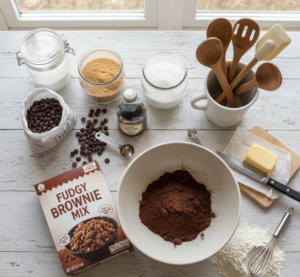
Ingredients You’ll Need

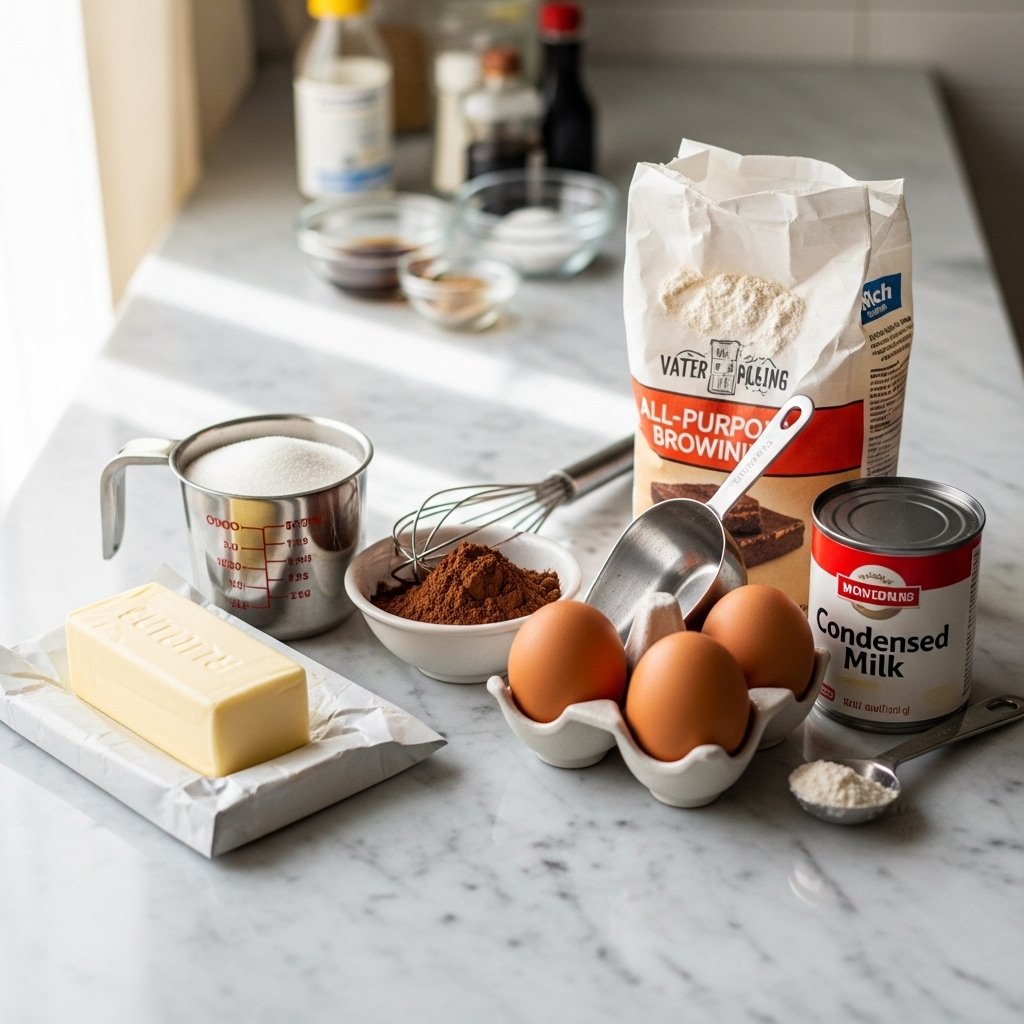
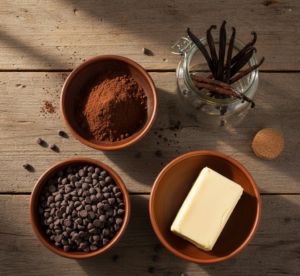
To achieve that bakery-level quality, you’ll need standard pantry staples, but the quality of your chocolate will make all the difference.

For the Brownie Base:

  • Unsalted Butter: Melted to create that signature chewy texture.

  • Granulated Sugar & Light Brown Sugar: A mix provides sweetness and moisture.

  • Cocoa Powder: Unsweetened, high-quality Dutch-processed cocoa is best.

  • Eggs: Room temperature for better emulsion.

  • Vanilla Extract: Pure Madagascar vanilla is the gold standard.

  • All-Purpose Flour: Just enough to provide structure.

  • Salt: To balance the intense sweetness.

For the Cookie Dough Topping:

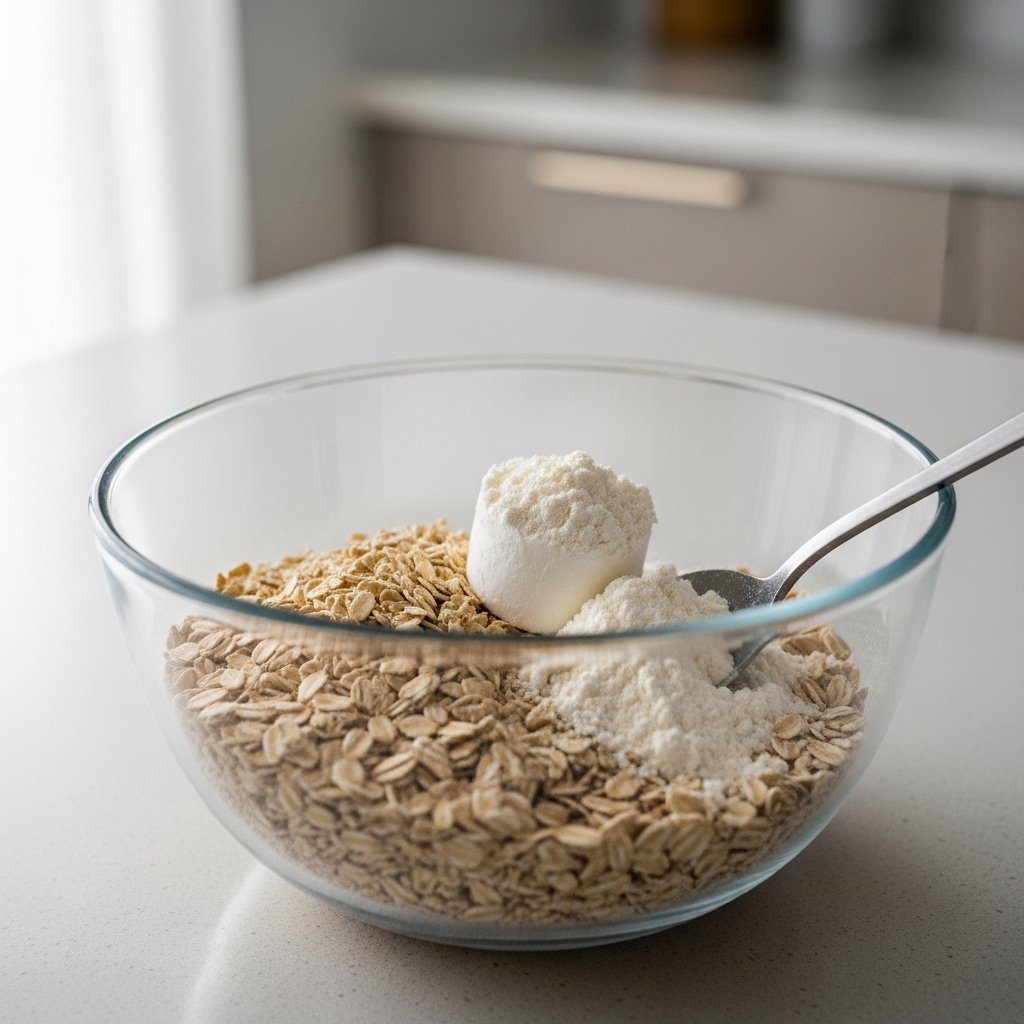
  • Heat-Treated All-Purpose Flour: Essential for food safety.

  • Unsalted Butter: Softened to room temperature.

  • Brown Sugar: For that deep molasses flavor.

  • Heavy Cream or Milk: To achieve the right “doughy” consistency.

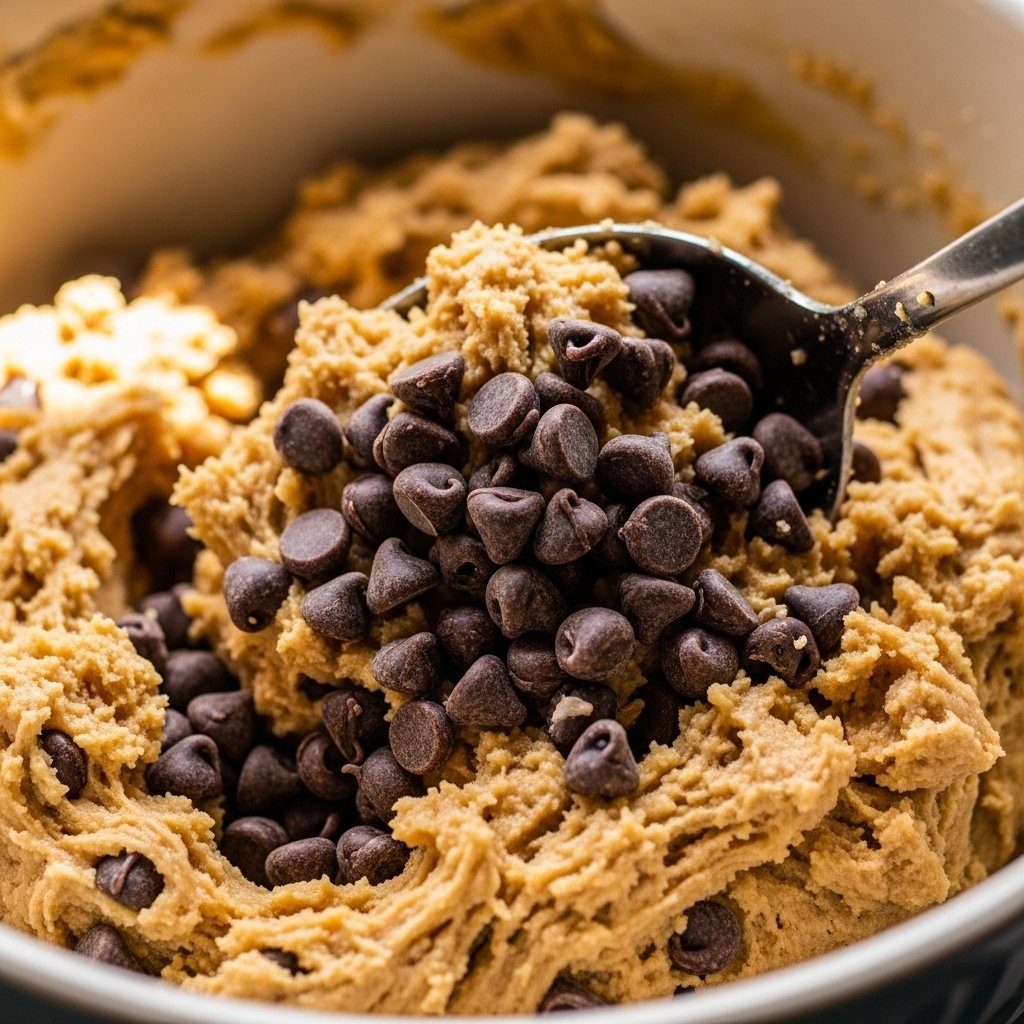
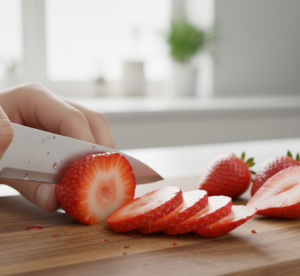
  • Mini Semi-Sweet Chocolate Chips: Mini chips ensure you get chocolate in every single bite.


Ingredient Notes for Professional Results

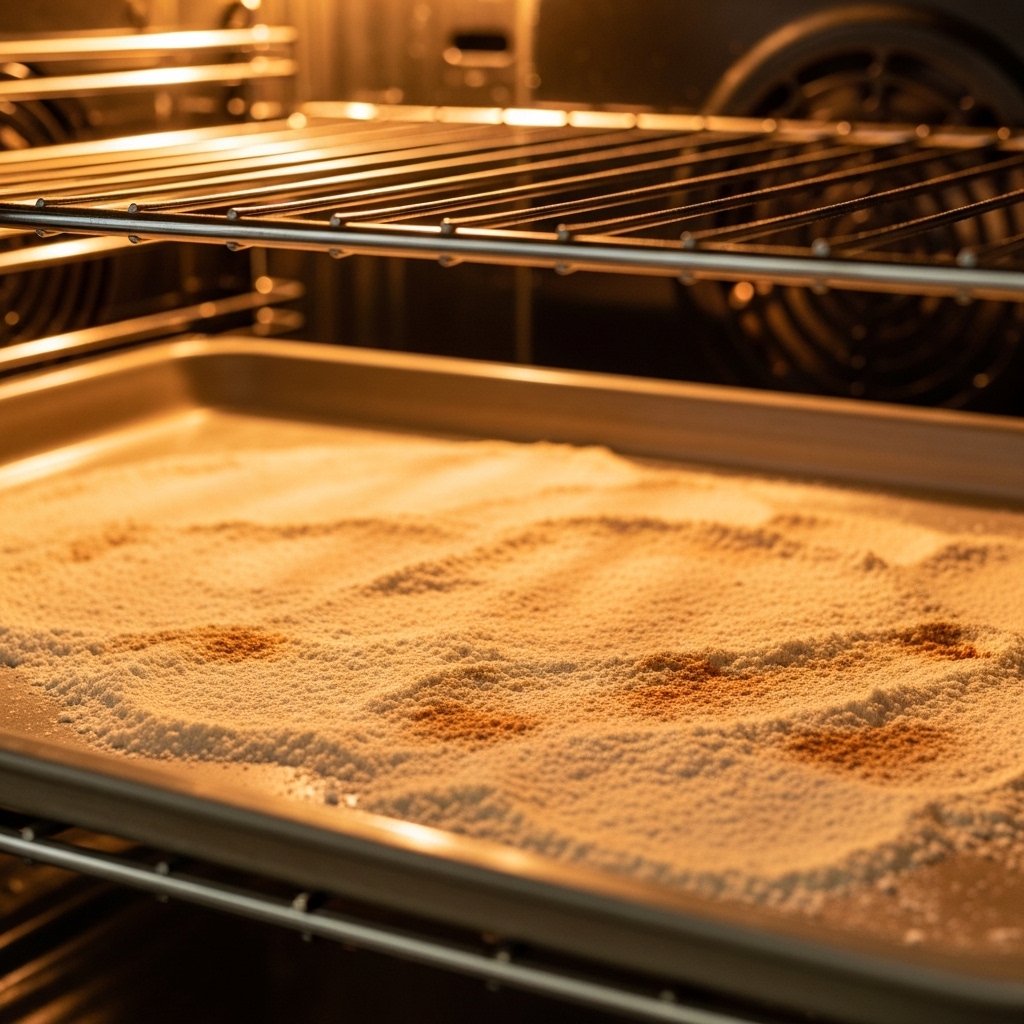
When making Chocolate Chip Cookie Dough Brownie Bites, the “heat-treated flour” is a step you cannot skip. To do this, simply spread your flour on a baking sheet and bake at 350°F for about 5–7 minutes until it reaches 160°F. This kills any lingering bacteria, making your edible cookie dough safe. Additionally, I highly recommend using Dutch-processed cocoa powder for the brownie base. It has a lower acidity and a darker, richer color than natural cocoa, which results in a more “gourmet” appearance and a smoother chocolate flavor.

Another tip is to use mini chocolate chips rather than standard-sized ones. Because these bites are small, regular chips can feel bulky and disrupt the creamy texture of the dough. Mini chips distribute more evenly, ensuring that the ratio of dough to chocolate remains perfect in every mouthful. If you want to get really fancy, sprinkle a tiny bit of flaky sea salt over the finished bites to cut through the sugar and enhance the cocoa notes.

Step-by-Step Instructions

1. Prepare the Brownies

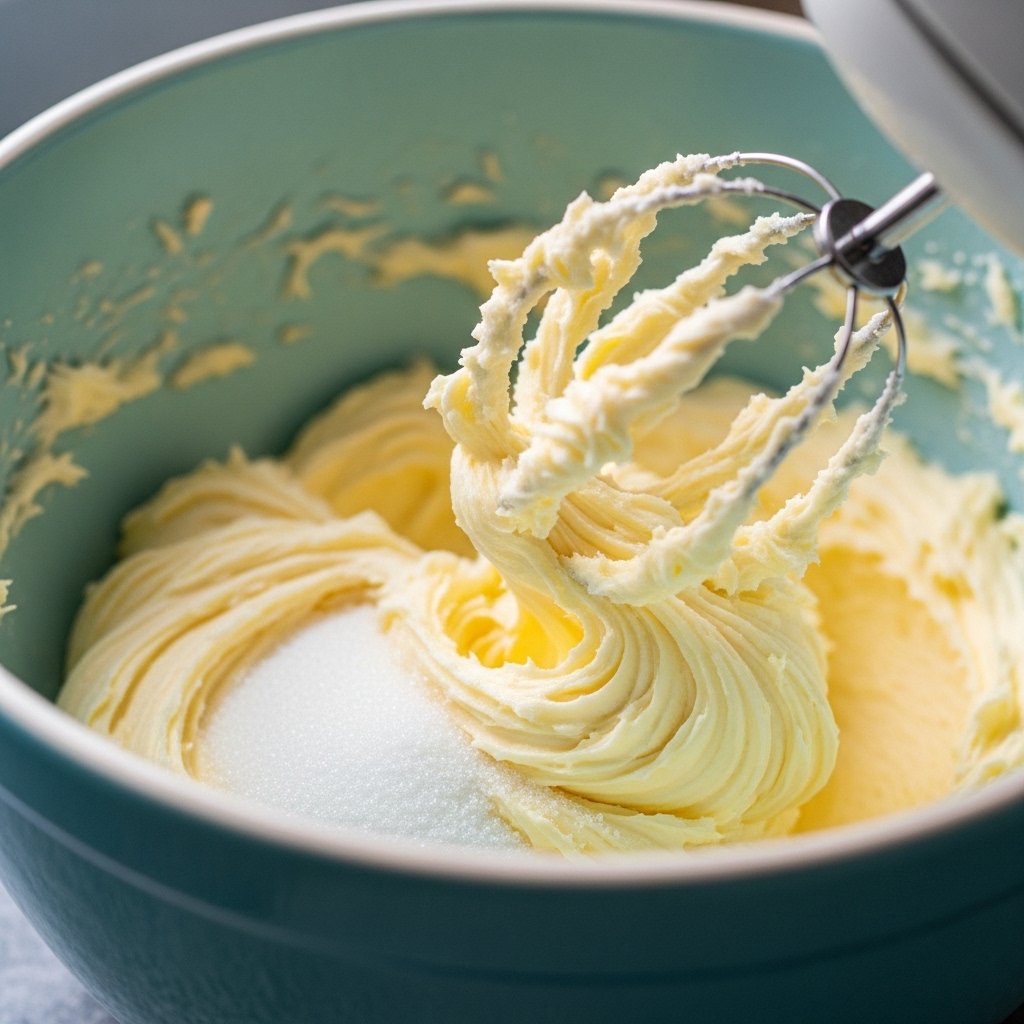
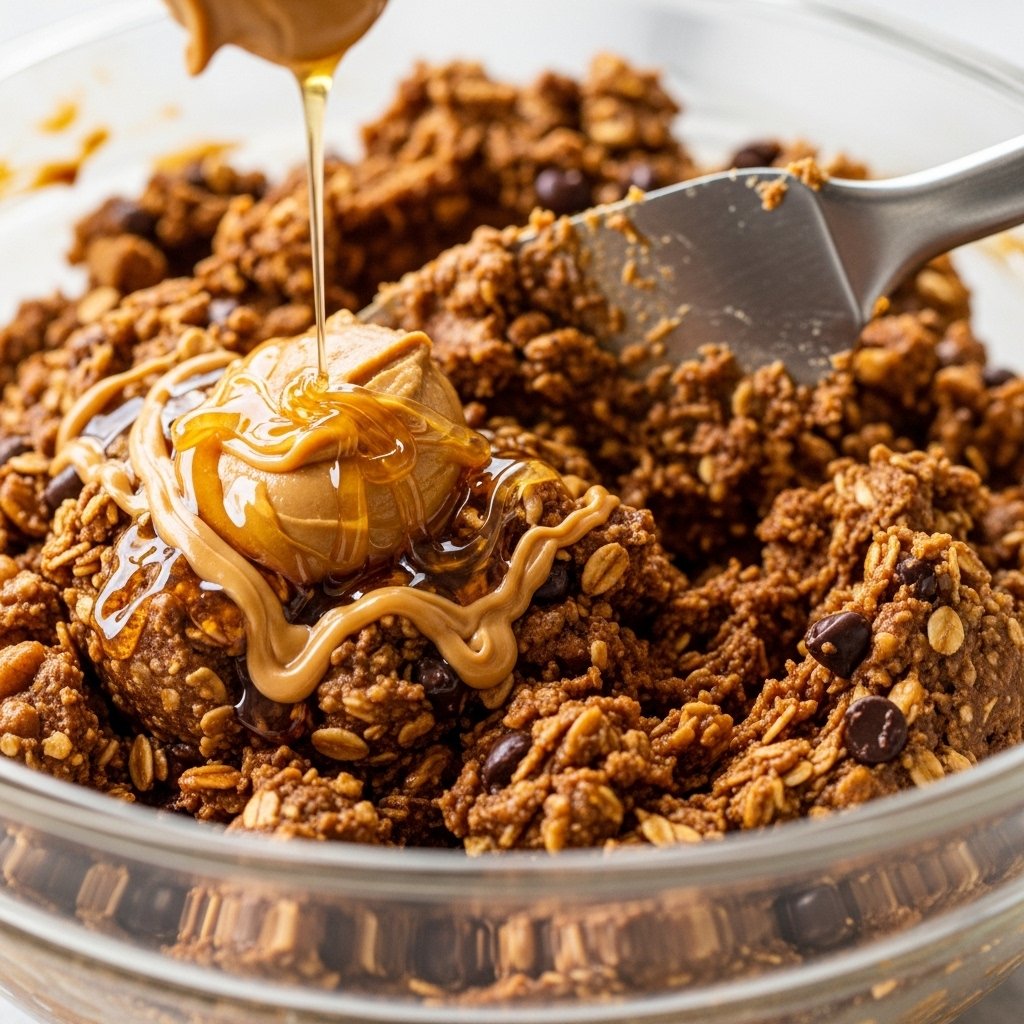
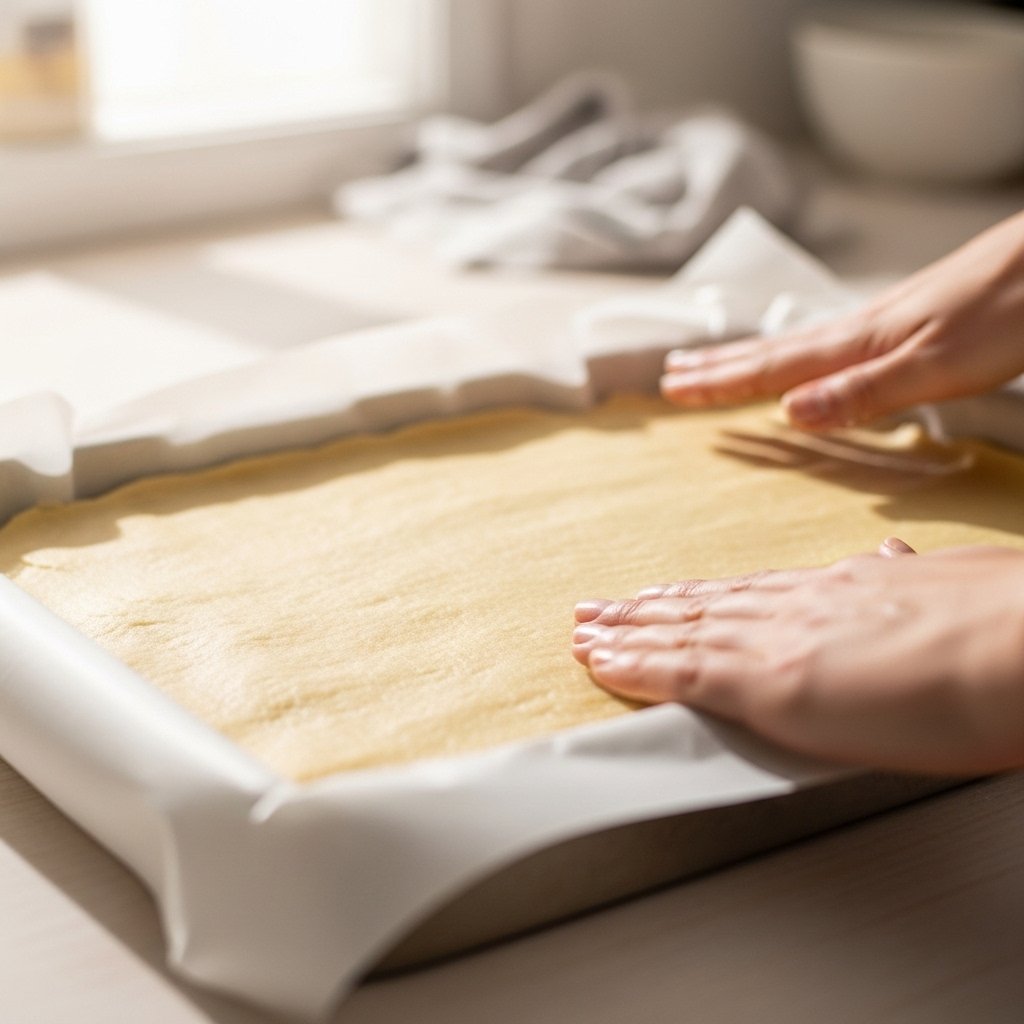
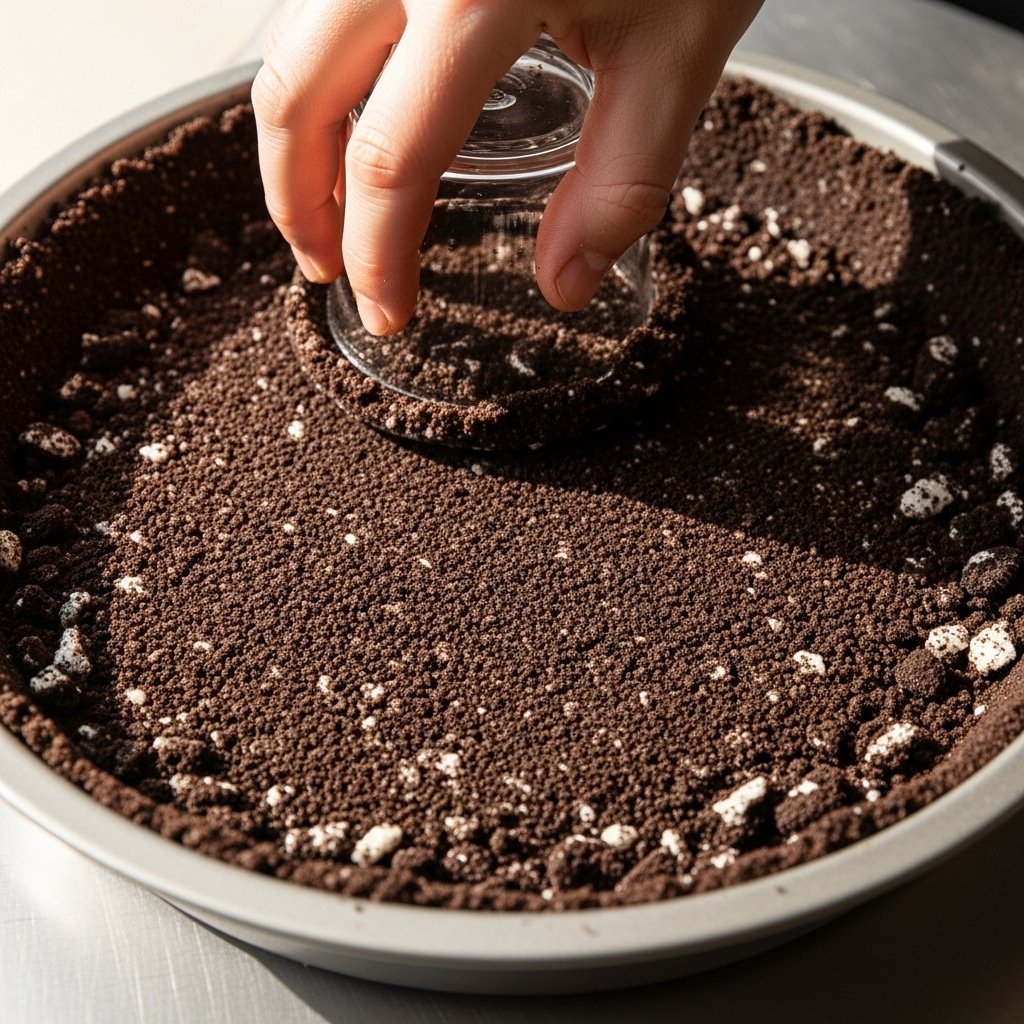
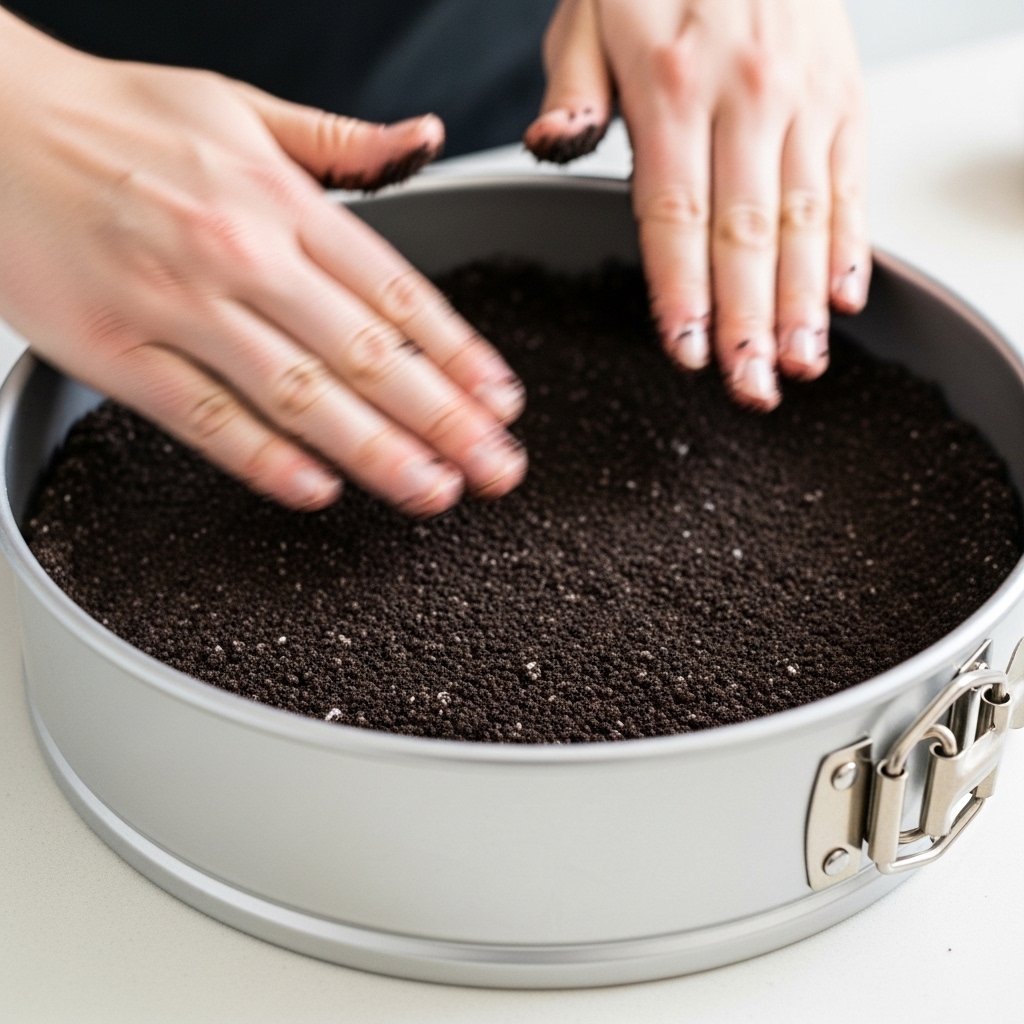
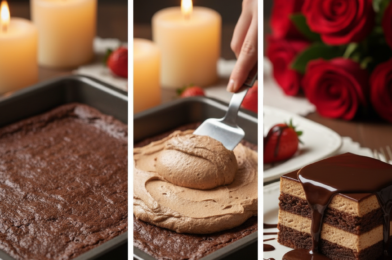
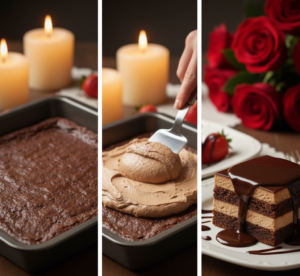
Preheat your oven to 350°F (175°C) and grease a mini-muffin tin or an 8×8 baking pan lined with parchment paper. In a large bowl, whisk together the melted butter and sugars. Add the eggs and vanilla, beating until the mixture is light and glossy. Sift in the cocoa powder, flour, and salt. Fold gently until just combined—do not overmix, or your brownies will become cakey rather than fudgy. Bake for 15-18 minutes (for bites) or 25 minutes (for a pan). Let them cool completely.

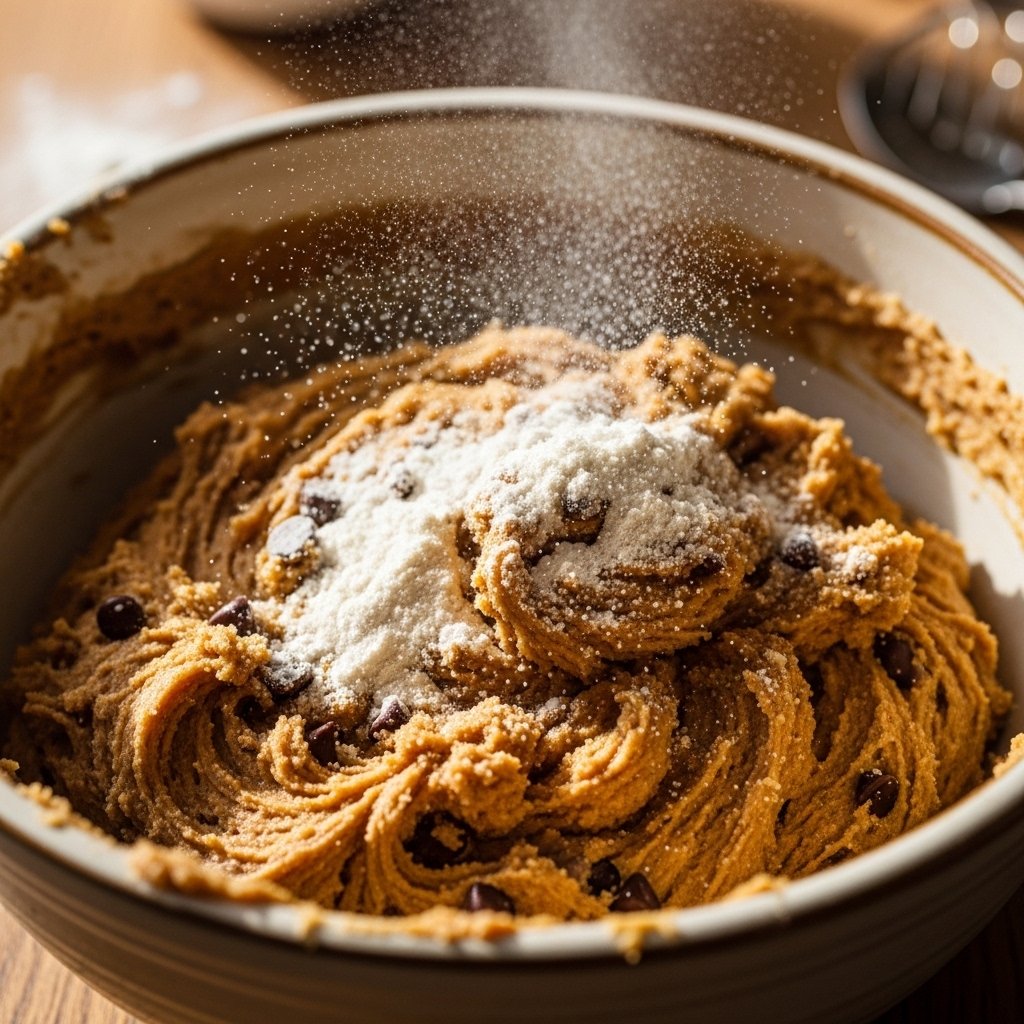
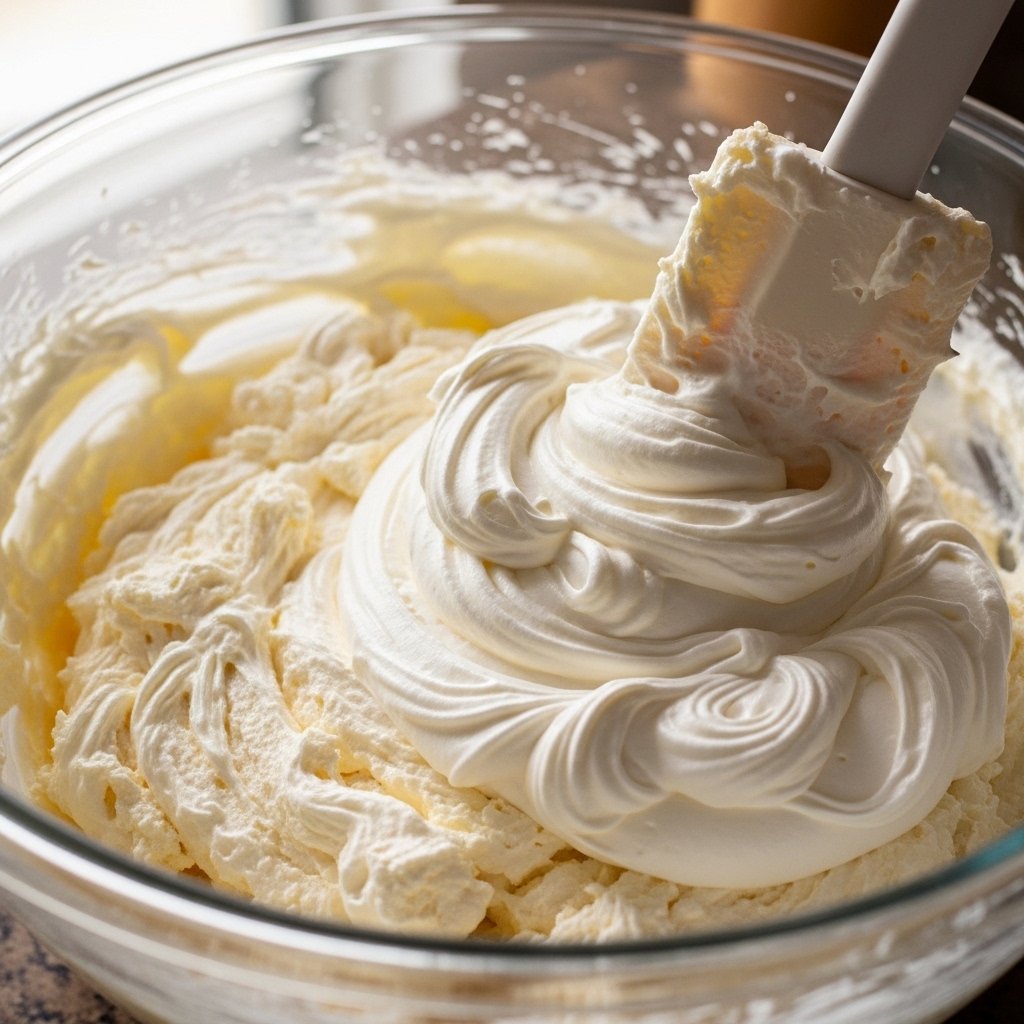
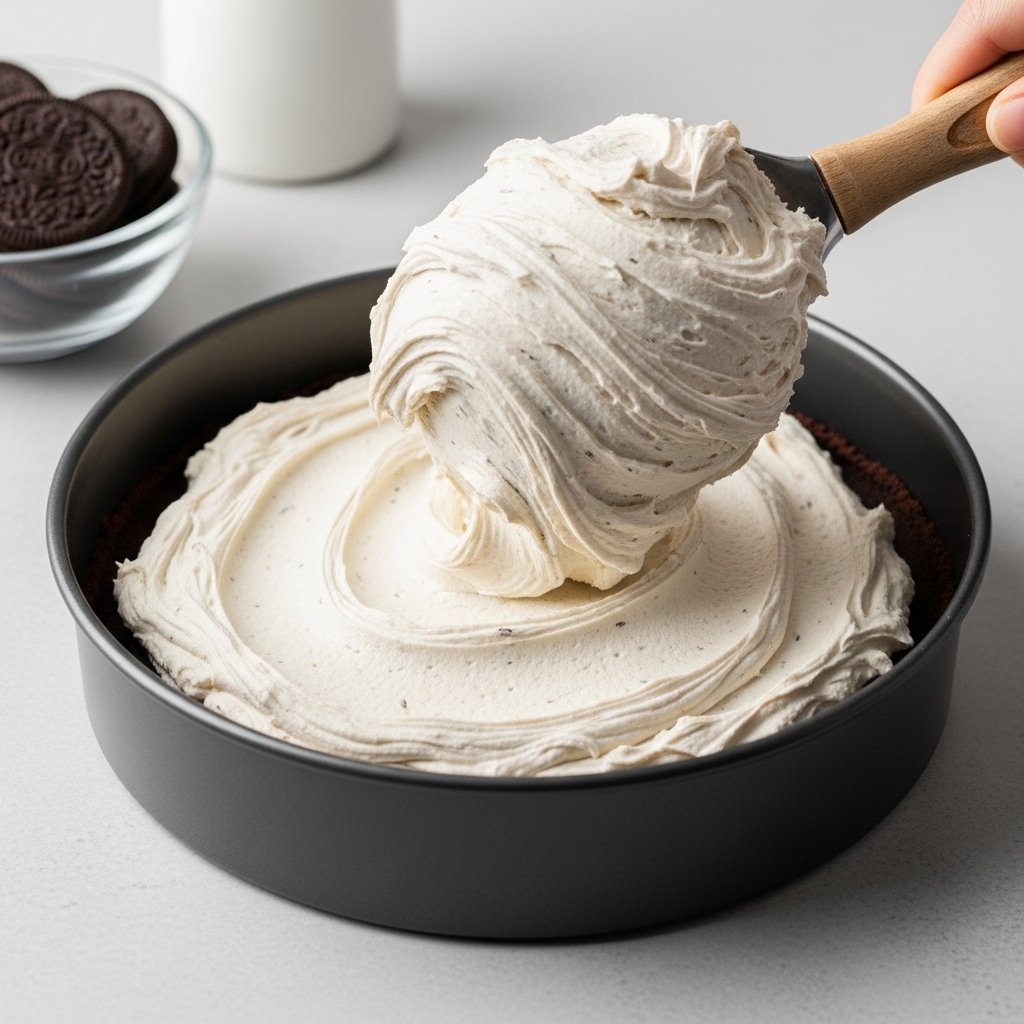
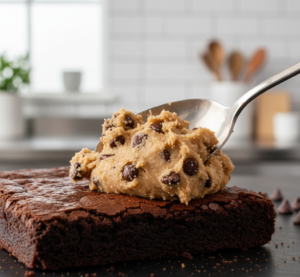
2. Make the Edible Cookie Dough

While the brownies cool, cream together the softened butter and brown sugar until fluffy. Add the vanilla and heavy cream. Gradually mix in your heat-treated flour and salt until a thick dough forms. Finally, fold in the mini chocolate chips. If the dough feels too stiff, add an extra teaspoon of cream.
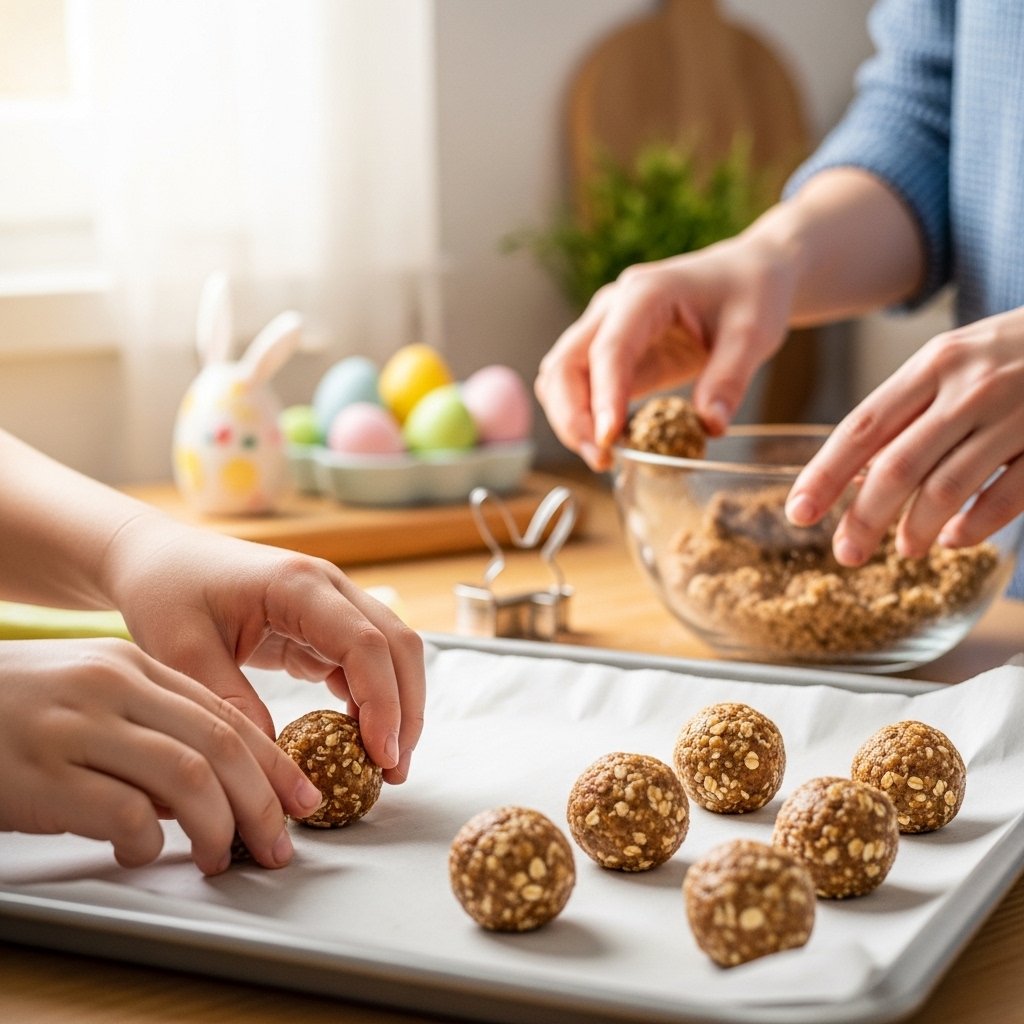
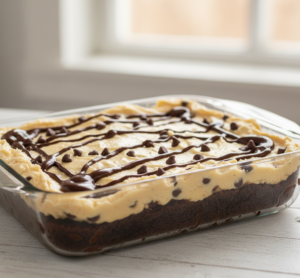
3. Assembly

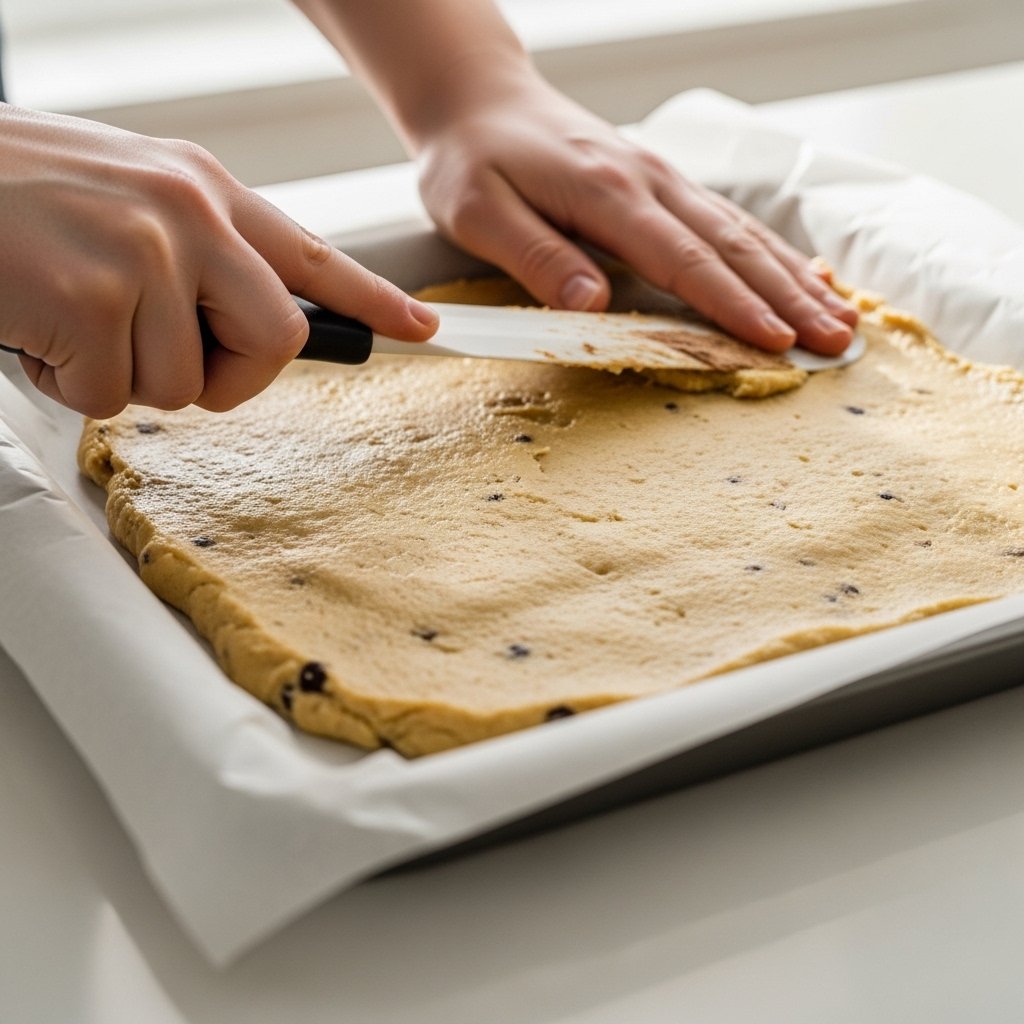
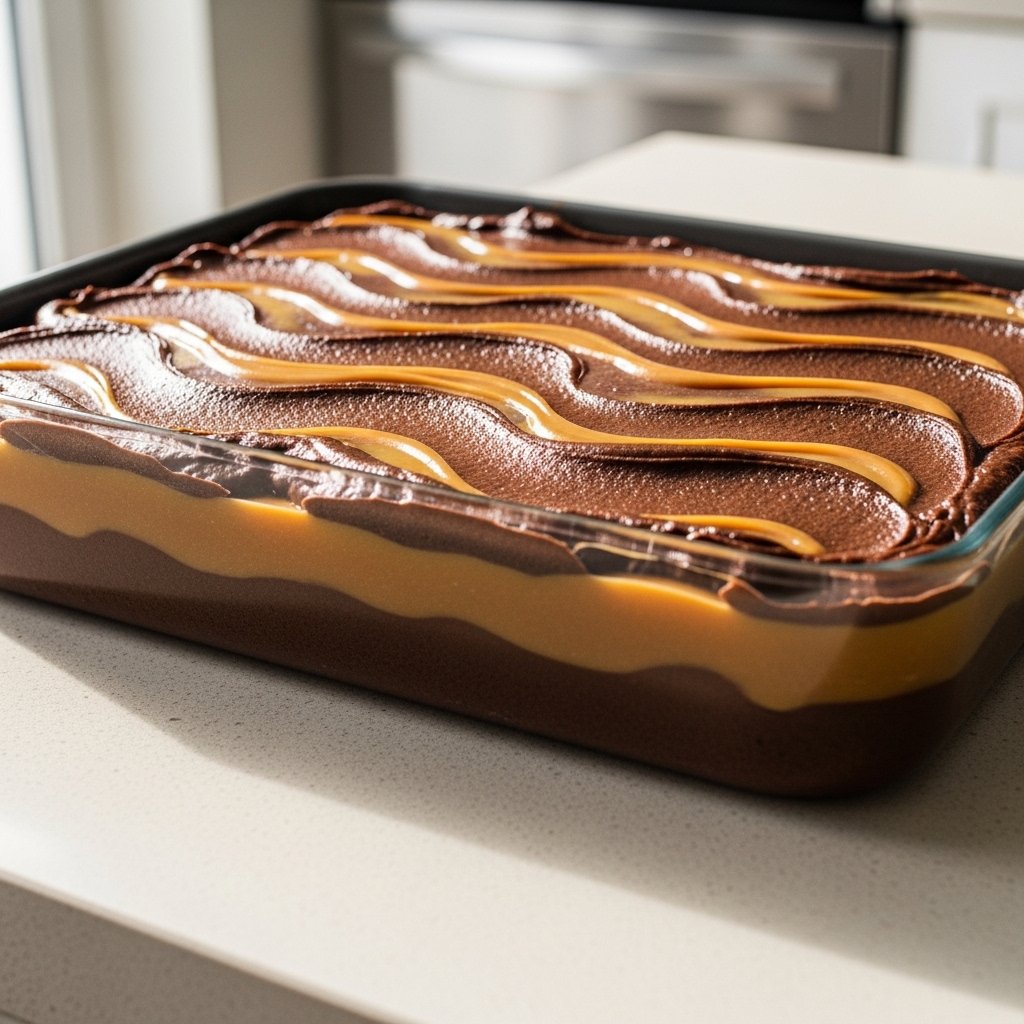
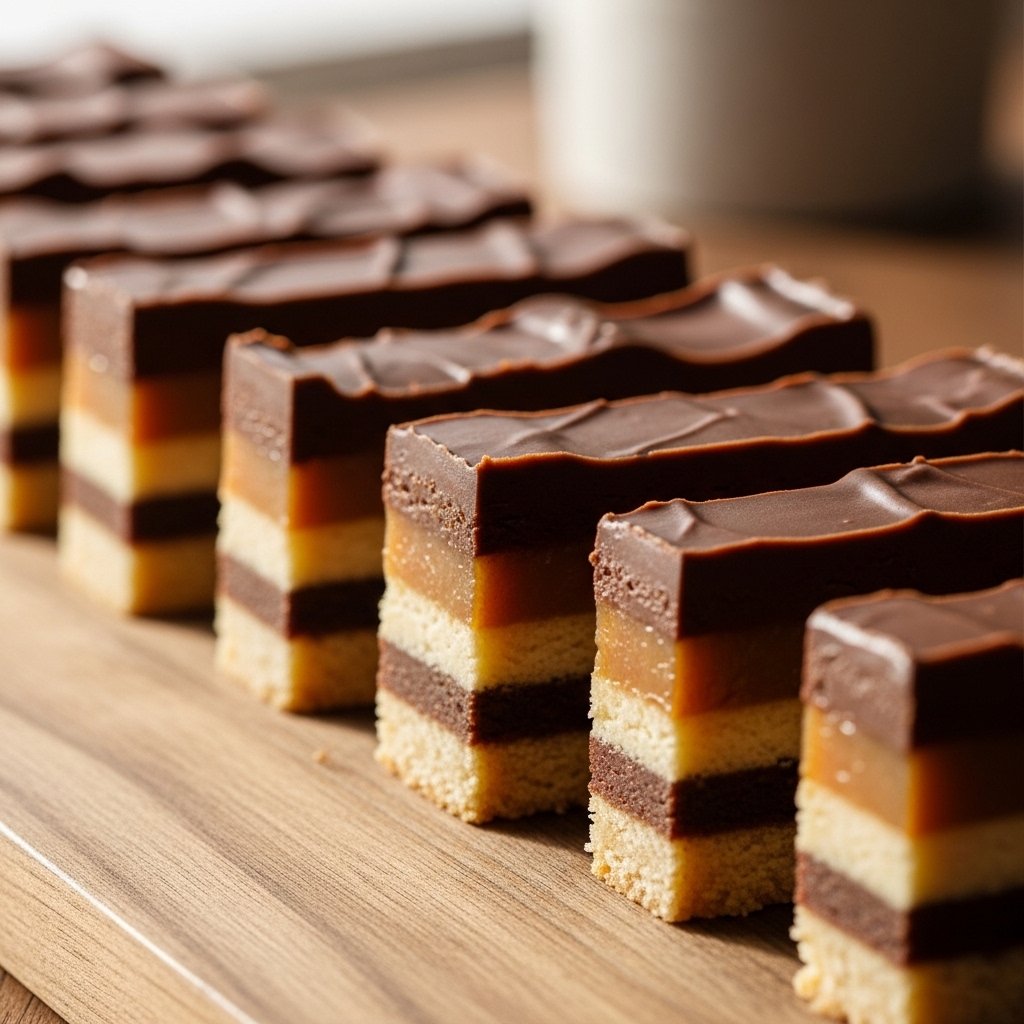
If using a mini-muffin tin, use a small spoon to press a tablespoon of cookie dough onto the top of each brownie bite. If you used a square pan, spread the dough in an even layer over the cooled brownie slab, then chill in the fridge for 30 minutes before cutting into small, sharp squares.

Tips for Perfect Results

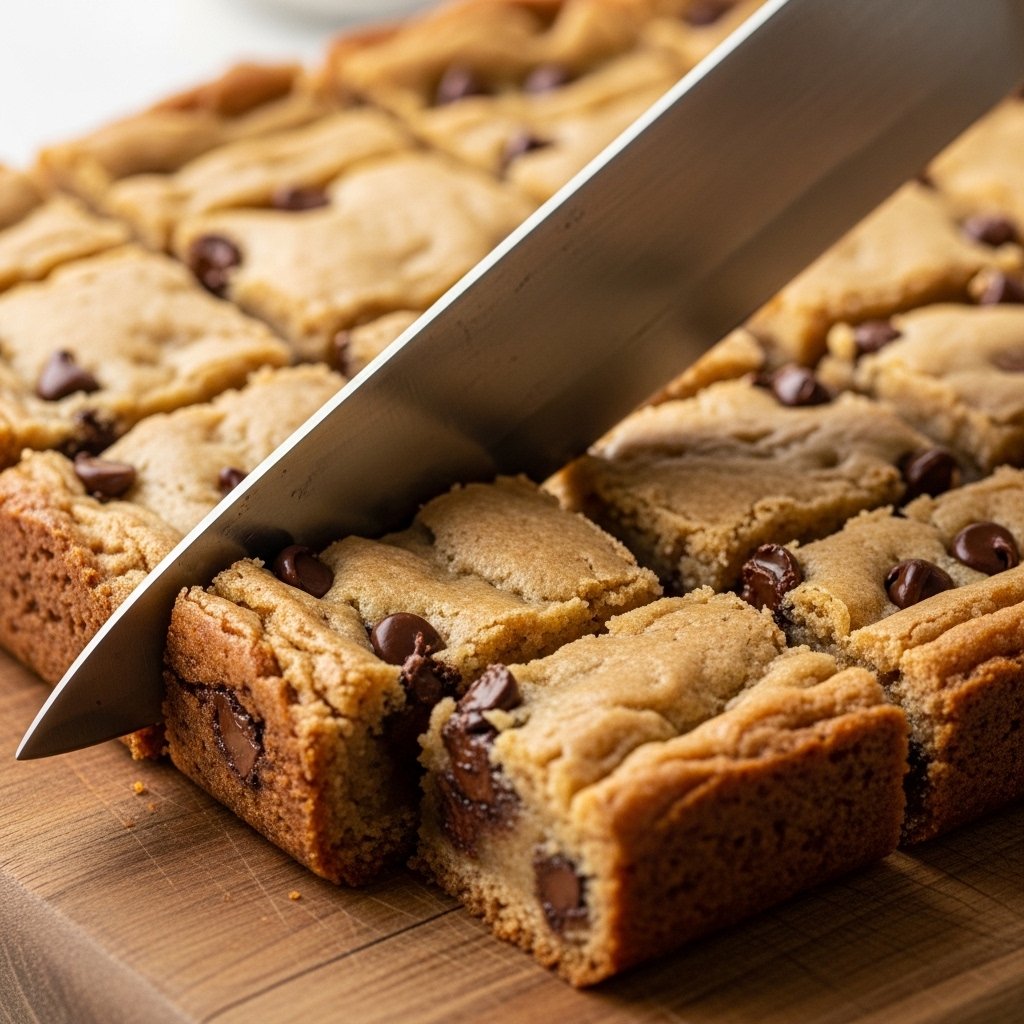
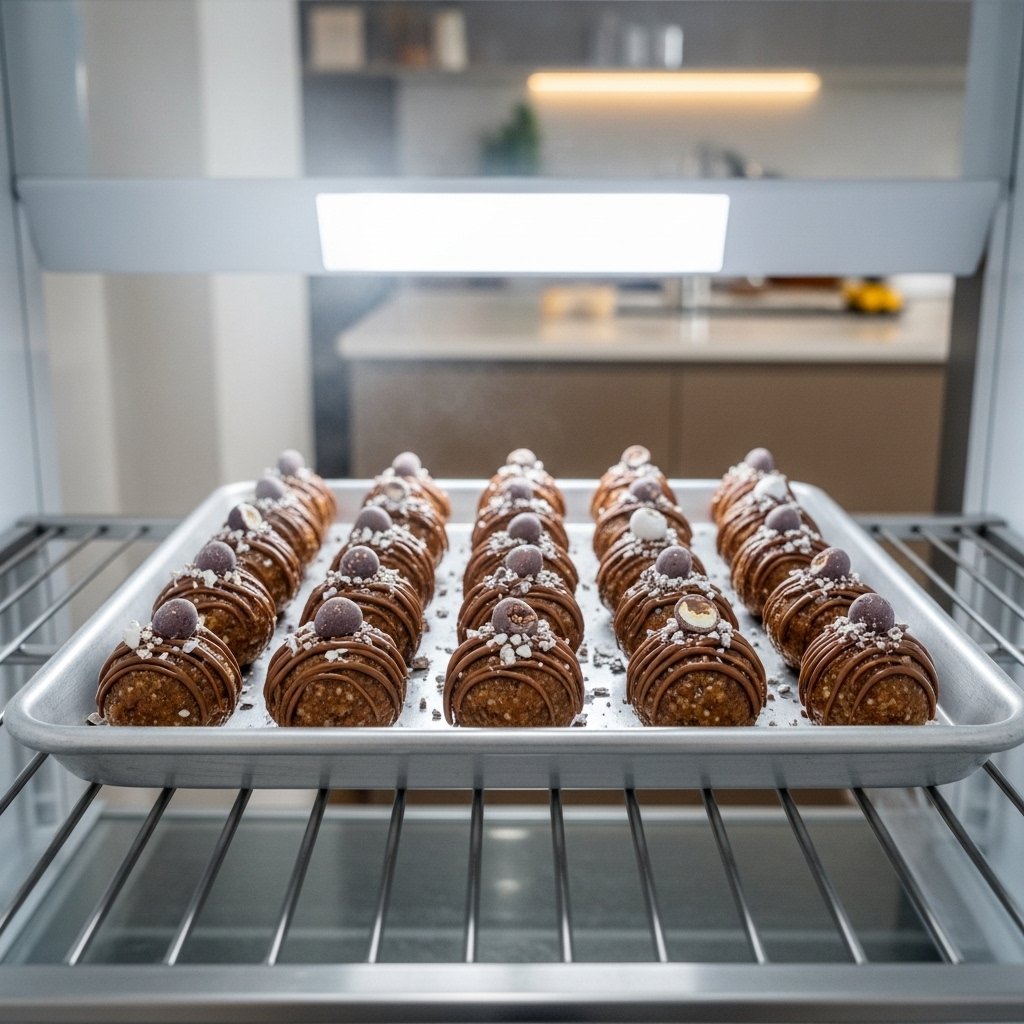
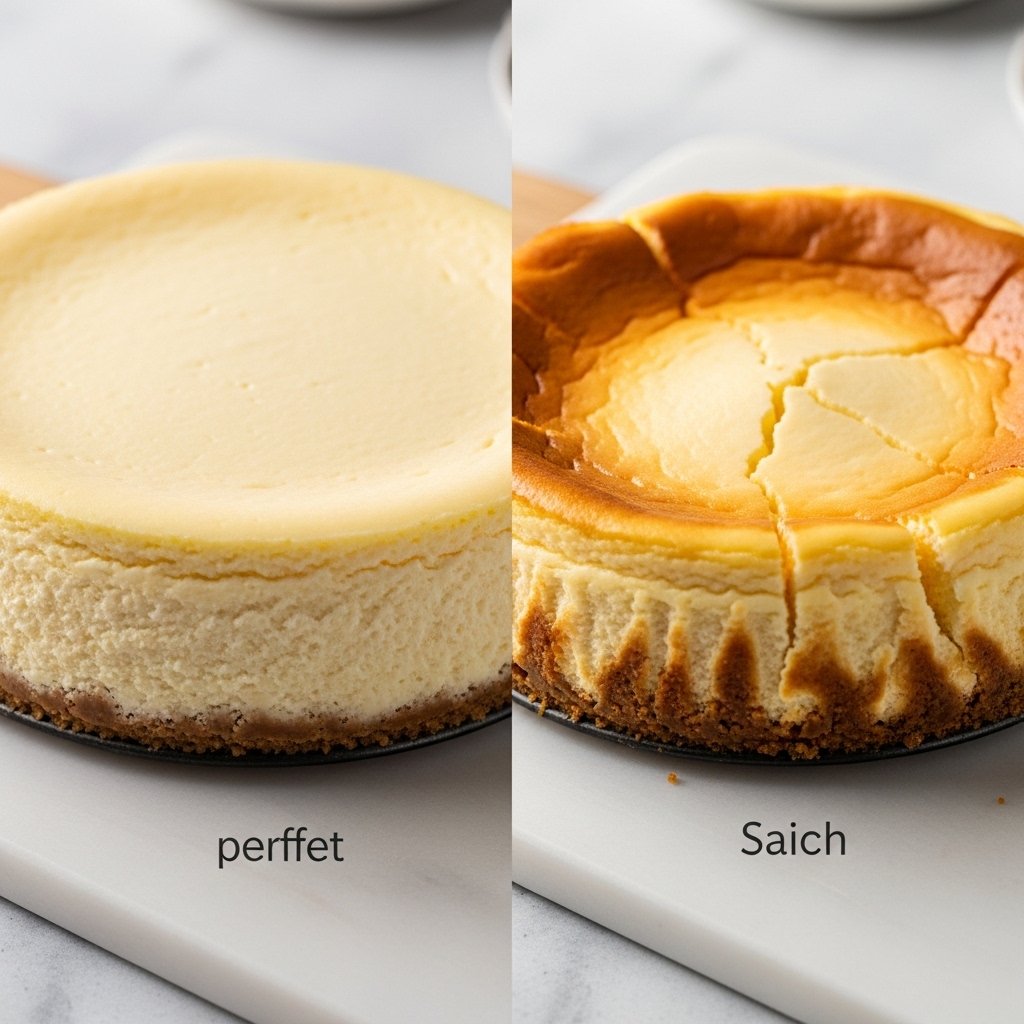
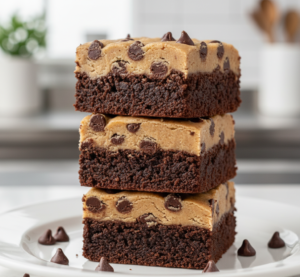
The secret to the best Chocolate Chip Cookie Dough Brownie Bites lies in the cooling process. If you try to add the cookie dough while the brownies are even slightly warm, the butter in the dough will melt, creating a greasy mess. Patience is a virtue here! For the cleanest cuts, I recommend chilling the entire tray in the freezer for about 20 minutes before slicing. This firms up the fats and allows your knife to glide through both layers without dragging the dough into the brownie.

Another pro tip: use a warm knife to slice your brownie bites. Run your knife under hot water, wipe it dry, and then make your cut. Repeat this for every single slice. This technique is what professional bakeries use to get those perfectly square, “clean” edges that look so satisfying on a serving platter.
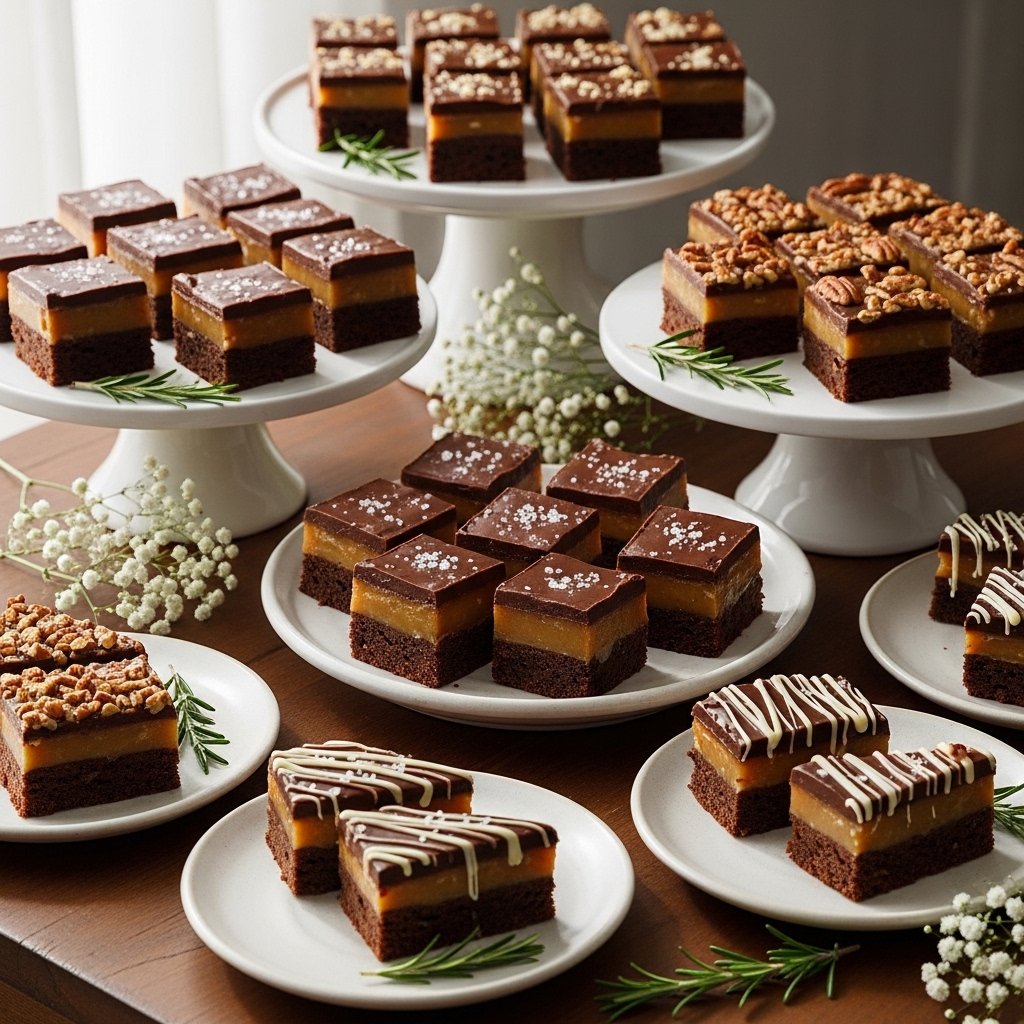

Variations to Try

  • Peanut Butter Twist: Replace half of the butter in the cookie dough with creamy peanut butter for a “Buckeye” inspired flavor profile.

  • Double Chocolate: Use cocoa powder in the cookie dough as well for an “Extreme Chocolate” version.

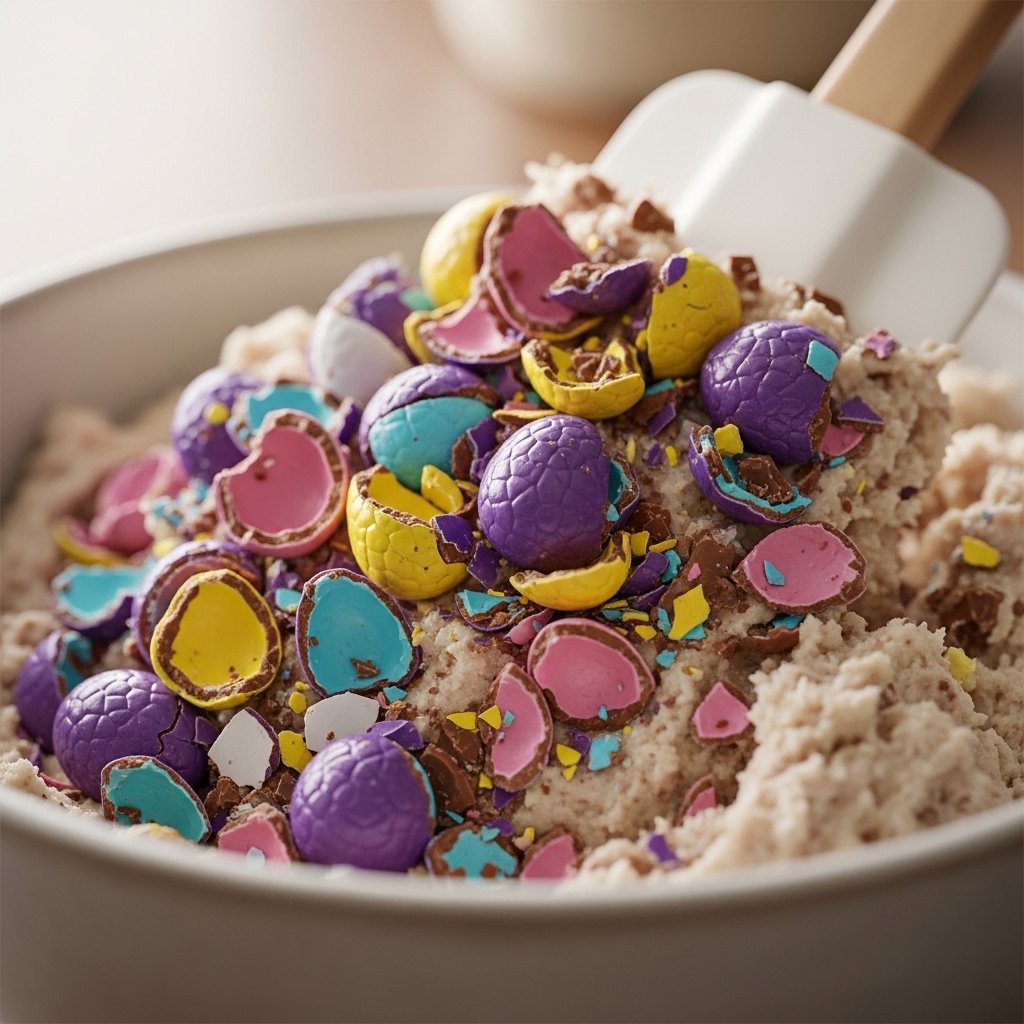
  • Holiday Style: Swap the chocolate chips for crushed peppermint or colorful M&Ms to match the season.

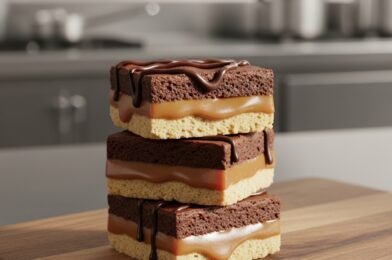
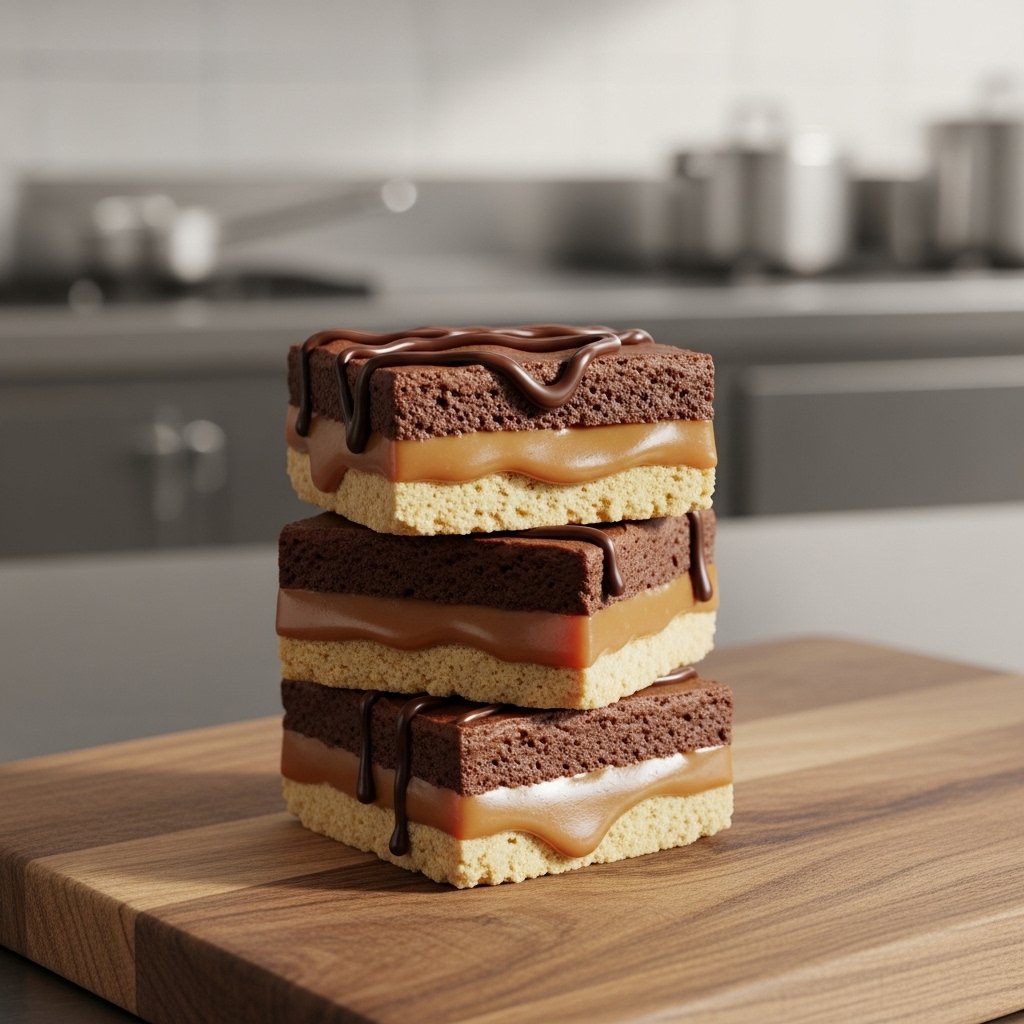
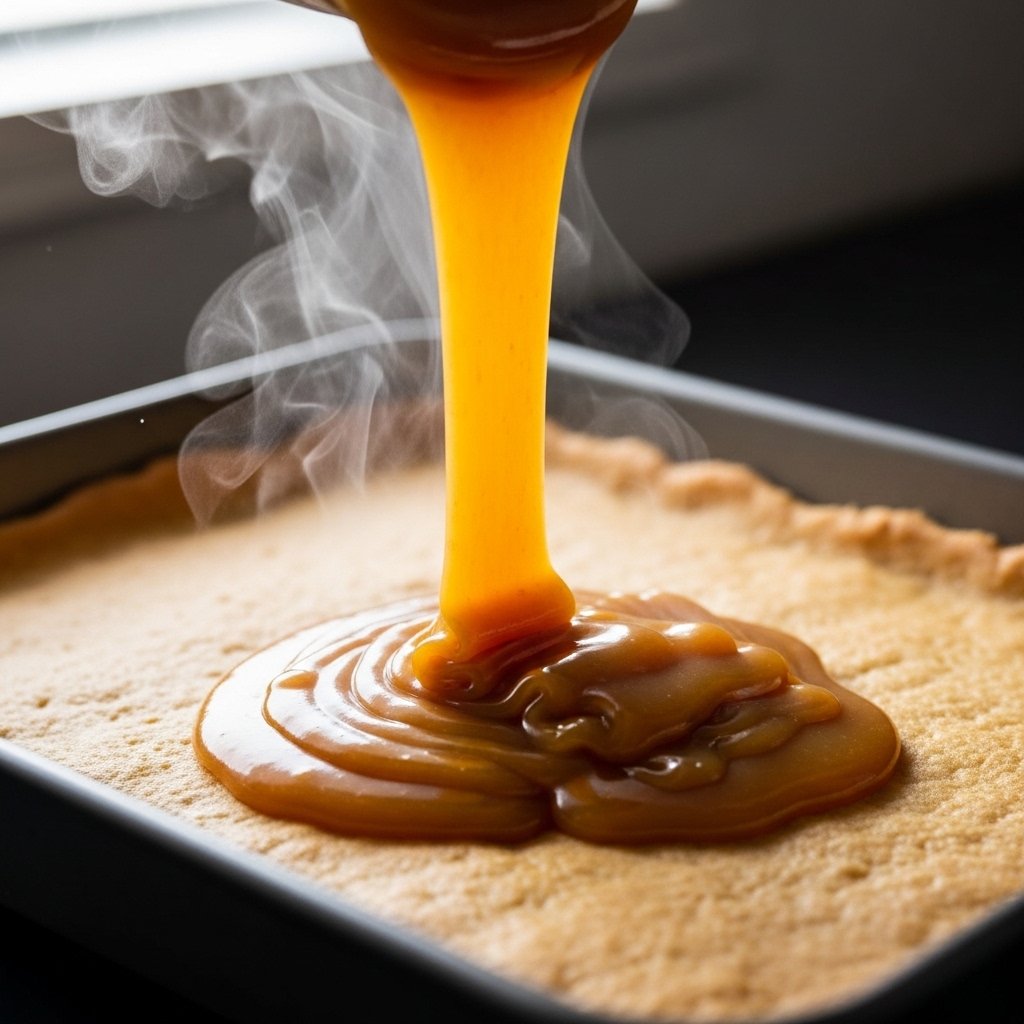
  • Salted Caramel: Drizzle a bit of homemade salted caramel between the brownie and the dough layer for an extra layer of indulgence.
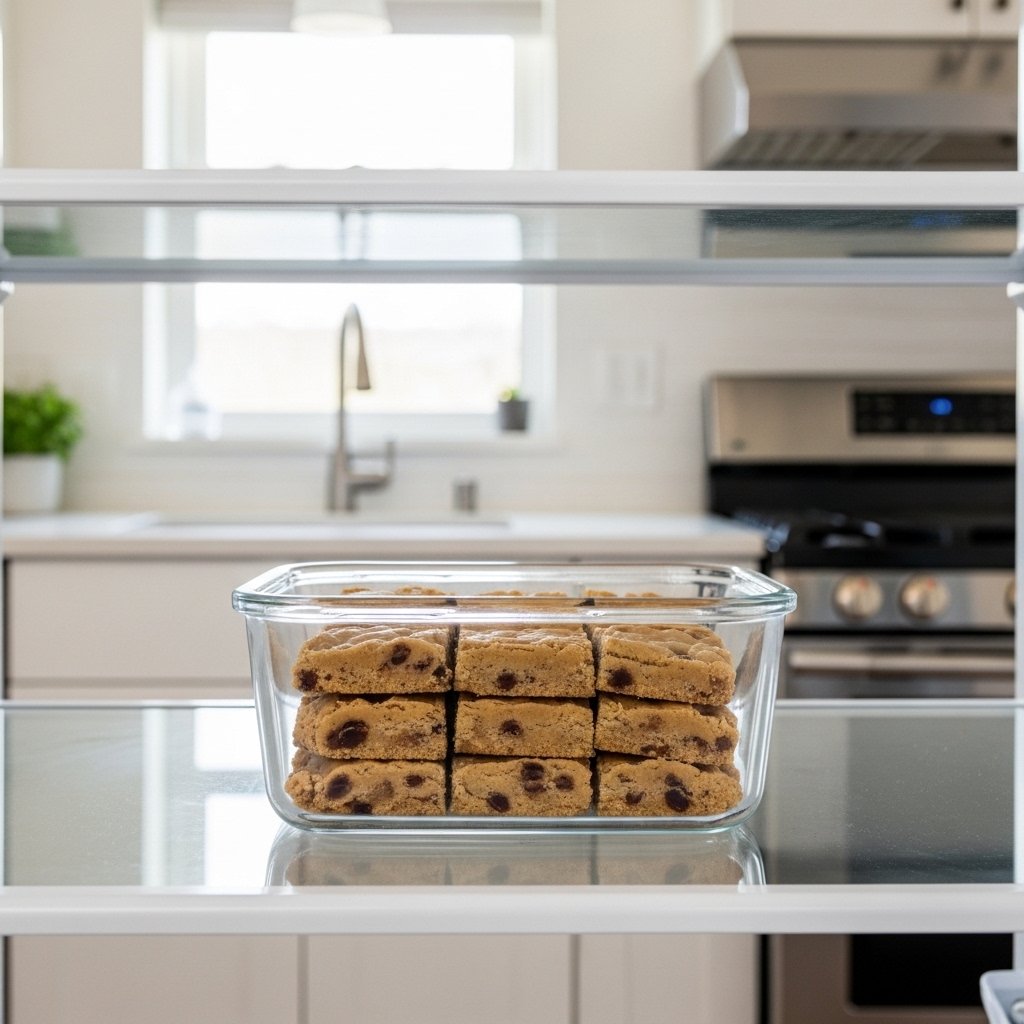
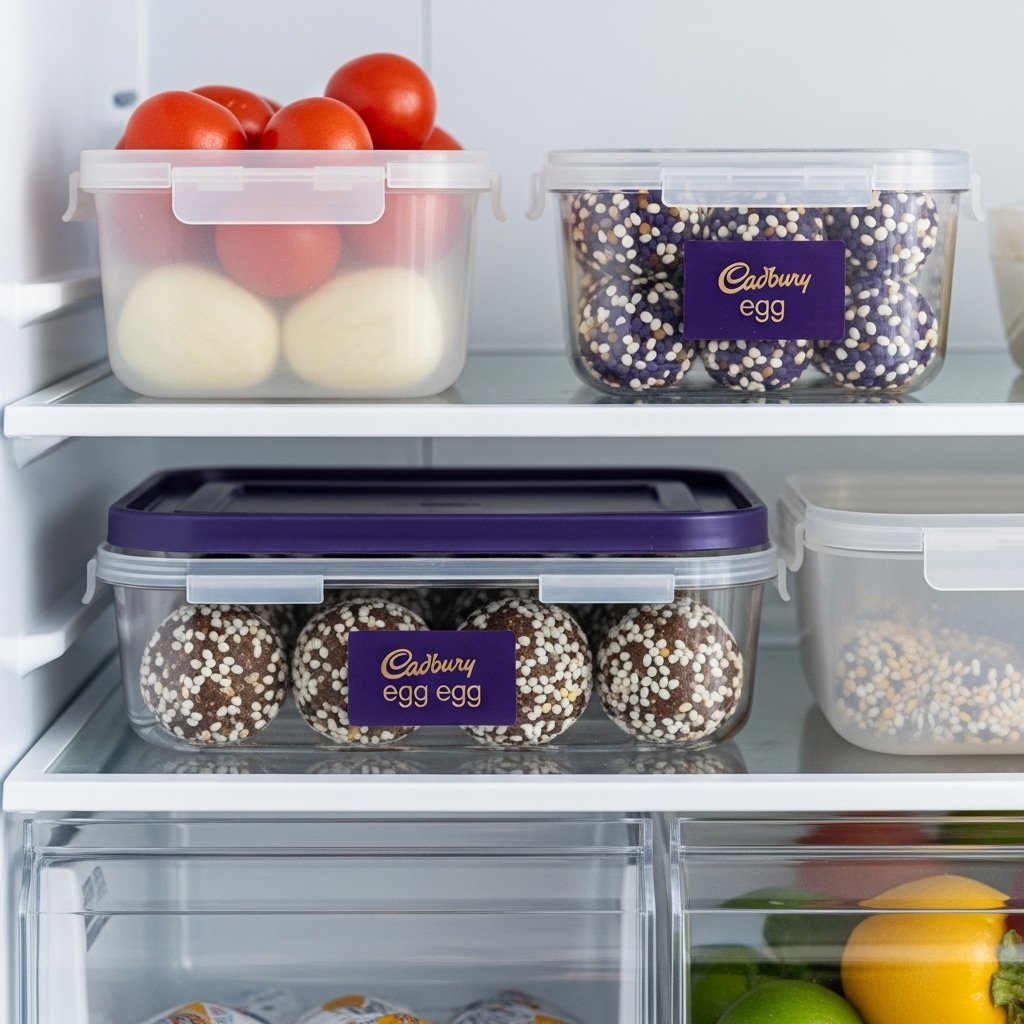

Storage & Reheating

Because the cookie dough contains dairy (butter and cream), these bites should be stored in an airtight container in the refrigerator. They will stay fresh and delicious for up to 5 days. If you prefer a softer texture, let them sit at room temperature for about 15 minutes before serving.

Can you freeze them? Absolutely! These are fantastic freezer treats. Wrap them individually in plastic wrap and place them in a freezer bag. They can be frozen for up to 3 months. To eat, just thaw one in the fridge overnight or enjoy it semi-frozen—it tastes almost like a fudge bar!

FAQs

Q: Why do I have to heat-treat the flour? A: Raw flour can contain E. coli or Salmonella. Baking it at 350°F until it reaches 160°F kills these pathogens, making it safe to consume without further cooking.

Q: Can I use a boxed brownie mix? A: Yes! If you’re short on time, a high-quality boxed “Ghirardelli” style mix works great. Just ensure you bake them in a way that results in a fudgy texture.

Q: My cookie dough is too crumbly. How do I fix it? A: This usually happens if there is too much flour. Add heavy cream or milk one teaspoon at a time until the dough is pliable and creamy.

Q: Do I need to refrigerate these? A: Yes, because of the butter and cream in the unbaked cookie dough topping, refrigeration is recommended for both safety and texture.


Final Thoughts

These Chocolate Chip Cookie Dough Brownie Bites are the ultimate crowd-pleaser. They combine the best of both worlds into a single, decadent mouthful that looks just as good as it tastes. By following the tips for heat-treating your flour and allowing for proper cooling time, you’ll end up with a dessert that rivals any high-end bakery in the USA. Give this recipe a try for your next get-together, and watch how quickly they disappear!

Layered Chocolate Mousse Brownies for Valentine’s Dessert Ideas (Rich, Romantic & Decadent)

If you’re looking for the ultimate show-stopping dessert for Valentine’s Day, these layered chocolate mousse brownies for Valentine’s dessert ideas are exactly what you need. Imagine a rich, fudgy brownie base topped with a cloud-like layer of silky chocolate mousse—all finished with a glossy chocolate topping or fresh berries.

This dessert is everything romance should taste like: indulgent, smooth, and deeply chocolatey. Whether you’re planning a romantic dinner at home or surprising someone special, these layered chocolate mousse brownies for Valentine’s dessert ideas are guaranteed to impress.

Why You’ll Love This Recipe

There are plenty of reasons these layered chocolate mousse brownies for Valentine’s dessert ideas deserve a spot on your dessert table.

  • Combines two desserts in one: brownies + mousse
  • Perfect for romantic occasions like Valentine’s Day
  • Rich, fudgy, and creamy textures
  • Make-ahead friendly for stress-free entertaining
  • Bakery-style presentation at home

This dessert looks fancy, but it’s surprisingly approachable for home bakers.


Ingredients

To make these layered chocolate mousse brownies for Valentine’s dessert ideas, you’ll need three main components:

For the Brownie Base:

  • 1/2 cup butter
  • 1 cup sugar
  • 2 eggs
  • 1/3 cup cocoa powder
  • 1/2 cup all-purpose flour
  • 1/4 teaspoon salt
  • 1/2 teaspoon vanilla extract

For the Chocolate Mousse:

  • 1 cup heavy whipping cream
  • 1/2 cup semi-sweet chocolate chips
  • 2 tablespoons powdered sugar
  • 1/2 teaspoon vanilla extract

Optional Topping:

  • Melted chocolate drizzle
  • Fresh strawberries
  • Chocolate shavings

Ingredient Notes

The magic of layered chocolate mousse brownies for Valentine’s dessert ideas comes from texture contrast. The brownie layer should be dense and fudgy, while the mousse is light and airy.

Using good-quality chocolate makes a huge difference in flavor. Semi-sweet chocolate balances the sweetness of the mousse, while cocoa powder intensifies the brownie base.


Step-by-Step Instructions

1. Make the Brownie Base

Preheat oven to 350°F (175°C). Melt butter and mix with sugar. Add eggs and vanilla, then whisk in cocoa powder, flour, and salt. Pour into a lined baking pan and bake for 20–25 minutes. Let cool completely.

2. Prepare the Chocolate Mousse

Melt chocolate chips and let cool slightly. Whip heavy cream with powdered sugar and vanilla until soft peaks form. Gently fold melted chocolate into whipped cream.

3. Assemble the Layers

Spread mousse evenly over cooled brownies. Smooth the top and refrigerate for at least 2–3 hours until set.

4. Add Toppings and Serve

Top with chocolate drizzle, berries, or shavings before slicing and serving.

Tips for Perfect Results

To make the best layered chocolate mousse brownies for Valentine’s dessert ideas, keep these tips in mind:

  • Always cool brownies completely before adding mousse
  • Use chilled cream for better whipping
  • Don’t overmix mousse—fold gently
  • Chill long enough for clean layers
  • Use a sharp knife for clean slices

These small details make a big difference in presentation and texture.


Variations

One of the best things about layered chocolate mousse brownies for Valentine’s dessert ideas is how easy they are to customize.

White Chocolate Version

Replace dark chocolate with white chocolate for a sweeter twist.

Raspberry Layer

Add fresh raspberries between brownie and mousse layers.

Mocha Flavor

Add espresso powder to enhance chocolate depth.

Nutty Crunch

Sprinkle chopped hazelnuts or almonds on top.

What to Serve With It

These layered chocolate mousse brownies for Valentine’s dessert ideas pair beautifully with:

  • Fresh strawberries
  • Espresso or coffee
  • Vanilla ice cream
  • Champagne or sparkling juice

These pairings enhance the romantic dessert experience.


Storage & Reheating

Proper storage keeps your layered chocolate mousse brownies for Valentine’s dessert ideas fresh and delicious.

  • Store in the refrigerator for up to 4 days
  • Keep covered to prevent drying
  • Do not freeze (mousse texture may change)
  • Serve chilled for best flavor

They taste even better after resting overnight.


Common Mistakes to Avoid

Avoid these mistakes when making layered chocolate mousse brownies for Valentine’s dessert ideas:

  • Adding mousse to warm brownies
  • Overwhipping or underwhipping cream
  • Skipping chill time
  • Using low-quality chocolate
  • Cutting before fully set

Avoiding these ensures perfect layers every time.


FAQs

Can I make these brownies ahead of time?

Yes! They’re perfect for making a day in advance.

Can I use boxed brownie mix?

Absolutely—it works well if you’re short on time.

Why is my mousse runny?

It likely wasn’t whipped enough or the cream was too warm.

Can I freeze them?

Not recommended due to mousse texture changes.


Final Thoughts

These layered chocolate mousse brownies for Valentine’s dessert ideas are the ultimate romantic treat—rich, creamy, and absolutely unforgettable. They combine the best of two worlds: fudgy brownies and airy chocolate mousse.

Whether you’re celebrating Valentine’s Day or simply want a luxurious dessert to share, this recipe delivers elegance without stress. Once you try these layered chocolate mousse brownies for Valentine’s dessert ideas, they’ll become your go-to special occasion dessert.

Chocolate Chip Cookie Dough Brownie Bites 🍫🍪✨ | Fudgy, Creamy & Bakery-Perfect

If you’ve ever found yourself torn between warm, fudgy brownies and soft, sweet chocolate chip cookie dough, this recipe is your dream come true. These chocolate chip cookie dough brownie bites combine both desserts into one irresistible, bite-sized treat that’s rich, indulgent, and completely bakery-worthy.

Each bite features a dense brownie base topped with smooth, edible cookie dough and finished with a drizzle of chocolate for the ultimate dessert experience. Whether you’re baking for a party, holiday tray, or just a late-night craving, these chocolate chip cookie dough brownie bites disappear fast—so you may want to make a double batch.

Image Prompt: Close-up of chocolate chip cookie dough brownie bites stacked on a dessert plate, showing fudgy brownie base and creamy cookie dough topping with chocolate drizzle, natural lighting, shallow depth of field, 4k food photography.

Why You’ll Love This Recipe

These chocolate chip cookie dough brownie bites are the perfect combination of two classic desserts in one easy-to-eat form.

Here’s why they’re a must-try:

  • Combines brownies and cookie dough in one bite
  • Rich, fudgy, and creamy texture
  • Perfect for parties, holidays, or gifting
  • Easy to make ahead and store
  • Bakery-style flavor without complicated steps

They’re the kind of dessert that gets people asking for the recipe every single time.


Ingredients

To make these indulgent chocolate chip cookie dough brownie bites, you’ll need:

For the Brownie Base:

  • 1 box brownie mix (or homemade brownie batter)
  • Ingredients listed on box (usually eggs, oil, water)

For the Cookie Dough Layer:

  • 1/2 cup unsalted butter, softened
  • 1/2 cup brown sugar
  • 1/4 cup granulated sugar
  • 1 teaspoon vanilla extract
  • 1 cup all-purpose flour (heat-treated)
  • 2 tablespoons milk
  • 3/4 cup mini chocolate chips

For Topping:

  • Melted chocolate or chocolate drizzle

Ingredient Notes

The magic of chocolate chip cookie dough brownie bites lies in balancing textures. The brownie layer should be rich and fudgy—not cakey—while the cookie dough layer stays soft and creamy.

Always heat-treat your flour for the cookie dough to make it safe for eating. You can do this by baking it at 350°F for about 5 minutes or microwaving it in short intervals. Mini chocolate chips are best because they distribute evenly and give you perfect chocolate flavor in every bite.


Step-by-Step Instructions

1. Prepare the Brownie Base

Prepare brownie batter according to package instructions. Pour into a lined baking pan and bake until just set and fudgy. Let it cool completely before adding cookie dough.

2. Make the Cookie Dough Layer

In a bowl, cream together butter, brown sugar, and granulated sugar until fluffy. Mix in vanilla, flour, and milk until smooth. Fold in mini chocolate chips.

3. Assemble the Layers

Spread cookie dough evenly over the cooled brownie layer. Press gently to smooth the surface.

4. Add Chocolate Drizzle

Drizzle melted chocolate over the top for an extra indulgent finish.

5. Chill and Slice

Refrigerate for at least 1 hour, then slice into bite-sized squares.

Tips for Perfect Results

To make the best chocolate chip cookie dough brownie bites, keep these expert tips in mind:

  • Let brownies cool completely before adding cookie dough
  • Use mini chocolate chips for better distribution
  • Chill before slicing for clean, sharp edges
  • Don’t overmix cookie dough for best texture
  • Line your pan with parchment paper for easy removal

These small details help you achieve bakery-level results at home.


Variations

One of the best things about chocolate chip cookie dough brownie bites is how easy they are to customize.

Peanut Butter Twist

Swirl peanut butter into the brownie layer for extra richness.

Double Chocolate Version

Add cocoa powder to the cookie dough for a chocolate overload.

Holiday Edition

Top with sprinkles or crushed peppermint for seasonal flair.

Gluten-Free Option

Use a gluten-free brownie mix and flour alternative.

What to Serve With It

These chocolate chip cookie dough brownie bites are rich and satisfying, so they pair best with simple accompaniments.

  • Cold milk or chocolate milk
  • Vanilla ice cream
  • Coffee or espresso
  • Fresh berries for balance

They’re perfect for dessert tables or party platters.


Storage & Reheating

These chocolate chip cookie dough brownie bites store beautifully, making them ideal for make-ahead desserts.

  • Store in an airtight container in the refrigerator for up to 5 days
  • Freeze for up to 2 months
  • Let frozen bites thaw for 10–15 minutes before serving
  • No reheating needed—best served chilled or room temperature

They actually taste even better after a day as the flavors blend.


Common Mistakes to Avoid

Even simple desserts can go wrong. Avoid these mistakes when making chocolate chip cookie dough brownie bites:

  • Adding cookie dough before brownies are fully cooled
  • Skipping flour heat treatment
  • Overbaking brownies (they should stay fudgy)
  • Not chilling before slicing

Avoiding these ensures perfect layers and clean cuts.


FAQs

Are chocolate chip cookie dough brownie bites safe to eat?

Yes, as long as you heat-treat the flour used in the cookie dough.

Can I make them ahead of time?

Absolutely! They’re perfect for making 1–2 days in advance.

Can I freeze brownie bites?

Yes, they freeze very well for up to 2 months.

What’s the best brownie mix to use?

A fudgy-style brownie mix works best for texture contrast.


Final Thoughts

These chocolate chip cookie dough brownie bites are the ultimate indulgent dessert—rich, creamy, fudgy, and completely irresistible. They combine two classic favorites into one easy, bite-sized treat that’s perfect for any occasion.

Whether you’re making them for a party, holiday gathering, or just because you love dessert, this recipe guarantees smiles all around. Once you try these chocolate chip cookie dough brownie bites, they’ll quickly become a go-to favorite in your baking rotation.